
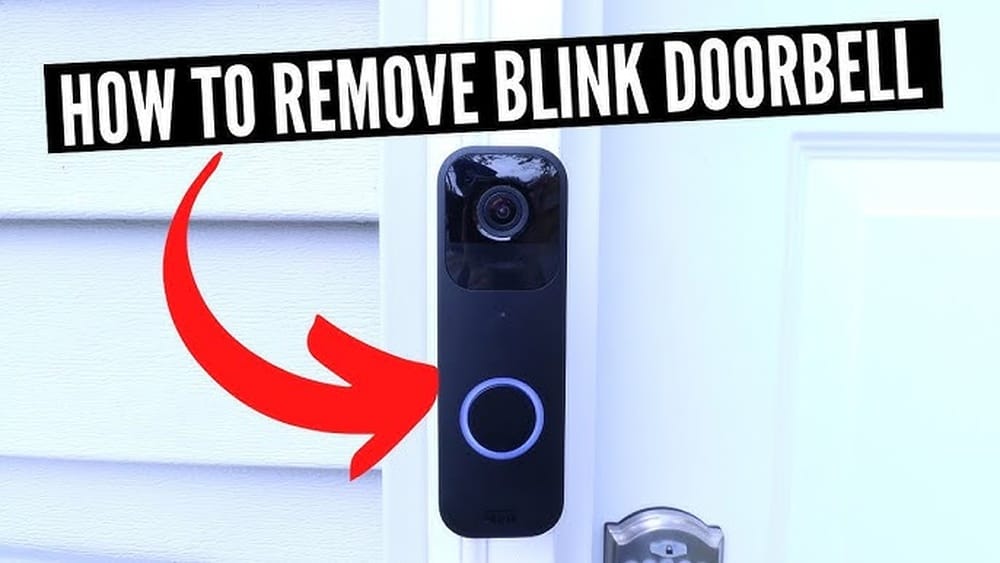
Removing a Blink camera from its mount might seem simple, but doing it the right way can save you time, prevent damage, and keep your camera working well. Blink cameras are popular for their easy setup and wireless design, but their mounts can be tricky if you’re not familiar with them.
Whether you want to reposition your camera, replace it, or perform maintenance, understanding the removal steps is important. This guide walks you through the process, offers practical advice, and explains common mistakes to avoid.
Understanding Blink Camera Mounts
Blink cameras come with different types of mounts. Most people use the basic plastic mount included with the camera, but there are also third-party mounts and special mounts for outdoor or indoor use. Each mount has its own way of attaching and holding the camera.
Blink’s standard mount usually attaches with a clip mechanism or a screw-in base. The camera snaps onto the mount, holding it firmly in place. Some mounts allow for easy adjustment, while others are more fixed. Knowing which mount you have makes removal much easier.
Types Of Blink Camera Mounts
- Standard Clip Mount: Used for Blink Indoor and Outdoor cameras. The camera snaps onto a plastic clip.
- Screw-in Mount: Common for Blink XT and XT2 cameras. The camera is screwed onto the mount.
- Wall Plate Mount: Often seen with Blink Mini. The mount attaches to a wall plate.
- Third-Party Mounts: Designed for special situations, like corners or ceilings.
Each type requires a different removal method. Always check your camera’s model and mount type before starting.
Preparing To Remove Your Blink Camera
Before you remove your Blink camera, make sure you’re prepared. This helps prevent accidents and keeps your camera safe.
Safety Precautions
- Turn off the camera: Disconnect it from power or remove batteries.
- Check for live wires: If your camera is wired, ensure there’s no live electricity.
- Use a stable ladder: For high mounts, use a ladder with someone to spot you.
- Wear gloves: Protect your hands from sharp edges or dirt.
Gather Tools
Most Blink mounts don’t need special tools, but having these ready helps:
- Small Phillips screwdriver
- Flathead screwdriver (for prying clips)
- Soft cloth (to hold the camera)
- Needle-nose pliers (for tight screws)
Having the right tools avoids damaging the camera or mount.
Step-by-step Guide To Removing Blink Camera From Mount
Removing your Blink camera requires patience and attention. Follow these steps for a smooth process.
Step 1: Disconnect The Camera
Start by disconnecting the camera from its power source.
- For battery-powered models, remove the batteries.
- For wired models, unplug the power cable.
- For Blink Mini, detach the USB cable.
This prevents electrical issues and makes handling safer.
Step 2: Assess The Mount
Look at your camera’s mount. Identify if it’s a clip, screw, or another type. Examine how the camera is held in place.
- If it’s a clip mount, look for release tabs or areas to squeeze.
- If it’s screwed in, check the screw size and location.
- For wall plate mounts, locate the locking mechanism.
Take a picture of the mount before removal. It helps when reinstalling.
Step 3: Remove The Camera
For Clip Mounts
- Hold the camera firmly.
- Gently squeeze the clip tabs or press the release button.
- Pull the camera away from the mount slowly. Don’t force it.
For Screw-in Mounts
- Use a screwdriver to unscrew the camera from the mount.
- Hold the camera to prevent it from dropping.
- Turn counterclockwise until it’s free.
For Wall Plate Mounts
- Find the locking mechanism (usually a small tab).
- Push or slide the tab to unlock.
- Pull the camera gently off the plate.
For Third-party Mounts
- Read the manufacturer’s instructions if available.
- Usually, these mounts use screws or clips.
- Remove according to the specific design.
Step 4: Remove The Mount (if Needed)
If you want to remove the mount as well:
- Unscrew the mount from the wall or surface.
- Use a flathead screwdriver for clips.
- Clean the area where the mount was attached.
Be careful with drywall, as mounts can leave holes. Patch holes if needed.
Step 5: Inspect The Camera And Mount
Check both for damage:
- Look for cracks, broken clips, or stripped screws.
- Clean the camera lens and mount with a soft cloth.
- Store the camera and mount safely if not reinstalling.
Proper inspection prevents problems during future setups.
Comparing Blink Mounts And Removal Difficulty
To help you understand removal steps, here’s a comparison of common Blink mounts:
| Mount Type | Removal Difficulty | Tools Required | Time Needed |
|---|---|---|---|
| Clip Mount | Easy | None | 2–5 minutes |
| Screw-in Mount | Moderate | Screwdriver | 5–10 minutes |
| Wall Plate Mount | Easy | None or screwdriver | 3–6 minutes |
| Third-Party Mount | Varies | Depends on design | 5–15 minutes |
Clip mounts are generally fastest and easiest. Screw-in mounts take a bit longer but are still simple with the right tools.

Credit: www.reddit.com
Common Mistakes To Avoid
Removing Blink cameras isn’t difficult, but many users make errors that can lead to damage or frustration.
Forcing The Camera
If the camera doesn’t release easily, don’t force it. Forcing can break clips or crack the camera housing. Always check for hidden tabs or screws.
Skipping Power Disconnection
Some users forget to turn off or unplug the camera. This can cause electrical problems or even short circuits. Always disconnect power first.
Using Wrong Tools
Using a large screwdriver or the wrong tool can strip screws and damage the mount. Use the recommended tool size.
Ignoring Mount Type
Different mounts have different removal methods. Not checking mount type leads to confusion and mistakes.
Dropping The Camera
Blink cameras are lightweight but fragile. Hold the camera securely during removal, especially when working at heights.
Not Inspecting After Removal
Some people reinstall the camera without checking for damage or dirt. Always inspect and clean both the camera and mount.
Tips For Easy And Safe Camera Removal
Here are helpful tips that can make the removal process easier and safer.
- Work in daylight: Good lighting helps you see tabs, screws, and mechanisms.
- Have backup batteries: If you plan to reinstall, fresh batteries make setup smoother.
- Use soft padding: Place a towel or cushion under the camera in case it drops.
- Label screws: If removing multiple mounts, label screws to avoid confusion.
- Take photos: Document each step for future reference.
These small steps help prevent mistakes and speed up the process.
What To Do After Removing The Camera
Once your Blink camera is off its mount, you have several options depending on your goal.
Repositioning
If you want to change the camera’s location:
- Choose a new spot with good visibility.
- Check for Wi-Fi signal strength in the new area.
- Make sure the mount fits the new location.
Maintenance
For cleaning or repair:
- Use a soft cloth to clean the lens and body.
- Replace batteries if needed.
- Inspect for hardware issues.
Storage
If not using the camera:
- Store in a dry, dust-free place.
- Keep batteries separate to avoid leaks.
- Protect the lens from scratches.
Replacement
If upgrading:
- Compare the new camera’s mount compatibility.
- Use the same mounting holes if possible.
- Dispose of old camera responsibly.
How Blink Cameras Attach To Mounts
Understanding how Blink cameras attach helps you avoid mistakes. Most Blink cameras use a snap-on clip or a threaded screw.
Snap-on Clip
The camera’s back has a groove or slot. The mount’s clip slides into this groove and locks. To remove, you press the clip and pull the camera.
Threaded Screw
The mount uses a standard screw thread (often 1/4 inch). The camera’s bottom has a matching thread. You twist the camera onto the mount. Removal is simply twisting off.
Wall Plate
The mount attaches to a wall plate. The camera slides into place and locks. A small tab releases the lock.
Special Cases
Some third-party mounts use magnetic attachments or suction cups. These are simple to remove but may require extra care.

Credit: www.youtube.com
Blink Camera Models And Removal Differences
Different Blink camera models have unique removal steps. Here’s a comparison:
| Camera Model | Mount Type | Removal Steps | Special Notes |
|---|---|---|---|
| Blink Indoor | Clip Mount | Press clip, pull camera | Easy removal |
| Blink Outdoor | Clip Mount | Press clip, pull camera | Weatherproof, check seals |
| Blink XT/XT2 | Screw-in Mount | Unscrew camera | Handle gently |
| Blink Mini | Wall Plate | Unlock tab, pull camera | Watch for cables |
| Third-Party | Varies | Follow instructions | Check for warranty |
Each model has slight differences. Outdoor models may have weatherproof seals. Mini models require careful cable management.
How To Patch Mount Holes After Removal
Many mounts leave holes in the wall. Here’s how to fix them:
- Clean the area: Remove dust and debris.
- Fill the hole: Use wall putty or filler.
- Smooth the surface: Sand after drying.
- Paint: Match the wall color for a clean finish.
This keeps your space neat and ready for new installations.

Credit: www.reddit.com
Troubleshooting Removal Problems
Sometimes, removing a Blink camera isn’t straightforward. Here are solutions for common issues.
Stuck Clip
- Try pressing both sides of the clip.
- Use a flathead screwdriver to gently pry.
- If still stuck, check for hidden tabs.
Stripped Screws
- Use needle-nose pliers to grip the screw.
- Try a rubber band between screwdriver and screw for extra grip.
- Replace screws after removal.
Broken Mount
- If the mount breaks, order a replacement from Blink or third-party sellers.
- Don’t use broken mounts, as they won’t hold the camera securely.
Camera Won’t Disconnect
- Check if there’s a locking tab or safety mechanism.
- Review the user manual.
- Contact Blink support if needed.
Blink Camera Removal Vs. Other Brands
How does removing a Blink camera compare to other brands like Ring, Arlo, or Nest? Here’s a simple comparison:
| Brand | Mount Type | Removal Ease | Common Issues |
|---|---|---|---|
| Blink | Clip/Screw/Wall Plate | Easy–Moderate | Broken clips, stripped screws |
| Ring | Screw/Magnetic | Moderate | Rusty screws |
| Arlo | Magnetic/Screw | Easy | Loose magnets |
| Nest | Screw/Magnetic | Moderate | Hidden screws |
Blink cameras are generally easier to remove than Ring or Nest, mainly because of their clip design.
Real-life Example: Removing A Blink Outdoor Camera
Let’s look at a real-life situation. Mike wanted to move his Blink Outdoor camera to get a better view of his driveway. He followed these steps:
- Turned off the camera and removed batteries.
- Used a ladder to reach the camera.
- Pressed the clip tabs and gently pulled the camera from the mount.
- Cleaned the camera and checked for damage.
- Removed the mount from the wall, patched the hole, and installed it in a new spot.
Mike finished in under 15 minutes, avoided breaking the clips, and his camera continued to work perfectly.
Non-obvious Insights For Beginners
Many beginners miss these key points:
- Mount orientation matters: The mount must face the right direction for the camera to clip on easily. Always check orientation before reinstallation.
- Check for weatherproof seals: Outdoor cameras often have seals. Make sure you don’t damage or misplace them during removal.
- Reuse mounts if possible: If you’re upgrading, reusing existing mounts saves time and keeps your walls clean.
Eco-friendly Disposal And Upgrading
If you’re replacing your Blink camera, consider eco-friendly disposal. Electronics shouldn’t be thrown in regular trash. Use e-waste recycling centers or return programs.
Upgrading to a new Blink model? Check compatibility with your existing mount. Newer Blink cameras often fit old mounts, saving you extra work.
Blink Camera Maintenance After Removal
Proper maintenance keeps your camera working longer.
- Clean regularly: Dust and dirt can block the lens and sensors.
- Store batteries safely: Remove and store batteries in a cool, dry place.
- Inspect connections: Look for corrosion or loose contacts.
- Update firmware: If reconnecting, update the camera’s software.
These steps extend your camera’s life and improve performance.
When To Call Professional Help
In rare cases, you may need professional help:
- Mount is stuck or broken inside the wall.
- Electrical issues with wired cameras.
- High or risky installation spots.
Contact Blink support or a professional installer if you face these problems. Safety is always the priority.
Additional Resources
For more detailed guidance, visit the official Blink support page. They offer manuals, troubleshooting, and video guides. For product compatibility and recycling tips, see Amazon’s Blink Support.
Frequently Asked Questions
How Do I Remove My Blink Camera Without Breaking The Mount?
Gently press or squeeze the clip tabs, avoid forcing the camera. Use the right screwdriver for screw-in mounts. Always disconnect power first and work slowly.
Can I Reuse My Blink Mount For A New Camera?
Yes, most Blink mounts are compatible with new models. Check for fit and make sure the mount is not damaged. Reusing mounts saves time and keeps your wall neat.
What Should I Do If My Blink Camera Is Stuck?
Check for hidden locking tabs or screws. Use a flathead screwdriver to gently pry. If the camera is still stuck, review the user manual or contact Blink support.
Is It Safe To Remove Blink Cameras Mounted Outdoors?
Yes, but check for weatherproof seals and disconnect power. Wear gloves and use a stable ladder. Inspect for water damage before removal.
How Can I Patch Holes Left By The Mount?
Clean the area, fill the hole with wall putty, sand smooth, and repaint. This keeps your wall looking good and ready for new installations.
Removing a Blink camera from its mount is easy when you understand the steps and avoid common mistakes. With careful handling, the right tools, and attention to detail, you can reposition, maintain, or upgrade your camera safely. Whether you’re a beginner or experienced user, following this guide keeps your Blink camera in great shape and your home secure.