
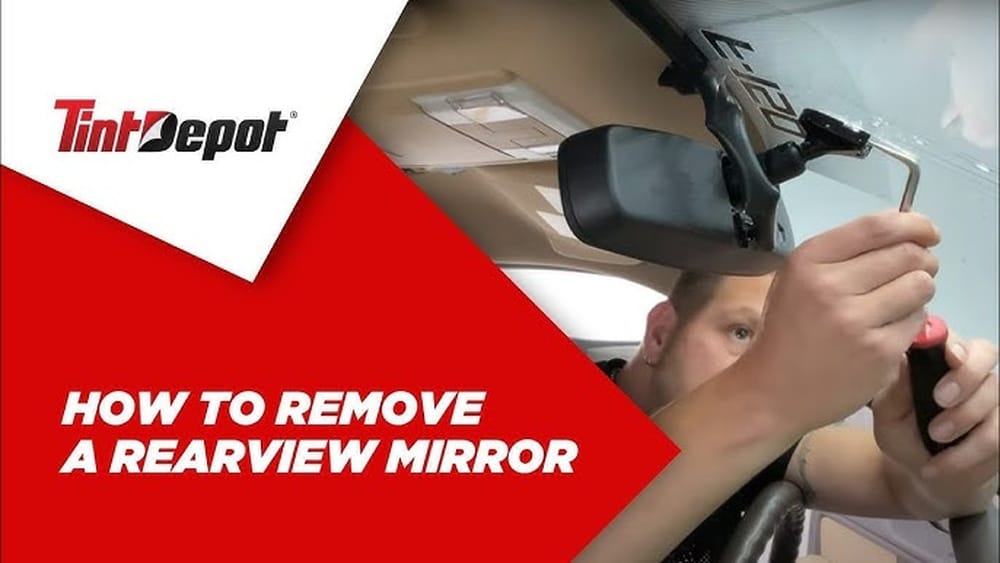
Every driver knows the importance of a clear view while driving. The rear view mirror is a key part of this, helping you see traffic behind and around your car. But what happens if the mirror mount becomes loose, damaged, or you need to replace it? Removing a rear view mirror mount can seem tricky at first, especially if you haven’t done it before. Many people worry about breaking the windshield or damaging their car’s interior. The truth is, with the right steps and tools, you can safely remove the mount yourself. This guide walks you through everything you need to know—no complicated jargon, just clear instructions. Whether you’re upgrading your mirror, fixing a broken mount, or prepping for a windshield replacement, you’ll find answers and tips for every situation.
Understanding Rear View Mirror Mounts
Before you start removing the mount, it’s helpful to know what you’re working with. Rear view mirror mounts come in several types, depending on the car model and year. The mount is the piece that attaches the mirror to the windshield or roof.
Most common mounts are either glued (bonded) to the glass or fixed with screws/clips.
Types Of Rear View Mirror Mounts
- Adhesive (Bonded) Mounts: These use strong glue to stick the metal button (mount) directly to the glass. It’s popular in modern cars.
- Screw-On Mounts: These mounts use screws to hold the mirror in place. You’ll see these in older vehicles or trucks.
- Clip-On Mounts: Some cars use a clip or spring mechanism instead of adhesive or screws.
Why The Mount Matters
The mount is not just a simple piece of metal or plastic—it’s designed to hold the mirror steady even during bumpy rides. If the mount is loose or damaged, the mirror can shake, fall, or block your view. Also, some mounts include wires for auto-dimming, sensors, or electronics.
Removing the mount incorrectly could damage these features.
How To Identify Your Mount
To check which mount you have:
- Look at the base of your mirror. If you see a small metal button stuck to the glass, it’s likely an adhesive mount.
- If you see screws or a cover plate, you probably have a screw-on mount.
- If the mirror seems to pop off with pressure, it could be a clip-on mount.
Knowing your mount type helps you choose the right tools and method.
Tools And Materials Needed
Removing a rear view mirror mount is easier if you gather the right supplies first. Here’s what you’ll need for most cars:
- Flathead screwdriver
- Torx or Phillips screwdriver (for screw-on mounts)
- Allen wrench (sometimes used for certain mounts)
- Utility knife or razor blade
- Heat gun or hairdryer (for adhesive mounts)
- Gloves
- Safety goggles
- Rubbing alcohol
- Microfiber cloth
- Masking tape (optional)
- Plastic pry tool (optional)
Tool Comparison Table
For quick reference, here’s a comparison of tools needed for each mount type:
| Mount Type | Essential Tools | Optional Tools |
|---|---|---|
| Adhesive | Heat gun, razor blade | Plastic pry tool, masking tape |
| Screw-On | Torx/Phillips screwdriver | Allen wrench |
| Clip-On | Flathead screwdriver | Plastic pry tool |
Safety Tips
Always wear gloves and safety goggles. The glass can crack or tiny chips can fly up. If you’re working with adhesives, make sure the area is well-ventilated. Keep all tools handy so you don’t rush or drop anything.
Preparing Your Work Area
Preparation is a big part of success. A clean, well-lit area helps you avoid mistakes and damage.
- Park your car on a flat surface. Avoid slopes or uneven ground.
- Switch off the ignition. Disconnect the battery if your mirror has electronic features.
- Clean the windshield. Use rubbing alcohol and a microfiber cloth to remove dirt and grease.
- Protect the dashboard. Place a towel or masking tape under the mirror area to catch falling parts.
- Check for wires. If your mirror has sensors or electronics, gently disconnect them before starting.
Spending a few minutes on preparation can save hours of trouble later.
Step-by-step Guide: Removing An Adhesive Rear View Mirror Mount
Adhesive mounts are the most common and also the most challenging to remove. The mount is glued to the glass with a strong epoxy or urethane.
Step 1: Soften The Adhesive
Use a heat gun or hairdryer. Hold it about 3–5 inches from the mount and heat for 2–3 minutes. This softens the glue and makes removal easier. Do not overheat—the windshield can crack if exposed to too much heat.
Insight: Beginners often skip this step, making the mount harder to remove and increasing the risk of glass damage.
Step 2: Loosen The Mirror
Most mirrors slide off the mount. Look for a small screw or clip on the mirror stem. Remove the screw with a screwdriver, then gently wiggle and slide the mirror off the mount. If it’s stuck, don’t force it—use more heat.
Step 3: Remove The Mount
Take a razor blade or utility knife. Carefully insert it between the metal button and the glass. Gently twist and pry, using smooth motions. Apply heat again if needed. The mount should begin to lift. If it resists, alternate heat and prying.
Non-obvious tip: Don’t pull straight out—this can crack the glass. Instead, use side-to-side movements.
Step 4: Clean The Glass
Once the mount is off, you’ll see glue residue. Use rubbing alcohol and a razor blade to scrape it away. Wipe with a microfiber cloth.
Step 5: Inspect For Damage
Check the glass for chips or cracks. If you see any, repair them before installing a new mount.

Credit: www.wikihow.com
Removing Screw-on Rear View Mirror Mounts
Screw-on mounts are easier to remove but require careful handling to avoid stripping screws or damaging threads.
Step 1: Locate The Screws
Find the screws at the base of the mirror or mount. They are usually Torx or Phillips.
Step 2: Unscrew And Detach
Use the correct screwdriver. Turn counterclockwise to loosen. Hold the mirror with one hand to prevent it from falling.
Step 3: Remove The Mount
Once the screws are out, the mount should come off easily. If it sticks, use a flathead screwdriver to gently pry it away.
Step 4: Clean And Inspect
Wipe away any dirt or rust. Check the glass and screw holes for damage.
Insight: Many people forget to check for hidden screws under covers or behind the mirror. Look carefully before pulling.
Removing Clip-on Rear View Mirror Mounts
Clip-on mounts use spring-loaded clips or tabs. They are common in some European and Asian cars.
Step 1: Identify The Clip Mechanism
Look for a small slot or tab at the base of the mirror. Sometimes, you need to press or pull the tab.
Step 2: Release The Clip
Use a flathead screwdriver or plastic pry tool. Insert into the slot and gently twist. The mirror should pop off. If it doesn’t, check for extra clips.
Step 3: Remove The Mount
The mount may stay on the glass or come off with the mirror. If it’s still attached, gently pry it away.
Step 4: Clean Up
Use alcohol and a cloth to clean the area. Check for any broken clips.
Non-obvious tip: Clip mounts can break easily if you use too much force. Always use gentle pressure.

Credit: www.wikihow.com
Special Cases: Electronic And Sensor Mirrors
Modern cars often have mirrors with electronics—auto-dimming, compass, temperature sensors, or cameras. Removing these mounts needs extra care.
Step 1: Disconnect Wires
Find the wire harness at the back of the mirror. Press the release tab and unplug.
Step 2: Remove The Mirror
Follow the steps for adhesive, screw-on, or clip-on mounts depending on your car.
Step 3: Protect The Wires
Cover exposed wires with tape to prevent short circuits.
Step 4: Avoid Damage
Don’t pull or twist wires. If unsure, check your car’s manual or ask a technician.
Data Point: According to automotive repair surveys, about 22% of mirror removals in newer cars involve electronic mounts. Damage to these wires can cost $200–$500 to repair.
Practical Tips For Easy Removal
Even with the right tools and steps, there are tricks that make the job smoother.
- Heat in short bursts instead of long exposure.
- Use masking tape around the mount to protect the glass.
- If the mount won’t budge, try a plastic pry tool instead of metal to avoid scratches.
- For stubborn glue, use a commercial adhesive remover (follow safety instructions).
- If you hear cracking, stop immediately and let the glass cool.
Example: One driver had a stuck adhesive mount. After heating and prying for 10 minutes, he used a plastic card (like an old credit card) to slide under the mount, which worked without damaging the glass.
Comparing Removal Difficulty By Mount Type
You may wonder which mount is easiest to remove. Here’s a quick comparison:
| Mount Type | Removal Difficulty (1–5) | Risk of Glass Damage | Time Required (minutes) |
|---|---|---|---|
| Adhesive | 4 | High | 20–40 |
| Screw-On | 2 | Low | 10–20 |
| Clip-On | 3 | Medium | 10–25 |
Adhesive mounts are hardest because of the glue. Screw-on mounts are fastest and safest. Clip-ons fall in the middle.
Common Mistakes And How To Avoid Them
Removing a rear view mirror mount is straightforward, but mistakes can happen. Here are some common errors:
- Skipping the heat step for adhesive mounts
- Using too much force—can crack the glass or break clips
- Not disconnecting electronics before removal
- Using wrong tools—can strip screws or scratch glass
- Pulling instead of prying—especially with adhesive mounts
How to avoid: Always read your car’s manual, use gentle motions, and double-check for hidden screws or wires.
What To Do After Mount Removal
Once the mount is off, there are a few important steps before installing a new mirror or finishing up.
Clean The Area
Remove all glue, dust, and residue. Use rubbing alcohol, adhesive remover, and a microfiber cloth.
Inspect For Damage
Check for chips, cracks, or scratches. If you see damage, repair with a windshield repair kit or contact a specialist.
Prepare For New Mount
If you’re installing a new mount:
- Make sure the glass is dry and clean.
- Use the correct adhesive (special mirror adhesive, not regular glue).
- Follow instructions carefully.
Store Or Dispose Old Mount
Keep the old mount if you plan to reuse it. Otherwise, recycle or dispose of it properly.
Real-life Examples: Success And Failure
Hearing from other drivers helps you avoid mistakes. Here are two examples:
Example 1: Sarah, from Ohio, tried to remove her adhesive mount without heating. The mount wouldn’t budge. After searching online, she used a hairdryer and the mount came off easily. She cleaned the area and installed a new mirror without issues.
Example 2: Tom, from California, had a screw-on mount. He didn’t check for hidden wires and pulled the mirror off, damaging the auto-dimming wires. The repair cost him $350.
Lesson: Always check for electronics and use heat for adhesive mounts.
When To Ask A Professional
Some situations require expert help:
- If the mount is stuck and heat/prying doesn’t work
- If you have electronic mirrors with complex wiring
- If the windshield is already damaged
- If you’re unsure about the mount type
Most auto glass shops can remove and install a mount for $50–$100. It’s worth it if you want peace of mind.
How Rear View Mirror Mount Removal Affects Windshield Replacement
When replacing your windshield, the rear view mirror mount must be removed and reinstalled. Professionals use special tools and adhesives. If you plan to replace the windshield soon, ask the installer to move the mount. This avoids extra work and risk.
Data Point: Over 90% of windshield replacements require mirror mount removal and reattachment.

Credit: www.youtube.com
Environmental And Legal Considerations
Disposing of old mirror mounts and adhesives is important. Some adhesives contain chemicals that are harmful to the environment. Always follow local guidelines for disposal.
In some states, driving without a rear view mirror is illegal. Make sure to reinstall a new mirror promptly.
Troubleshooting: What If The Mount Won’t Come Off?
If you’re stuck, try these solutions:
- Reapply heat and wait longer.
- Use a commercial adhesive remover.
- Try a plastic pry tool for better leverage.
- Ask a friend to help hold the mirror while you pry.
If the mount still won’t move, it’s time to contact a professional.
Cost Breakdown: Diy Vs Professional Removal
Wondering about the costs? Here’s a quick comparison:
| Removal Method | Average Cost | Time Required | Risk |
|---|---|---|---|
| DIY | $10–$25 (tools & adhesive remover) | 30–60 minutes | Medium |
| Professional | $50–$100 | 10–30 minutes | Low |
DIY is cheaper but riskier. Professional removal costs more but saves time and reduces risk.
Frequently Asked Questions
Is It Possible To Remove The Mount Without Damaging The Windshield?
Yes, if you use the right tools and technique. Heating the mount, using gentle prying, and avoiding force help prevent damage. If unsure, seek help from a professional.
Can I Reuse The Old Mount After Removal?
It depends. Adhesive mounts usually cannot be reused because the glue loses strength. Screw-on and clip-on mounts may be reused if not bent or broken. Inspect carefully before reusing.
What Kind Of Adhesive Should I Use For Reinstalling The Mount?
Always use special rear view mirror adhesive (often sold at auto stores). Regular glue or epoxy is not strong enough and may fail. Follow the instructions for curing time and placement.
How Long Should I Wait Before Attaching The Mirror After Installing A New Mount?
Most adhesives need at least 24 hours to cure fully. Some fast-setting glues may be ready in 1–2 hours, but full strength takes longer. Check the product instructions.
Can I Remove The Mount Myself If My Car Has Electronic Features?
Yes, but extra care is needed. Disconnect all wires, avoid pulling or twisting cables, and protect exposed connectors. If you’re unsure, consult your car’s manual or a technician. For more details, check resources like the Wikipedia Rear View Mirror page.
Removing a rear view mirror mount is a task almost anyone can do with patience and care. By knowing your mount type, gathering the right tools, and following step-by-step instructions, you can avoid costly mistakes and keep your car safe.
Remember, preparation is key—always protect your windshield, check for wires, and clean the area well. If something feels too difficult, don’t hesitate to ask for help. With these tips, you’ll have a clear view and a secure mirror, ready for the road ahead.