

Removing a Ring camera from its mount might sound like a simple job, but there’s more to it than just twisting and pulling. Maybe you’re moving, upgrading, or troubleshooting. No matter your reason, knowing the right way to detach your Ring camera helps you avoid damage, keeps your device working, and ensures your security system stays reliable.
Many users struggle with stuck mounts, lost screws, or even accidental device resets during removal. This guide will walk you through each step, explain the tools you’ll need, point out common mistakes, and share practical tips for every Ring camera model.
Let’s get started on how to safely and smoothly remove your Ring camera from its mount.
Why Remove Your Ring Camera From Its Mount?
There are several reasons why you might need to take your Ring camera off its mount. Understanding these helps you plan and avoid surprises.
- Relocation: Moving to a new home or changing your camera’s position for better coverage.
- Device Upgrade: Replacing with a newer model or swapping to another spot.
- Maintenance: Cleaning, troubleshooting, or repairing the device.
- Battery Replacement: Some Ring models need to be removed to access batteries.
- Mount Replacement: Changing mounts to a different style or fixing a broken one.
- Rental Property Rules: Removing devices when moving out or at the landlord’s request.
- Seasonal Adjustments: Moving cameras for different seasons (like pointing at a driveway in winter).
Each reason brings its own challenges. For example, relocating requires careful cable management, while maintenance often involves cleaning delicate sensors.
Types Of Ring Cameras And Mounts
Not all Ring cameras use the same mount or removal method. Knowing your model is the first step.
| Ring Camera Model | Mount Type | Typical Removal Tool |
|---|---|---|
| Ring Stick Up Cam (Battery/Wired/Solar) | Bracket with screws | Phillips screwdriver |
| Ring Spotlight Cam (Battery/Wired/Solar) | Quick-release bracket | Phillips screwdriver |
| Ring Floodlight Cam | Wall plate (wired) | Phillips screwdriver, sometimes Torx bit |
| Ring Indoor Cam | Stand/base or wall mount | Hand (stand), Phillips screwdriver (wall) |
| Ring Doorbell (all models) | Faceplate & mounting bracket | Security screwdriver (special Torx) |
Non-obvious insight: Some Ring cameras have security screws requiring a special tool included in the box. Losing this tool is a common problem—always keep it in a safe place.
Safety Tips Before You Begin
Removing a smart device is more than a hardware task. You need to think about safety, both physical and digital.
- Power Off First: For hardwired cameras, always turn off the power at the breaker to avoid shocks.
- Secure Your Ladder: If your camera is mounted high, use a stable ladder and ask someone to help.
- Check for Wasps/Spiders: Outdoor mounts often attract insects; check before touching.
- Notify Others: Tell family or roommates before removing—your security system will have a blind spot.
- Unlink from App (if selling): If you’re giving away or selling your device, remove it from your Ring account first.
Practical tip: Take a photo of your camera’s position and wiring before removal. This makes reinstallation much easier.
Tools And Materials Needed
Having the right tools makes the process faster and safer. While most Ring cameras use simple screws, some require a special screwdriver.
- Screwdriver: Usually a Phillips head, sometimes a Torx or security bit.
- Ring Security Screwdriver: A special tool for Ring Doorbells and some outdoor cams.
- Ladder: For hard-to-reach places.
- Work Gloves: To protect your hands from sharp edges or insects.
- Plastic Pry Tool: Useful for gently removing tight faceplates without damage.
- Ziplock Bag: For keeping screws and small parts safe.
- Smartphone: For taking photos of wiring or mount setup.
- Flashlight: If working in low light or shaded areas.
Non-obvious insight: Many users damage their mounts by using the wrong screwdriver size. Always check screw heads before choosing your tool.
Credit: www.youtube.com
Step-by-step: How To Remove Ring Camera From Mount
Let’s go through the general process, followed by details for specific models. Most Ring camera removal involves these basic steps:
- Open the Ring App: Temporarily disable motion alerts to avoid unnecessary notifications.
- Power Down (if wired): Turn off power at the breaker.
- Locate and Remove Screws: Find all screws holding the camera or mount in place.
- Remove Faceplate (if present): Some models have a cover that must be removed first.
- Gently Detach the Camera: Pull or slide the camera off the mount.
- Disconnect Wires (if any): For wired models, carefully disconnect electrical wires.
- Store All Parts: Put screws and mounts in a bag for later use.
Example: Removing Ring Stick Up Cam
The Ring Stick Up Cam is one of the most popular models and comes in battery, wired, and solar versions.
- Disable Alerts in the app.
- Unscrew Camera from the mount (usually one or two Phillips screws at the base).
- Slide Off Camera from the mounting bracket.
- If Wired, disconnect the power cable by gently pulling the connector.
Tip: The Stick Up Cam’s mount can stay on the wall if you plan to reinstall. Only remove the bracket if you’re moving locations.
Example: Removing Ring Floodlight Cam
The Floodlight Cam is heavier and connected to live wires.
- Turn Off Power at the circuit breaker.
- Unscrew Camera from Plate (usually two screws under the main body).
- Support Camera with one hand while loosening.
- Disconnect Wires by unscrewing wire nuts (black, white, ground).
- Lower Camera Carefully to avoid dropping.
Caution: If you’re not comfortable with electrical work, consider hiring a qualified electrician.
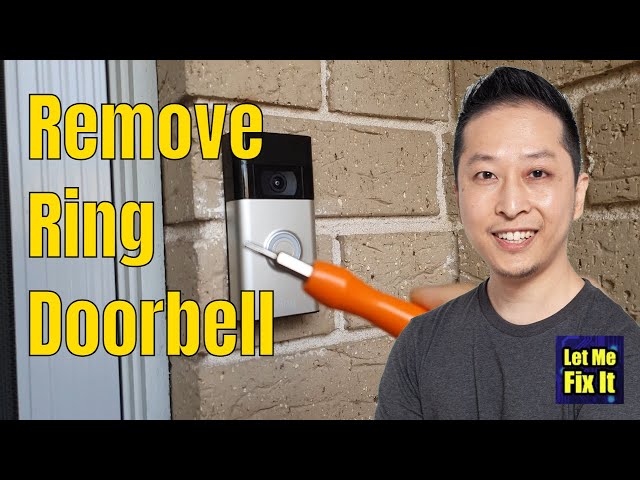
Example: Removing Ring Doorbell
The Ring Doorbell uses a faceplate and a special security screw.
- Remove Security Screw from the bottom with the included tool.
- Pull Faceplate Off gently.
- Remove Main Screws holding the device to the bracket.
- Slide Doorbell Up and Off the mounting bracket.
- Disconnect Wires if hardwired.
Tip: Keep the security screw safe—it’s hard to replace and necessary for reinstallation.
Detailed Removal Guides For Popular Ring Cameras
Not all Ring cameras are the same. Here’s how to remove the most common models.
Ring Stick Up Cam (battery/wired/solar)
- Check for the small locking screw at the base. Remove with a Phillips screwdriver.
- Twist the camera body counterclockwise (if using the original mount).
- Gently pull the camera away from the mount.
- If using a solar panel, unplug the power cable before full removal.
Ring Spotlight Cam (battery/wired/solar)
- Open battery compartment (if battery version) to make the camera lighter.
- Remove mounting screw from the side or bottom, depending on the model.
- Slide the camera up to detach from the mounting bracket.
- For wired/solar, disconnect the attached power cable.
Ring Floodlight Cam
- Power off at the breaker to prevent electrical shock.
- Remove the two mounting screws (under the camera head).
- Support the camera as you unscrew.
- Disconnect wires, noting which wire goes where for future installation.
Ring Indoor Cam
- If on stand, simply lift the camera off.
- If wall-mounted, remove the screws from the base with a Phillips screwdriver.
- Unplug power cable from the back.
Ring Doorbell (all Models)
- Use the special Ring screwdriver to remove the faceplate screw.
- Pull off the faceplate.
- Remove the two main screws holding the device to the wall.
- Slide the device off the mount.
- Disconnect any wires if hardwired.
Note: Ring Doorbell models have small differences. For example, the Ring Video Doorbell Pro uses a smaller mount and different screws. Always check your manual.
Common Problems And How To Avoid Them
Even with a guide, some things can go wrong. Here’s what to watch for.
Stripped Screws
A stripped screw is a common headache. Using the wrong screwdriver or too much force can cause this.
- Use the correct screwdriver size and type.
- Apply firm, steady pressure—not forceful twisting.
- If stripped, try using a rubber band between the screwdriver and screw for extra grip.
Stuck Mounts
Mounts can become stuck due to weather, paint, or dirt.
- Gently wiggle the camera instead of pulling hard.
- Use a plastic pry tool if needed—never a metal one, which can scratch.
- Spray a little silicone lubricant around the edge if outdoor dirt is the cause.
Damaged Cables
Pulling on wires can damage connectors.
- Always disconnect cables by holding the connector, not the wire.
- Take a picture before you disconnect for easy reinstallation.
Forgotten Security Screw
Ring Doorbells use a unique security screw. Many users lose this tool.
- Store the screwdriver and spare screws in a labeled bag.
- If lost, you can order a replacement from Ring’s website.
Device Not Detected After Reinstall
Sometimes, after remounting, your Ring camera won’t reconnect.
- Check power and Wi-Fi connections.
- Restart the device using the reset button.
- Re-add the device in the Ring app if needed.
Comparison: Ring Camera Removal Difficulty
Some Ring cameras are much easier to remove than others. Here’s a quick comparison:
| Ring Camera Model | Removal Difficulty (1=Easy, 5=Hard) | Special Tools Needed? |
|---|---|---|
| Stick Up Cam (Battery) | 1 | No |
| Stick Up Cam (Wired/Solar) | 2 | No |
| Spotlight Cam (Battery) | 2 | No |
| Spotlight Cam (Wired/Solar) | 3 | No |
| Floodlight Cam | 5 | Possibly Torx screwdriver |
| Indoor Cam | 1 | No |
| Ring Doorbell (all) | 3 | Ring Security Screwdriver |
Insight: Wired models are always harder to remove due to electrical connections. Battery-powered and plug-in models are much simpler.
Advanced Tips For A Smooth Removal
If you want your Ring camera removal to go perfectly, try these advanced tips.
- Mark All Parts: Use colored tape to label wires, mounts, and screws, especially if you’re reinstalling later.
- Document Everything: Take close-up photos of screw positions, wiring, and how the mount attaches to the wall.
- Clean as You Go: Use a soft brush to remove dust from the camera and mount. This prevents grime buildup on reinstallation.
- Test Before Remounting: Plug in and test your camera before putting it back on the wall to ensure it still works.
After Removal: What To Do Next
Once your Ring camera is off the mount, don’t just toss it in a drawer. Here’s what to consider:
Cleaning And Storage
- Wipe down the camera and mount with a dry cloth.
- Store in a dry place if not reinstalling soon, to prevent moisture damage.
- Keep all screws and small parts in a labeled bag or small box.
Resetting Or Unlinking
If you’re selling, gifting, or recycling your Ring camera:
- Open the Ring app and remove the device from your account.
- Factory reset the camera (hold the setup button for 15 seconds).
- Delete video history if you wish to protect your privacy.
Reinstallation Tips
If you’re moving the camera to a new location:
- Double-check Wi-Fi signal at the new spot.
- Test camera angle before final mounting.
- Use original screws and mounts if possible for best fit.
Recycling Or Disposing
If your camera is broken or old:
- Check local electronics recycling rules.
- Remove batteries before recycling—never throw in regular trash.
Pro tip: Many electronics stores offer free recycling for old smart devices.
When To Call A Professional
Most people can remove a Ring camera with patience and care. But there are times when expert help is smarter.
- Floodlight Cam or other wired models: If you’re not comfortable with electrical work, hire a licensed electrician.
- High or tricky locations: If the camera is mounted high up or over stairs, safety comes first.
- Stubborn mounts: If you can’t remove a mount without damaging your wall, call a handyman.
Hiring help might cost more upfront but can prevent expensive mistakes.
Keeping Your Home Secure During And After Removal
Removing a Ring camera even temporarily leaves a blind spot in your home security. Here’s how to keep your home safe:
- Plan removal during low-risk times (daytime, when people are home).
- Notify housemates or family so everyone is aware.
- Temporarily adjust other security devices to cover the gap (like moving another camera).
- Limit time without monitoring—reinstall or replace the camera as soon as possible.
Remember, most burglaries happen during the day when people are out. Stay vigilant.

Credit: www.youtube.com
Real-world Examples
Moving To A New Home
Sarah had three Ring cameras—two Stick Up Cams and one Floodlight Cam. She took photos of each mount before removal, labeled every wire with colored tape, and stored all screws in separate bags. When she moved, reinstalling was fast and easy.
She avoided the common mistake of losing parts or forgetting which wire went where.
Replacing A Broken Camera
Mike’s outdoor Stick Up Cam stopped working after two years. He carefully removed it, checked the mount for rust, and used the same screws for the replacement camera. He found that taking photos before disconnecting helped with the new installation.
Upgrading Doorbell
Priya upgraded her Ring Video Doorbell to a Pro model. She saved the old faceplate, screws, and security screwdriver. When the new device arrived, she had everything needed for a quick swap—no missing parts, no confusion.
Insight: Preparation before removal saves time and prevents frustration later.
Frequently Asked Questions
How Do I Know Which Ring Camera Model I Have?
Check the back or underside of your device for a model number. You can also find it in the Ring app under device settings. Each model has a unique shape and mounting style. If you’re unsure, the Ring support site has pictures to help identify your device.
Can I Reuse My Old Ring Camera Mount?
Yes, in most cases the original mounting bracket can be reused for the same or similar model. However, different Ring cameras may use slightly different brackets. Always compare the new camera’s mount with the old one before reinstalling.
What Should I Do If I Lose The Security Screwdriver?
If you lose the Ring security screwdriver, you can order a replacement from the official Ring website. Some hardware stores may also carry Torx bits that fit. Avoid using improvised tools, as they can strip the screw.
Is It Safe To Remove A Wired Ring Camera Myself?
If you have basic DIY skills and turn off power at the breaker, you can safely remove most wired Ring cameras. However, if you’re unsure or uncomfortable, especially with hardwired models like the Floodlight Cam, it’s smart to call a licensed electrician to avoid risk.
Will Removing My Camera Delete My Videos?
No, removing your Ring camera from the mount will not delete your saved videos. However, if you remove the device from your Ring account, you may lose access to stored videos. Download important clips before unlinking or resetting the device.
For more details and official troubleshooting, visit the Ring Support Center.
Removing your Ring camera from its mount is a straightforward task with the right tools, a little planning, and careful attention to detail. Whether you’re moving, upgrading, or just doing maintenance, following the steps above helps avoid damage and keeps your home secure. Remember, preparation is key: label everything, take photos, and keep screws safe. If you’re ever unsure—especially with electrical work—don’t hesitate to ask for professional help. With these tips, you’ll have your Ring camera off the mount and ready for its next job in no time.

Credit: www.reddit.com