
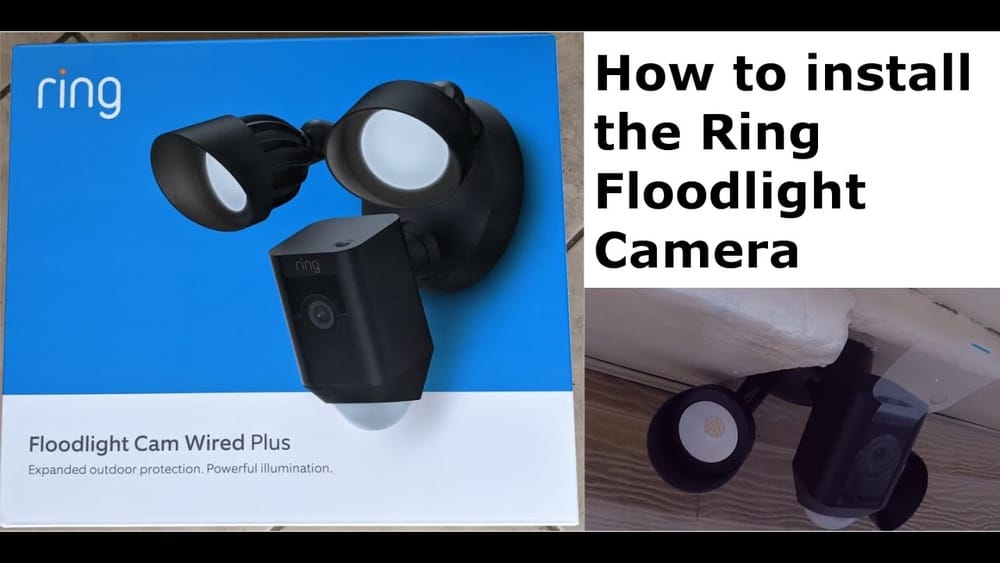
Removing a Ring Floodlight Camera might sound simple, but it involves more than just taking the device off the wall. Whether you want to replace it, relocate it, or simply disconnect it for maintenance, knowing the right steps is important. Doing it incorrectly can lead to electrical hazards, damage to your property, or problems reconnecting later. This guide gives you the exact steps, tips, and safety advice you need to safely and confidently remove your Ring Floodlight Camera. If you’re not familiar with electrical work, don’t worry—this article explains everything in plain English, with clear steps and practical examples.
Many people buy smart cameras for security, but when it’s time to remove them, questions often arise: Do I need to shut off the power? How do I avoid damaging the wiring? What tools are needed? Are there privacy or account issues to handle? Here, you’ll find answers to all these questions and more. By the end, you’ll know how to remove your device safely and what to do next, including how to fill holes, reset your Ring account, and reuse or recycle the camera.
Why Remove A Ring Floodlight Camera?
There are several reasons why someone might need to take down their Ring Floodlight Camera. Understanding these reasons helps you plan the removal and what comes after.
- Upgrading Your Security System: You might want to replace the camera with a newer model that has better features or improved video quality.
- Relocating the Camera: If the current position doesn’t cover the area you need, moving it is a logical choice.
- Renovations or Repairs: Home improvements may require the camera to be temporarily removed to avoid damage.
- Selling or Renting the Property: New owners or tenants may prefer to use their own devices.
- Device Malfunction: If your camera stops working, removal might be necessary for repair or warranty replacement.
- Switching Brands: You may choose a different brand for compatibility or preference reasons.
- Privacy Concerns: Sometimes, family or guests may not feel comfortable with a camera in certain areas.
Removing a Ring Floodlight Camera is not just about unscrewing it from the wall. The process involves electrical safety, protecting your property, and handling your personal data.
What You Need Before Removing Your Camera
Preparation is key for a safe and smooth removal. Here’s what you should have ready:
- Ladder (if your camera is mounted high)
- Screwdriver (usually a Phillips-head, but check your model)
- Voltage tester (to check if the power is off)
- Wire nuts/caps
- Electrical tape
- Protective gloves
- Safety glasses
- Drop cloth (to catch dust or screws)
- Smartphone (for Ring app access and taking photos)
- Helper (optional, but recommended for high or hard-to-reach places)
Some people forget to bring wire nuts or a voltage tester, but these are very important. Wire nuts keep your wiring safe after removal, while a voltage tester ensures you don’t get shocked.
Checking The Power Source
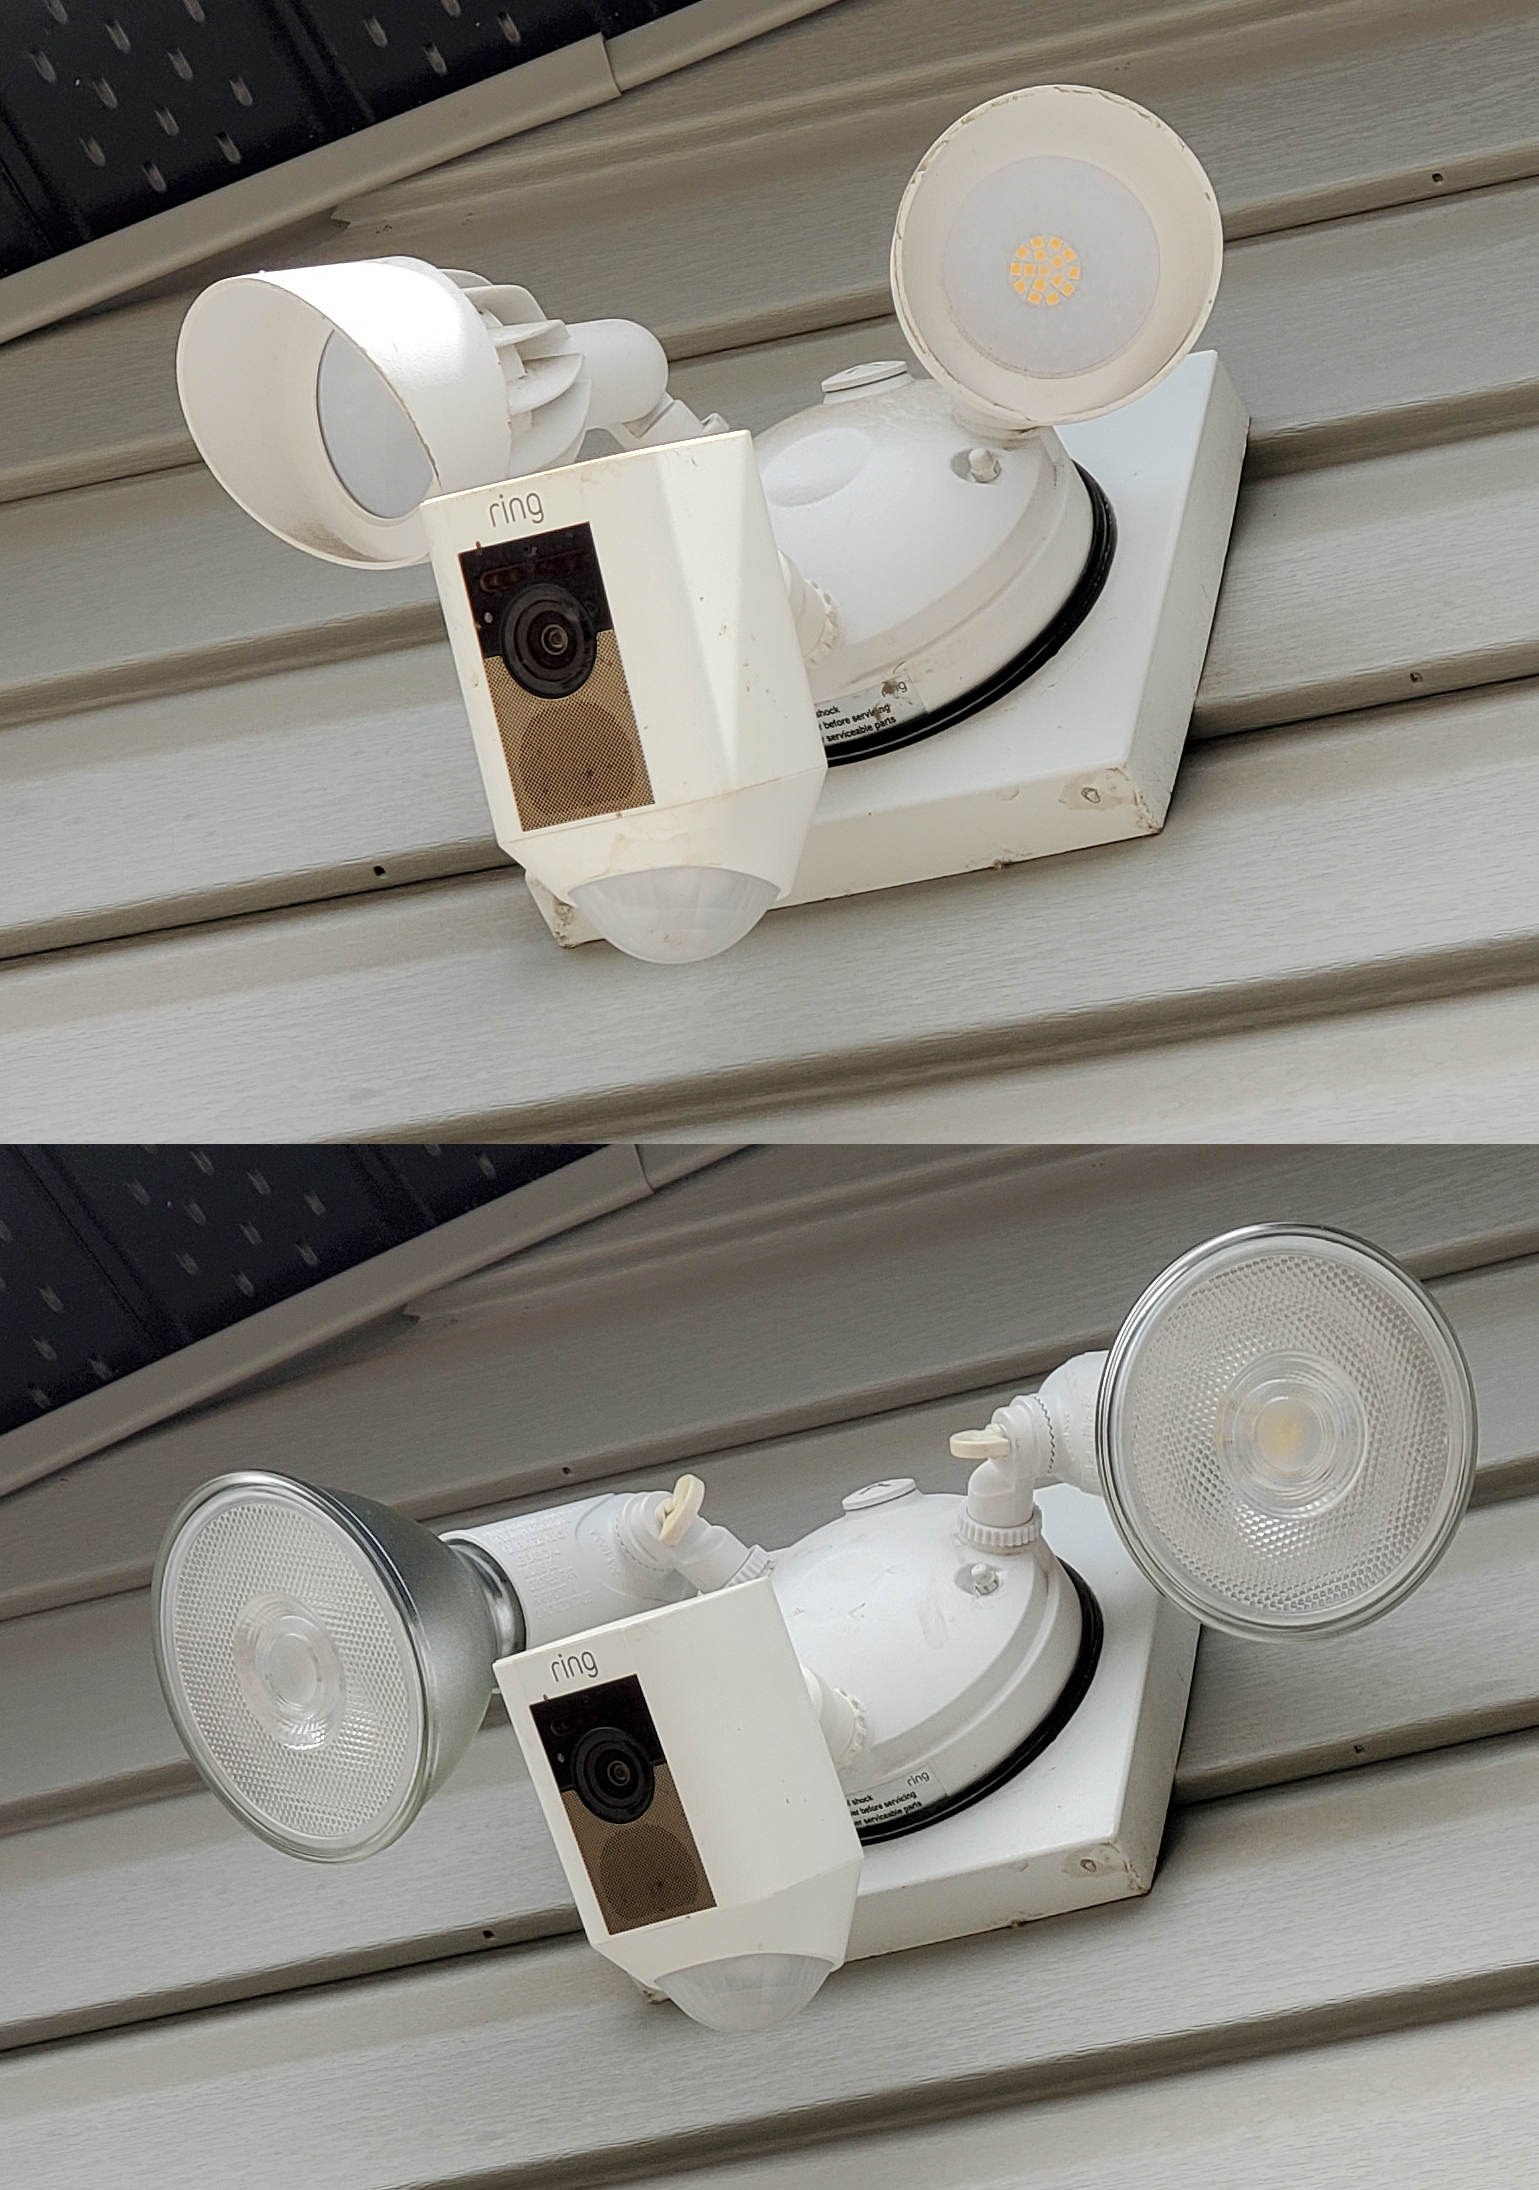
The Ring Floodlight Camera is hardwired into your home’s electrical system. This means there’s a risk of electric shock if you don’t turn off the power. Locate the circuit breaker for the outdoor lights or the area where your camera is installed. Flip the switch to OFF before starting. Don’t rely on just turning off the wall switch—the circuit may still be live.
Credit: koenaerts.ca
Step-by-step Guide: How To Remove A Ring Floodlight Camera
Let’s break down the process into clear, manageable steps. If you follow these, you’ll reduce the risk of mistakes and finish with confidence.
1. Disconnect The Camera From The Ring App
Before you touch any wires, you need to remove the device from your Ring account. This ensures you can set it up elsewhere or sell it later without issues.
- Open the Ring app on your phone.
- Tap on the Device you want to remove.
- Go to Device Settings.
- Tap Remove Device.
- Confirm when prompted.
This step is often skipped, but it’s crucial. If you don’t remove the device from your account, you may not be able to add it to a new account or location later.
2. Turn Off The Power
Go to your breaker panel and shut off the circuit powering the floodlight camera. Use a voltage tester at the camera’s wiring to make sure the power is really off. This step is non-negotiable—never work on live electrical wires.
3. Remove The Camera From The Mount
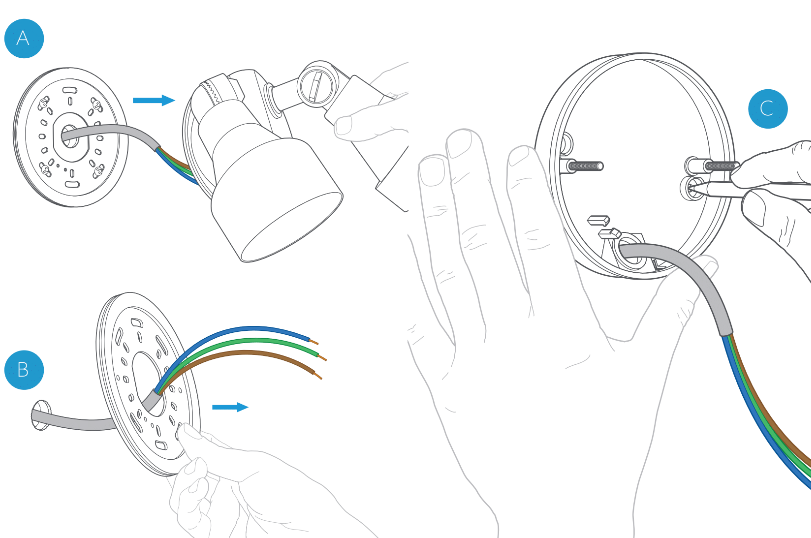
Most Ring Floodlight Cameras are attached with two or three screws and a mounting bracket.
- Use a screwdriver to loosen the screws holding the camera in place.
- Gently support the camera as you remove the last screw. These devices can be heavy, so don’t let it fall.
- Carefully pull the camera away from the wall or ceiling until you see the wires.
4. Disconnect The Wires
You’ll see three wires: usually black (hot), white (neutral), and green or bare copper (ground).
- Use your voltage tester again to double-check for power.
- Remove the wire nuts or electrical tape connecting the camera to your home’s wiring.
- Detach the black, white, and ground wires.
- Cap the exposed house wires with new wire nuts for safety.
If you plan to install another light or device in the same spot, leave the wires accessible and safe. If not, tuck them safely into the electrical box and cover them with a blank plate.
5. Remove The Mounting Bracket (if Needed)
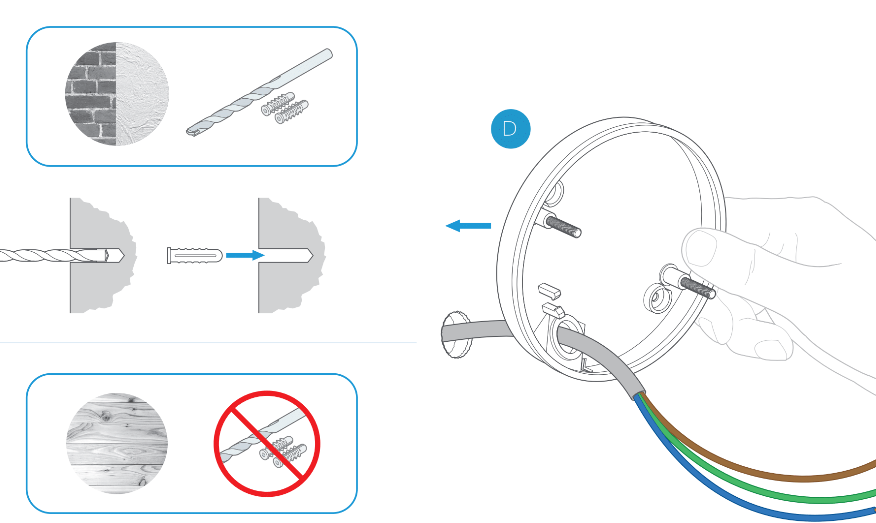
If you want a completely clean look or plan to install a different fixture, remove the mounting bracket by unscrewing it from the electrical box. Save these screws and parts if you might reuse them.
6. Inspect And Repair The Area
After removal, check for:
- Exposed wires (they must be capped and secure)
- Holes or wall damage
- Old screw anchors or debris
Use spackle or outdoor-rated filler for holes. Sand, prime, and paint as needed to restore the area.
7. Store, Sell, Or Recycle The Camera
Decide what to do with your old device:
- Store: Wrap the camera in bubble wrap and keep it in a dry place.
- Sell: Clean the camera, include all mounting hardware, and reset it to factory settings.
- Recycle: If broken, find an e-waste recycling center.
Many people overlook the importance of factory resetting before selling or giving away their camera. This protects your privacy and ensures the next user can set it up.
Safety Tips For Removing A Ring Floodlight Camera
Electrical projects can be dangerous if you’re not careful. Here are some key safety tips:
- Always turn off the power at the breaker, not just the switch.
- Use a voltage tester before touching wires.
- Wear insulated gloves and safety glasses to protect yourself.
- If the camera is high or in a tricky spot, have a helper steady the ladder.
- Never rush. Take your time and double-check each step.
A common mistake is forgetting to cap the wires after removal. This can cause electrical shorts or even fires later.
What To Do After Removing The Camera
Once your Ring Floodlight Camera is off the wall, what comes next? Here’s how to finish the job properly:
Filling And Painting Holes
If you plan to leave the area without a new fixture, fill any holes with outdoor spackle or caulk. Allow it to dry, then sand and paint to match your home’s exterior.
Handling Electrical Wires
If you’re not installing a new device, cap the wires and push them back into the junction box. Cover the box with a weatherproof blank plate.
Updating Your Ring Account
After removing the device in the app, check your account to make sure it’s gone. This avoids confusion or notifications from a device you no longer have.
Recycling Old Electronics
If your camera is broken, don’t throw it in the trash. Many communities offer e-waste recycling services. Visit your city’s website or use a national directory like EPA’s Electronics Donation and Recycling.
Special Situations And Common Challenges
Removing a Ring Floodlight Camera is usually straightforward, but you may run into some unique situations.
Painted Over Or Sealed Cameras
If your camera has been painted over or sealed, use a utility knife to score around the bracket before removal. This helps prevent peeling or tearing the paint.
High Or Hard-to-reach Installations
For cameras mounted on second stories or over garages, use a taller, stable ladder. Consider hiring a professional if you’re uncomfortable with heights.
Damaged Or Old Wiring
If the wires are frayed, brittle, or look unsafe, don’t attempt removal yourself. Call a licensed electrician. Old wiring can pose fire risks.
Extreme Weather
Don’t remove outdoor cameras during rain, snow, or high winds. Wet conditions increase the risk of electrical shock and falling.
Credit: ring.com
Comparing Ring Floodlight Camera Models
There are several versions of the Ring Floodlight Camera, and knowing which one you have can help with removal.
| Model | Power Source | Mounting Type | Removal Difficulty |
|---|---|---|---|
| Ring Floodlight Cam Wired Plus | Hardwired | Wall/Ceiling | Moderate |
| Ring Floodlight Cam Wired Pro | Hardwired | Wall/Ceiling | Moderate |
| Ring Floodlight Cam (1st Gen) | Hardwired | Wall | Easy |
| Ring Floodlight Cam Plug-In | Plug-in (outlet) | Wall | Easy (no wiring) |
Most models are hardwired, but the Plug-In version just unplugs from the wall, making removal much simpler.
Electrical Safety: Wired Vs. Plug-in Models
There’s a big difference between hardwired and plug-in versions of the Ring Floodlight Camera. Here’s a quick comparison to help you know which steps apply to your device.
| Feature | Hardwired | Plug-In |
|---|---|---|
| Power Source | Connected to home’s electrical wiring | Standard power outlet |
| Removal Steps | Shut off breaker, disconnect wires | Unplug from outlet |
| Safety Level | Medium to high (electric shock risk) | Low (just unplug) |
| Skill Needed | Basic electrical knowledge | None |
If you have a plug-in model, most of the electrical safety steps above won’t apply. Simply unplug it, remove the screws, and you’re done.
Common Mistakes To Avoid
Even careful homeowners can make errors during removal. Here are some frequent mistakes and how to avoid them:
- Not turning off the breaker: This is the most dangerous mistake. Always shut off power at the panel.
- Using the wrong tools: Using a power drill can strip screws or damage the fixture. Stick to manual screwdrivers for better control.
- Forgetting to remove from the app: Skipping this step can cause setup issues if you sell or reinstall the camera.
- Leaving wires exposed: Always cap wires with nuts or tape to prevent electrical hazards.
- Damaging the wall or siding: Pulling too hard can crack stucco, brick, or siding. Loosen all screws and use gentle force.
- Not checking for power twice: Always double-check with a voltage tester before touching wires.
- Losing screws or hardware: Place small parts in a bowl or bag to avoid losing them.
Many beginners miss the step of capping and protecting wires after removal. This is not just about safety—it’s also required by electrical codes in most areas.
How To Prepare For A New Fixture After Removal
If you plan to install a new light, camera, or fixture in the same spot, do a little prep work before you finish.
Clean The Electrical Box
Remove dust, debris, or old tape from the box. Check that the box is firmly attached to the wall or ceiling.
Inspect The Wiring
Look for frayed or damaged insulation. If you see any, call a professional before installing a new device.
Measure The Space
Some modern fixtures have larger or smaller mounting plates. Measure to be sure your new device will fit.
Gather New Hardware
Most new cameras or lights come with their own mounting hardware. Keep the old screws and brackets just in case—they may fit better than the new ones.
Test The Circuit
Before you install anything new, test the circuit by turning the breaker back on briefly. If you notice flickering or popping sounds, turn it off and call an electrician.
Step-by-step: Removing A Plug-in Ring Floodlight Camera
While most Ring Floodlight Cameras are hardwired, a few models plug into a standard outlet. Here’s how to remove those:
- Unplug the device from the power outlet.
- Remove any screws or mounting hardware.
- Take down the camera and store or recycle it.
- If desired, fill and paint over the screw holes.
No need to mess with wiring or circuit breakers. Still, remember to remove the device from your Ring app to avoid future setup problems.
Disposal And Recycling: Doing It Responsibly
Smart cameras contain plastics, metals, and sometimes batteries. Throwing them in the trash is bad for the environment and may be illegal.
- Take the camera to a local e-waste recycling center.
- Remove any batteries (if present) and recycle them separately.
- Clean the device before recycling.
- Some electronics stores (like Best Buy) have drop-off bins for old cameras.
Some cities offer free e-waste pickup or scheduled drop-off days. Check your local government website for details.
Privacy And Data Protection After Removal
Your Ring Floodlight Camera may store video clips or personal data. Here’s how to protect your privacy:
- Factory reset the device before selling or recycling.
- Remove the device from your Ring account.
- Delete any saved video clips from your app or cloud storage.
- Remove your address and Wi-Fi settings from the device.
This step is often missed, but it’s important for your privacy and security.
Troubleshooting: What If The Camera Won’t Come Off?
Sometimes, the camera may feel stuck or the screws won’t budge. Here’s what to do:
- Spray a little WD-40 on stuck screws and wait a few minutes.
- Use the correct screwdriver size. Stripped screws can be removed with a screw extractor.
- If the bracket is painted over, use a utility knife to gently cut around it.
- If you’re still stuck, call a professional to avoid damaging your wall or wiring.
Never force the camera off—this can damage both the device and your home.
When To Call A Professional
While many homeowners can remove a Ring Floodlight Camera themselves, there are times when it’s better to call an electrician:
- If you’re unsure which breaker controls the circuit.
- If the wiring looks old, damaged, or confusing.
- If the camera is installed very high or in a risky spot.
- If you feel uncomfortable working with electricity.
Remember, safety is always the top priority.
Example: Real-world Removal Scenario
Let’s look at a typical removal:
Sarah wants to replace her Ring Floodlight Cam Wired Pro with a newer model. She follows these steps:
- She logs into the Ring app and removes the camera from her account.
- She turns off the outdoor light breaker and confirms with a voltage tester.
- She uses a ladder and screwdriver to loosen the camera from the bracket.
- She supports the camera while disconnecting the black, white, and ground wires.
- She caps the house wires and removes the old bracket.
- She fills the old screw holes with outdoor spackle and paints over them.
- She stores the camera for resale, making sure to factory reset it.
- She installs the new camera using the existing wiring and bracket.
Sarah avoids common mistakes by double-checking power, capping wires, and resetting the device.
Quick Reference: Removal Steps For Different Ring Floodlight Camera Types
Here’s a summary for quick comparison:
| Step | Hardwired Model | Plug-In Model |
|---|---|---|
| Remove from App | Yes | Yes |
| Shut Off Power | Yes (breaker) | Optional (unplug) |
| Unscrew Camera | Yes | Yes |
| Disconnect Wires | Yes | No |
| Cap Wires | Yes | No |
| Remove Bracket | Optional | Optional |
| Fill Holes | Optional | Optional |
This overview helps you see at a glance what’s involved for your specific model.
Frequently Asked Questions
How Do I Know If My Ring Floodlight Camera Is Hardwired Or Plug-in?
Look at the installation point. If the camera connects to your home’s wires inside a junction box, it’s hardwired. If it plugs into a regular outlet, it’s a plug-in model. The Ring app may also show the power source in device settings.
Can I Remove The Camera Without Deleting It From My Ring App?
Technically, yes, but it’s not recommended. Leaving the device on your account can cause issues if you want to reinstall it, sell it, or give it away. Always remove it from your app first.
What Should I Do If I Can’t Find The Right Circuit Breaker?
If you’re unsure which breaker controls your floodlight camera, try turning off breakers one by one and testing the camera each time. If you still can’t find it, call a licensed electrician for help.
Do I Need To Hire An Electrician To Remove A Ring Floodlight Camera?
Most people with basic DIY skills can remove a Ring Floodlight Camera safely. However, if you’re unsure about wiring, can’t reach the camera safely, or notice damaged wires, it’s best to hire a professional.
How Should I Dispose Of My Old Ring Floodlight Camera?
Don’t throw smart cameras in the trash. Take them to a certified e-waste recycling center. Remove any batteries and wipe your data before recycling. For more information, check out the EPA’s recycling guide.
Removing a Ring Floodlight Camera doesn’t have to be stressful or risky. With the right preparation and safety steps, anyone can do it. Whether you’re upgrading, moving, or just making changes to your home, following these clear instructions will help you protect your property, your privacy, and your peace of mind.
Credit: support.ring.com