
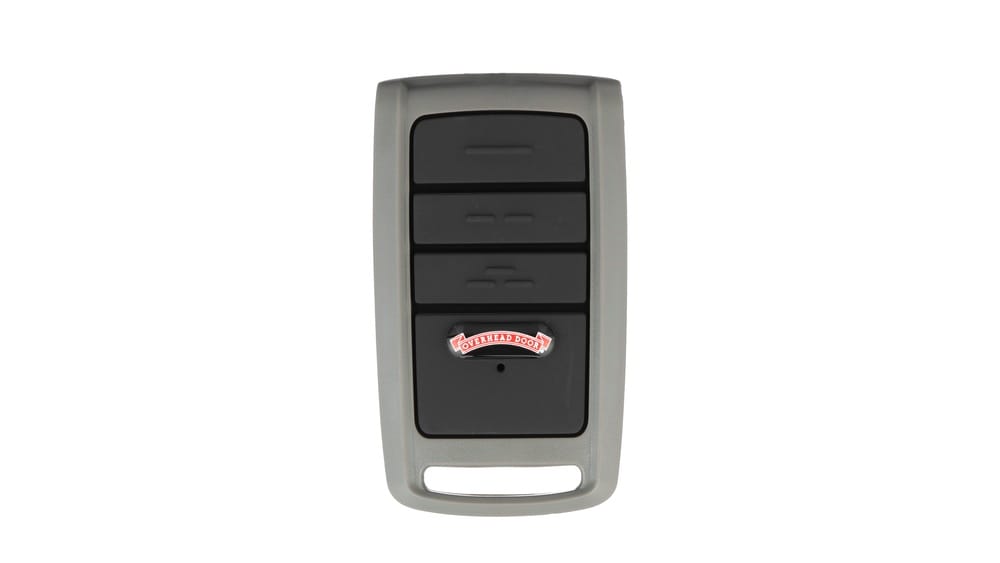
Replacing a garage door remote control might seem like a small task, but it’s an essential part of keeping your home secure and your daily routine smooth. A faulty or lost remote can leave you locked out, frustrated, or worried about unwanted access. The good news: you don’t need to be a tech expert to handle this job. With a few clear steps, the right information, and some practical tips, you can replace your garage door remote without stress—and often for less than you might think. This guide walks you through everything, from choosing the right replacement to programming it, troubleshooting common problems, and making the process as simple as possible.
Why You Might Need To Replace Your Garage Door Remote
Garage door remotes don’t last forever. Sometimes, they just stop working because of age or wear. Other times, you might lose them, break them, or they get stolen. Each situation requires a different approach, but replacing the remote is usually the fastest solution.
- Lost or stolen remotes can be a security risk. Anyone who finds your remote can access your garage.
- Broken or malfunctioning remotes might not open or close the door reliably, causing inconvenience or leaving your home unsecured.
- Upgrading to new technology can give you more features—like smartphone control or better range.
Knowing why you need a new remote helps you make smarter choices when buying and programming a replacement.
Understanding Garage Door Remote Types
Not all remotes are the same. Choosing the wrong type can leave you frustrated and out of pocket. Here’s a breakdown of the main types you’ll find:
| Remote Type | Description | Compatibility |
|---|---|---|
| Universal Remote | Works with many brands; programmable for multiple doors. | Most major brands (check compatibility list) |
| Brand-Specific Remote | Designed for a particular brand/model. | Limited to specific openers |
| Smart Remote | Connects to Wi-Fi/bluetooth and smartphones. | Requires compatible opener or hub |
Key Differences To Know
- Universal remotes offer flexibility but may need more steps to program.
- Brand-specific remotes are often easier to program but only work with certain openers.
- Smart remotes add features, but setup can be more complex.
Checking your garage door opener’s model and frequency before buying saves time and headaches.
What To Check Before Buying A Replacement
Before you buy, gather some key information. Missing any of these details can lead to buying a remote that won’t work.
- Brand and Model Number: Usually found on the opener unit (mounted on your garage ceiling).
- Remote Frequency: Common frequencies are 315 MHz, 390 MHz, or 433 MHz. Printed on the opener or old remote.
- Opener Type: Chain, belt, or screw drive—sometimes affects compatibility.
- Programming Method: Some use DIP switches; others have a “Learn” button.
- Features Needed: Do you want simple open/close, or extra functions like light control or multiple door support?
Tip: Take a photo of your opener’s label and old remote for reference at the store or when searching online.
How To Choose The Right Replacement Remote
Picking the best remote isn’t just about brand. Here’s how to make a confident choice:
1. Match The Brand And Frequency
Most remotes only work with certain brands and frequencies. If your opener says “Chamberlain 315 MHz,” look for remotes supporting that exact combination.
2. Decide Between Universal Vs. Brand Remote
- Universal remotes: Good if you have more than one opener or want future flexibility.
- Brand remotes: Often simpler if you want a guaranteed match with your current opener.
3. Think About Features
Some remotes come with extra buttons for lights, keypads, or multiple doors. Make sure the features fit your needs.
4. Check Reviews And Return Policies
Look for remotes with solid reviews and a clear return policy. This protects you if something doesn’t work.
5. Watch For Counterfeit Remotes
Buy from reputable stores or directly from the manufacturer. Counterfeit remotes may look right but can fail quickly or be insecure.
Where To Buy A Garage Door Remote
You have several good options for buying a replacement remote:
- Local hardware stores: Home Depot, Lowe’s, Ace Hardware, etc.
- Online retailers: Amazon, eBay, manufacturer websites.
- Garage door specialists: Local companies often stock common remotes.
- Direct from manufacturer: Chamberlain, LiftMaster, Genie, etc., all sell replacements on their websites.
| Buying Option | Pros | Cons |
|---|---|---|
| Local Store | Instant purchase, staff help, easy returns | May not have every model |
| Online Retailer | Wide selection, reviews, home delivery | Counterfeit risk, shipping time |
| Garage Door Pro | Expert advice, programming help | Higher cost, limited brands |
| Manufacturer Website | Guaranteed compatibility, support | Shipping wait, sometimes higher price |
Tip: If you’re unsure, bring your old remote or opener info to the store. Staff can often help find the right match.
Step-by-step: Replacing Your Garage Door Remote
Once you have the right remote, replacing it is straightforward. Here’s how to do it safely and efficiently.
Step 1: Remove The Old Remote From Service
If your remote was lost or stolen, you need to clear its code from your garage door opener. This prevents anyone who finds the remote from accessing your home.
- Locate the “Learn” button on your opener (usually on the unit near the ceiling).
- Press and hold the “Learn” button for about 6-10 seconds until the indicator light turns off. This erases all remote codes from memory.
- Reprogram any remaining remotes you still use.
Important: If you still have the old remote and it’s just broken, you can skip this step.
Step 2: Install Batteries In The New Remote
Most remotes come without batteries installed.
- Open the battery compartment with a small screwdriver or by sliding the cover.
- Insert the correct battery (usually a small coin cell or AAA/AA).
- Close the cover and check for a power light when you press a button.
Step 3: Program The New Remote
Programming can vary, but most modern remotes use a similar process:
- Get close to the opener unit (within reach of the “Learn” button).
- Press the “Learn” button on the opener. The indicator light will turn on or blink.
- Within 30 seconds, press and hold the button on your new remote you want to program.
- The opener’s light should blink or you’ll hear a click. This means it’s programmed.
- Test the remote to make sure it works.
Some older remotes use DIP switches. Set the switches on the new remote to match the pattern on your opener or old remote.
Step 4: Test All Functions
- Try the remote from inside and outside your garage.
- Check if any extra buttons (for lights or multiple doors) work as expected.
- Program additional remotes if needed.
Step 5: Secure Your System
If you erased all codes (due to a lost or stolen remote), reprogram any keypads or car remotes as well. This keeps your home secure.
Tip: Write down the programming steps for future reference or store the manual in a safe place.

Credit: store.geniecompany.com
Troubleshooting Common Problems
Even with clear steps, you might run into issues. Here’s how to solve the most common problems:
The Remote Doesn’t Work At All
- Check the battery: Make sure it’s inserted correctly and is new.
- Wrong frequency or brand: Double-check compatibility.
- Didn’t program correctly: Repeat the programming steps slowly.
- Too far from opener: Try programming while standing close to the opener.
The Remote Only Works Sometimes
- Weak battery: Even new batteries can be bad; try replacing again.
- Interference: Wireless routers, LED lights, or other devices can block signals.
- Obstructions: Metal doors, cars, or walls can block the signal. Try from different angles.
Can’t Erase Old Remotes
- Wrong “Learn” button: Some openers have multiple buttons for different doors.
- Not holding long enough: Make sure to hold until the indicator light turns off.
The Remote Opens The Wrong Door
- Multiple openers in range: Check you programmed the remote to the correct opener.
If you’re stuck, check the opener’s user manual or look up your model number on the manufacturer’s website for more help.
How To Replace A Garage Door Remote For Multiple Doors
Many homes have two or three garage doors. Universal remotes often let you control more than one opener.
- Identify the buttons: Most multi-door remotes have two or three buttons.
- Program each button separately to each opener. Follow the programming steps above for each opener.
Tip: Label the buttons or write down which button controls which door to avoid confusion.
Upgrading To Smart Garage Door Remotes
Smart technology is changing how we use garage doors. Upgrading to a smart remote or Wi-Fi controller lets you open or close your garage from your phone, get alerts, or even integrate with smart speakers.
- Most smart remotes need a Wi-Fi connection and a compatible opener.
- Some systems require you to install a small hub or sensor in your garage.
- Popular brands include myQ, Nexx, and Genie Aladdin Connect.
Example: myQ lets you open/close your garage from anywhere and set schedules or alerts.
Note: Smart remotes can cost $30–$100, but offer more features and convenience.
Safety And Security Tips
Replacing a remote is also a good time to review your garage security.
- Erase old codes if you lose a remote.
- Don’t leave remotes in your car (especially if parked outside).
- Choose remotes with rolling code technology—this changes the code each use, stopping hackers.
- Check the opener’s lock feature: Many new openers have a “vacation lock” that disables all remotes temporarily.
Data point: According to the FBI, over 9% of home burglaries involve garage access. Keeping remotes secure is a simple way to lower risk.
Cost Breakdown: Replacing A Garage Door Remote
How much will you spend to replace your remote? Here’s a general range:
- Universal remote: $20–$40
- Brand-specific remote: $25–$50
- Smart remote/controller: $30–$100
- Professional programming (if needed): $50–$100 service call
Tip: If you have the manual and follow the steps above, you can often avoid service fees.
When To Call A Professional
Most replacements can be done DIY, but there are times when calling a pro is best:
- You’re unsure about compatibility or wiring.
- The opener is old, damaged, or not responding.
- You need help programming smart features.
- Physical issues: The door won’t open or close, even with the wall button.
Professionals have tools and experience to diagnose more complex problems quickly.

Credit: store.geniecompany.com
Recycling Or Disposing Of Old Remotes
Don’t just throw old remotes in the trash. Many contain small batteries or circuit boards.
- Remove the battery and recycle it at a battery collection point.
- Electronics recycling: Many hardware stores or city centers accept small electronics for safe disposal.
This protects the environment and keeps harmful materials out of landfills.
How To Prevent Future Remote Problems
A little planning can save you time and stress later:
- Keep a spare remote somewhere safe (not in your car).
- Write down programming steps or keep the manual in a safe place.
- Check batteries each year or whenever you change smoke detector batteries.
- Label remotes if you have several doors or family members.
Pro insight: Most people don’t realize how many remotes they have in circulation. Gather them all when replacing to avoid missing one.
Real-world Example: Replacing A Lost Remote
Let’s look at a quick example. Jack lost his Chamberlain garage door remote. He’s worried someone might find it and use it to enter his garage.
- Jack finds the model number on his opener.
- He checks online and finds a universal remote that matches 315 MHz and Chamberlain openers.
- Before programming, Jack erases all codes from the opener by holding the Learn button for 8 seconds.
- He programs the new remote, tests it, and then reprograms his wife’s car’s built-in remote.
- Jack recycles the old remote’s battery at a local hardware store.
Jack now has a secure, working garage and peace of mind.
Garage Door Remote Programming Methods
Not all remotes program the same way. Here’s a quick overview of the two most common methods:
1. Learn Button Programming
- Most openers made after 1993 use this system.
- Simple and secure: Just press the “Learn” button and the remote button.
2. Dip Switches
- Older openers (pre-1993) use physical switches inside the remote and opener.
- Match the switch pattern exactly for the remote to work.
- Less secure: Code never changes, so consider upgrading if possible.
Tip: If your opener is very old and uses DIP switches, consider updating to a newer model for better security and compatibility.
Comparing Universal Vs. Brand-specific Remotes
Choosing between universal and brand-specific remotes comes down to a few key factors:
| Feature | Universal Remote | Brand Remote |
|---|---|---|
| Compatibility | Works with many brands/models | Only for specific brand/models |
| Programming | May require extra steps | Usually simpler |
| Cost | Usually less expensive | Can be higher |
| Features | More buttons, extra functions | Basic features only |
| Availability | Hardware/online stores | Manufacturer or authorized dealer |
Important Security Features To Look For
When buying a new remote, look for these features to keep your home safe:
- Rolling code technology: Changes the code every use. Stops “code grabber” hackers.
- Short range: Remotes that only work close to the door are safer than those with very long range.
- Manual lockout: Some remotes have a lock switch to disable them when not in use.
- Weather resistance: Good if you keep the remote on your keychain or use it outside.
Programming Built-in Car Remotes
Many newer cars have built-in garage door buttons (like HomeLink). Here’s a general way to program them:
- Hold the car’s garage button until the indicator light blinks.
- Press and hold your working remote near the button until the car’s light changes.
- Press the opener’s “Learn” button, then the car’s button to complete programming.
Note: Each car and opener brand may be a bit different. Check your car’s manual for exact steps.
Common Mistakes To Avoid
Replacing a remote is usually simple, but these mistakes can cost you time and money:
- Buying the wrong frequency or model.
- Not erasing old codes when a remote is lost or stolen.
- Leaving remotes in cars parked outside.
- Forgetting to program all remotes after erasing codes.
- Mixing up remotes for multiple doors.
Double-checking each step helps avoid these headaches.

Credit: www.amazon.com
The Future Of Garage Door Remotes
Technology is moving fast. In the next few years, expect more garage doors to use:
- Smartphone apps as the main remote.
- Voice control (using Alexa, Google Assistant, etc. ).
- Geofencing: Automatically opens or closes when you arrive or leave.
- Better security features like fingerprint or face unlock.
If you’re replacing a remote now, consider if it’s time to upgrade for more convenience and peace of mind.
Frequently Asked Questions
How Do I Know If A Universal Remote Will Work With My Opener?
Check the compatibility list on the universal remote’s package or the manufacturer’s website. Match the brand, model number, and frequency of your opener. If you’re unsure, bring your opener info to the store or contact customer service.
What Should I Do If My Remote Is Lost Or Stolen?
Erase all remote codes from your garage door opener by holding the Learn button until the light goes out. Then, reprogram any remotes or keypads you still use. This prevents anyone with the lost remote from accessing your garage.
How Many Remotes Can I Program To My Garage Door Opener?
Most openers support five to seven remotes at a time, including wall keypads and car buttons. Check your opener’s manual or the manufacturer’s website for the exact number.
Can I Program A New Remote Without The Old One?
Yes. As long as you have access to the garage door opener’s Learn button, you can program a new remote. The old remote is not needed unless your opener uses DIP switches (very old models).
Where Can I Find More Help If Programming Doesn’t Work?
Visit your opener manufacturer’s website for support videos and manuals. For example, Chamberlain Support offers detailed guides. You can also call a local garage door professional for in-person help.
Replacing your garage door remote doesn’t have to be stressful or expensive. With the right information, you can quickly restore convenience and security—and maybe even upgrade your system for the future. Take a few minutes now to review your options, follow the steps, and enjoy peace of mind every time you come home.