
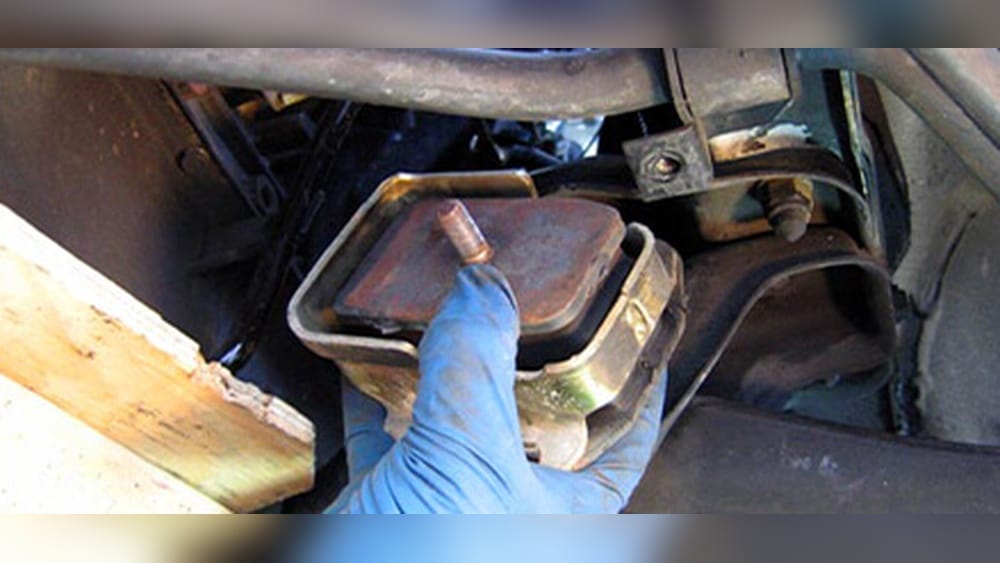
Replacing engine mounts is a task that many car owners overlook until a problem becomes too obvious to ignore. The engine mount is not just a chunk of rubber or metal—it’s a key part that keeps your engine in place and absorbs vibrations.
When engine mounts fail, you might feel rough shakes, hear strange noises, or even notice the engine shifting when you step on the gas. If you’re considering tackling this job yourself, you’re about to save money and learn more about how your car works.
This guide will walk you through the process, explain the tools you need, highlight common mistakes, and help you decide if you should do it yourself or ask a professional.
What Are Engine Mounts And Why Do They Matter?
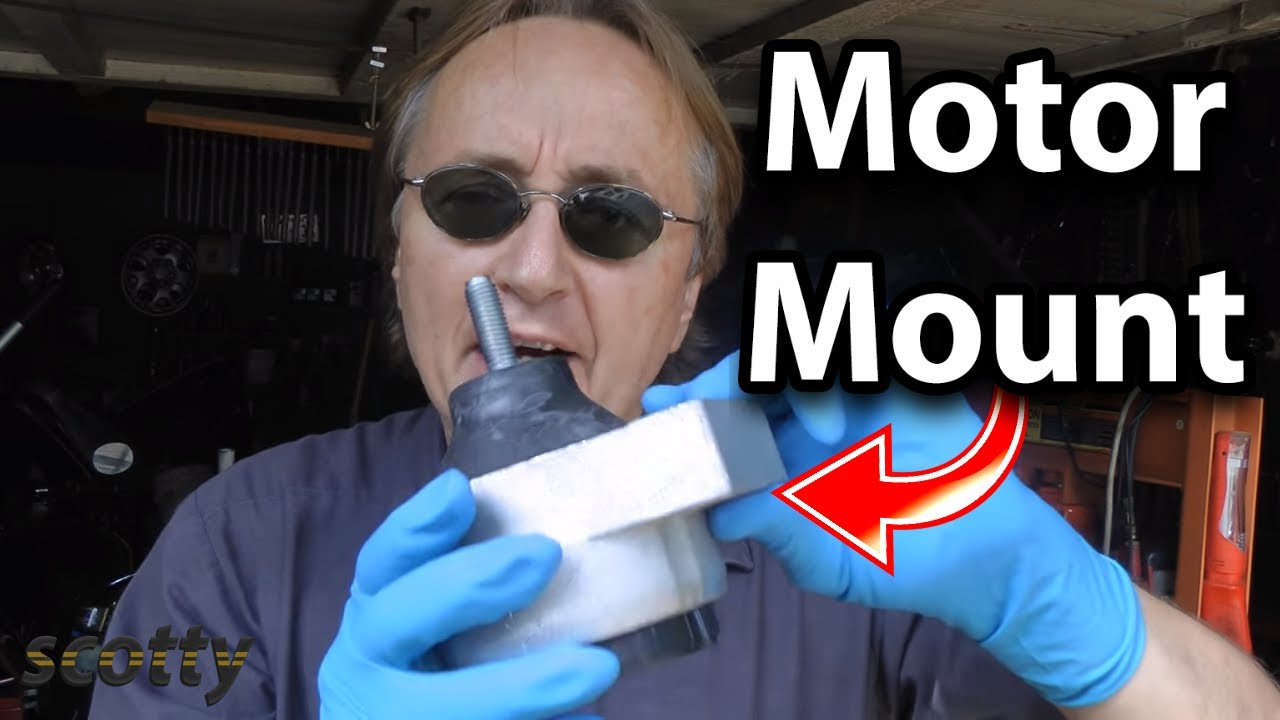
Engine mounts are small, but they play a big role in your car’s health. They connect the engine to the vehicle’s frame and help absorb the engine’s vibrations. Most cars have between two and four engine mounts, depending on the make and model. Each mount usually contains a rubber or polyurethane core sandwiched between metal plates. Some modern mounts are hydraulic or even active, using electronics to control vibration.
When engine mounts work well, you don’t even notice them. But when they wear out or break, you might experience:
- Increased vibration inside the car, especially at idle.
- Clunking or banging noises when accelerating or shifting.
- Visible engine movement under the hood.
- Misaligned engine components that cause other parts to wear out early.
Ignoring bad mounts can lead to expensive engine or transmission damage. That’s why replacing them promptly is so important.
Signs Your Engine Mounts Need Replacement
It’s not always easy to know when an engine mount is bad. But some signs are clear warnings:
- Strong vibrations in the steering wheel, seat, or floor when the car is idling.
- Loud clunk or thud when shifting gears or going over bumps.
- Engine movement—open the hood, shift between drive and reverse, and watch for the engine to rock.
- Physical cracks or separation in the rubber when you inspect the mount.
- Oil leaks—hydraulic mounts can leak fluid when damaged.
If you notice any of these, it’s time to check your mounts.
Tools And Materials Needed
Before you start, gather all the tools and materials. Having everything ready makes the job much smoother.
Basic tools:
- Floor jack and jack stands (or ramps)
- Socket set (metric and SAE)
- Wrenches (including breaker bar for stuck bolts)
- Pry bar
- Torque wrench (for correct bolt tightening)
- Screwdriver set
Special items:
- Engine support bar (for some vehicles)
- Block of wood (to protect oil pan when lifting engine)
- Penetrating oil (for rusted bolts)
- Replacement engine mounts (always use mounts made for your car’s year, make, and model)
Safety gear:
- Gloves
- Safety glasses
- Wheel chocks
Optional but helpful:
- Service manual for your car (for mount locations and torque specs)
- Flashlight or work light
Understanding Engine Mount Types
Not all engine mounts are the same. Picking the right type for your vehicle is crucial.
Rubber Mounts
Most common, these use a thick rubber block between two metal plates. They are good at absorbing vibration and are fairly cheap. They wear out over time, especially with heat and oil exposure.
Hydraulic Mounts
These have a fluid-filled chamber inside, giving even better vibration absorption. They are common on modern cars and usually cost more than rubber mounts. When they fail, you may see fluid leaks.
Polyurethane Mounts
For performance cars, these mounts use a tougher material than rubber. They last longer and give a firmer feel, but can send more vibration into the cabin.
Active/ Electronic Mounts
Some newer cars use mounts with electronic controls to adjust stiffness. These are usually dealer-only parts and can be expensive.
Pro tip: Always match the new mount to your car’s original design for best results.
How Much Does It Cost To Replace Engine Mounts?
The cost of engine mount replacement depends on your car, the mount type, and labor rates. Here’s a quick comparison:
| Mount Type | Part Cost (each) | Labor Time | Total Cost (DIY) | Total Cost (Shop) |
|---|---|---|---|---|
| Rubber | $25-$80 | 1-2 hours | $25-$160 | $150-$350 |
| Hydraulic | $50-$200 | 2-3 hours | $100-$600 | $250-$650 |
| Polyurethane | $60-$150 | 1-2 hours | $60-$300 | $175-$400 |
| Active/Electronic | $100-$400 | 2-4 hours | $200-$800 | $300-$1200 |
If you have the tools and time, DIY saves a lot of money, especially on labor.
Preparing To Replace Engine Mounts
Preparation is the key to a safe and easy job. Here’s what you should do before starting:
- Check the service manual for your car. Every engine is different. The manual tells you where mounts are located, which bolts to remove, and the correct torque.
- Buy the correct mounts. Not all mounts are the same, even for the same model year. Use your VIN when ordering.
- Park on a flat surface. Use wheel chocks to stop the car from rolling.
- Disconnect the battery. This prevents accidental shorts or airbag issues.
- Let the engine cool. Hot parts can burn you, and some mounts are near the exhaust.
One insight beginners miss: Some mounts are hidden under engine covers, air filters, or even the subframe. Be ready to remove other parts to reach them.
Step-by-step: How To Replace Engine Mounts
The general process is similar for most vehicles, but always check your service manual for details. Here’s a step-by-step guide:
1. Raise And Support The Car
- Use a floor jack to lift the front of the car.
- Place jack stands under the frame or pinch welds (never under the oil pan or plastic parts).
- Double-check stability before crawling under.
2. Support The Engine
The engine needs support when you remove a mount.
- Place a wood block on the jack and gently lift the engine from the oil pan. Don’t lift too much—just enough to take the engine’s weight.
- For some vehicles, an engine support bar from above is safer, especially for side mounts.
3. Locate And Remove The Old Mount
- Find the mount you want to replace.
- Remove any parts blocking access (air filter box, covers, etc. ).
- Spray bolts with penetrating oil if rusty. Wait a few minutes.
- Use the right socket and wrench. Loosen and remove the mount’s bolts. Some mounts have upper and lower bolts.
4. Remove The Engine Mount
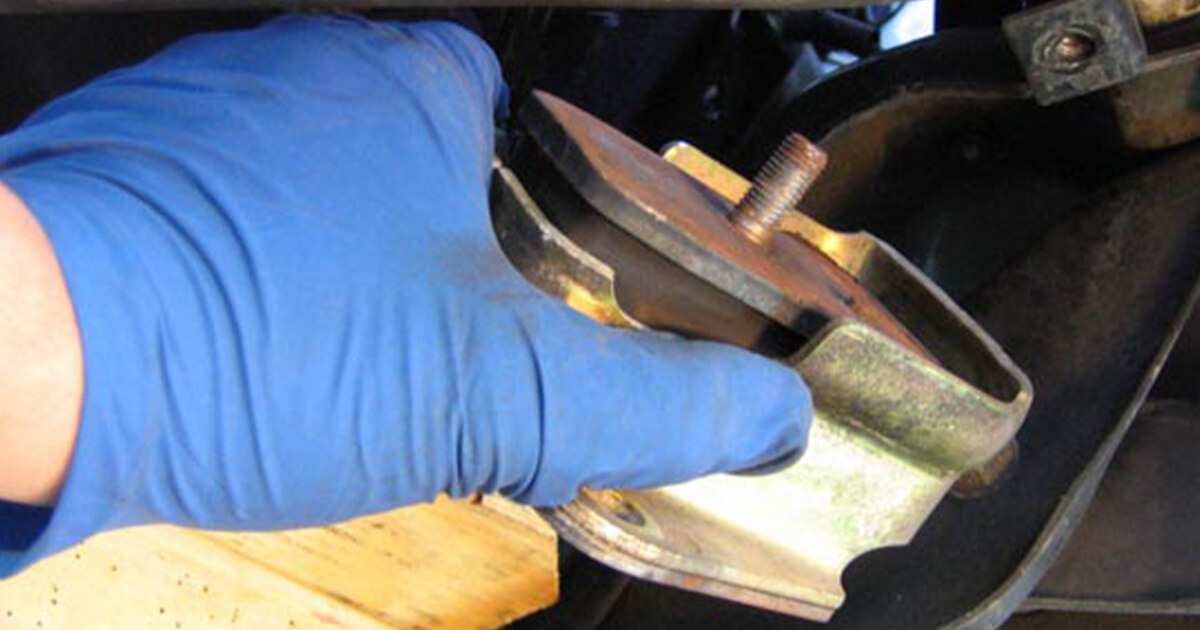
- Carefully slide the old mount out.
- Compare it with the new mount. Check shape, size, and bolt holes. They must match exactly.
5. Install The New Engine Mount
- Position the new mount where the old one was.
- Start bolts by hand to avoid cross-threading.
- Tighten bolts in stages, following the torque specs in your manual.
- Reinstall any parts you removed.
6. Lower The Engine And Car
- Carefully lower the engine back into place.
- Remove the jack and engine support bar.
- Remove jack stands and lower the car.
7. Reconnect The Battery
- Reconnect the negative cable to the battery.
8. Test Your Work
- Start the engine. Listen and feel for vibration or clunks.
- Take a short drive. If something feels wrong, double-check bolts and alignment.
Another common mistake: Forgetting to tighten all bolts to the correct torque. Loose mounts can cause more damage than old ones.
Tips For A Smooth Engine Mount Replacement
Changing engine mounts is not extremely technical, but a few tips can make it much easier:
- Label bolts and parts as you remove them, especially if you take off several parts to reach the mount.
- Take photos during disassembly to help with reassembly.
- Replace all mounts at once if possible. When one fails, others are often close behind.
- Beware of hidden mounts. Some cars (like Hondas or BMWs) have mounts under the engine or behind the subframe.
- Use new hardware if the bolts look rusty or worn. Some mounts require special stretch bolts.
- Double-check torque specs. Too tight can strip threads; too loose can cause failure.
Comparing Diy Vs. Professional Replacement
Should you do this job yourself or pay a shop? Here’s a quick look at the pros and cons.
| DIY Replacement | Professional Shop |
|---|---|
|
|
|
|
Non-obvious insight: Some shops replace only the failed mount, but it’s often wise to do all mounts at once. This helps prevent uneven stress and future breakdowns.
Common Problems And How To Avoid Them
Even experienced DIYers can run into trouble. Here are some common issues and how to avoid them:
Engine Won’t Line Up
After removing a mount, the engine may shift slightly. Use a pry bar or carefully adjust the jack to align it with the new mount.
Stuck Or Broken Bolts
Rust or over-tightening can snap bolts. Use penetrating oil and a breaker bar. If a bolt breaks, you may need a bolt extractor or professional help.
Damaged Oil Pan
Jacking directly on the oil pan can bend or crack it, causing leaks. Always use a wood block to spread the load, or use an engine support bar if possible.
Wrong Mount Installed
Double-check part numbers before installing. Even small differences can cause vibration or stress.
Over-tightening Or Under-tightening
Always use a torque wrench. Too tight can strip threads; too loose can let the mount shift.
Credit: www.youtube.com
How Long Do Engine Mounts Last?
On average, engine mounts last between 60,000 and 100,000 miles. Hard driving, frequent stop-and-go traffic, or oil leaks can shorten their life. Performance mounts (polyurethane) may last longer, but send more vibration into the car.
Tip: If you notice increased vibration after 60,000 miles, it’s worth checking your mounts, even if you don’t see cracks.
After Replacement: What To Expect
Once new mounts are in, you should notice:
- Smoother idle and less vibration.
- Quieter cabin, especially when starting or stopping.
- Better shifting (for manual and automatic cars).
- No more engine movement when you accelerate.
Sometimes, a small amount of vibration is normal, especially if using performance mounts. But large shakes, clunks, or noises are not.
When To Replace All Engine Mounts
It’s not always required to replace all mounts at once. However, you should consider full replacement if:
- Your car is over 100,000 miles and the mounts are original.
- You notice vibration from more than one direction.
- One mount fails shortly after another.
- You plan to keep the car for several more years.
Cost-conscious insight: Labor cost is similar for one mount or several, so doing all at once can save money in the long run.
Replacing Engine Mounts On Different Vehicles
The basic process is similar, but some brands and styles have unique challenges. Here are a few examples:
Front-wheel-drive (fwd) Cars
Most FWD cars have three or four mounts: front, rear (torque strut), left, and right. The rear mount is often the hardest to reach, sometimes under the subframe.
Rear-wheel-drive (rwd) Cars
These usually have two main mounts on each side of the engine. Some also have a “transmission mount” in the rear.
Trucks And Suvs
Larger vehicles may have bigger, heavier mounts. Sometimes, you’ll need to remove skid plates or other covers.
European Cars
BMW, Mercedes, and VW often use hydraulic or active mounts. Access can be tight, and special tools may be needed.
Hybrids And Electric Vehicles
These often use custom mounts. Always check for high-voltage safety warnings before working on hybrids or EVs.
Real-world example: On some Honda Accords, the rear mount is nearly impossible to access without lowering the subframe. In this case, consider a shop unless you have advanced tools.
Engine Mounts And Other Related Parts
When replacing mounts, check these related parts:
- Transmission mount: Often replaced at the same time, as it also controls vibration.
- Exhaust hangers: Cracked or broken hangers can mimic engine mount symptoms.
- Drive belts and hoses: Check for stress or stretching, especially if the engine was moving.
- CV joints and axles: Misaligned mounts can put stress on these parts.
It’s smart to check all these areas when you’re under the car.
Upgrading Engine Mounts: Should You Do It?
Some drivers, especially those with sports cars or modified vehicles, consider upgrading to polyurethane or solid mounts. These offer better performance, but at a cost:
- Pros: Less engine movement, better power transfer, improved feel.
- Cons: More vibration in the cabin, harsher ride, sometimes more noise.
For daily drivers, stock-style rubber or hydraulic mounts are usually best. If you race or want a sportier feel, an upgrade might make sense.
Non-obvious insight: Upgraded mounts can sometimes cause new rattles or interior trim noises, especially in older cars.
What If You Ignore Bad Engine Mounts?
Driving with broken engine mounts can cause:
- Damage to the exhaust system, especially at the flex joint.
- Premature failure of axles or CV joints.
- Transmission misalignment, leading to expensive repairs.
- Broken hoses or wiring from engine movement.
In rare cases, the engine can shift so much that it affects steering or brakes. Don’t delay this repair.
How To Make Engine Mounts Last Longer
You can extend the life of your engine mounts with a few simple habits:
- Fix oil leaks quickly. Oil weakens rubber and hydraulic mounts.
- Avoid aggressive driving. Hard launches, burnouts, or sudden stops stress mounts.
- Address vibration early. Don’t ignore new shakes or noises.
- Use OEM or high-quality mounts. Cheaper mounts often fail faster.
Pro tip: If you live in a hot climate, park in the shade when possible. Heat speeds up rubber aging.

Credit: www.youtube.com
Real-life Example: Engine Mount Replacement On A Toyota Camry
Let’s look at a common case: a 2010 Toyota Camry 4-cylinder.
Symptoms: Strong vibration at idle, especially in drive. Thud when shifting from park to reverse.
Diagnosis: Visual inspection found the front engine mount cracked, rear mount sagging.
Replacement steps:
- Raised car, supported engine with wood block and jack.
- Removed air filter box to access the front mount.
- Loosened bolts, slid out old mount, compared with new.
- Installed new mount, torqued bolts to spec.
- Repeated process for rear mount (more difficult, under car).
- Reassembled, test drove—vibration gone, shifting smooth.
Time required: 2.5 hours (DIY with basic tools).
Cost: $85 for two mounts, no labor charge.
Lesson: Even for a common car, having the right tools and manual helps avoid mistakes.
Troubleshooting: Still Have Vibration After Replacement?
If your car still vibrates after replacing engine mounts, check these:
- Transmission mount—often overlooked, but vital for smoothness.
- Misaligned mount—double-check position and torque.
- Failed new mount—rare, but possible with cheap parts.
- Other engine problems—like misfire, bad spark plugs, or vacuum leak.
Quick test: If vibration happens only at idle, check engine health. If it happens during driving or turning, check mounts and suspension.
Credit: www.mobil.com
Environmental Impact Of Engine Mount Replacement
When you replace engine mounts, you also help the environment. Worn mounts can lead to more engine movement, which stresses other parts. This can cause leaks, poor fuel economy, and higher emissions.
Disposal tip: Most auto parts stores recycle old mounts. Don’t throw them in the trash.
Where To Learn More
For detailed, car-specific guides, check forums or YouTube channels for your vehicle model. Manufacturers’ service manuals are the gold standard for step-by-step instructions.
If you want to understand more about the science behind engine mounts, the Wikipedia page on engine mounts offers a good overview.
Frequently Asked Questions
How Do I Know Which Engine Mount Is Bad?
Usually, the bad mount will show cracks, separation, or leaking fluid. You may also feel more vibration or hear clunks from the side of the car where the mount is failing. Having a helper shift gears while you watch the engine move can help you pinpoint the problem.
Is It Safe To Drive With A Broken Engine Mount?
It’s not recommended. While you can drive short distances, a broken mount can cause more damage to the engine, transmission, and even the exhaust system. If the engine shifts too much, it can also affect steering and braking.
Can I Replace Just One Engine Mount?
Yes, you can replace only the failed mount, but it’s often best to replace all mounts at once, especially if your car is older. This prevents uneven stress and reduces the chance of future breakdowns.
How Long Does It Take To Replace Engine Mounts?
For most cars, DIY replacement takes 2-4 hours, depending on access and tools. A shop can often do it in 1-2 hours if they have a lift. Some mounts (like rear or hidden mounts) take longer.
What Happens If I Use The Wrong Engine Mount?
Using the wrong mount can cause vibration, noise, or even early failure of the part. Always match the part number and design to your car’s make, model, and year.
Replacing engine mounts might look challenging, but with the right tools, patience, and preparation, it’s a job many car owners can handle. The reward is a smoother, quieter car and the satisfaction of fixing an important part yourself. Whether you choose to do it yourself or go to a professional, understanding the process helps you make the best decision for your car’s health and your wallet.