
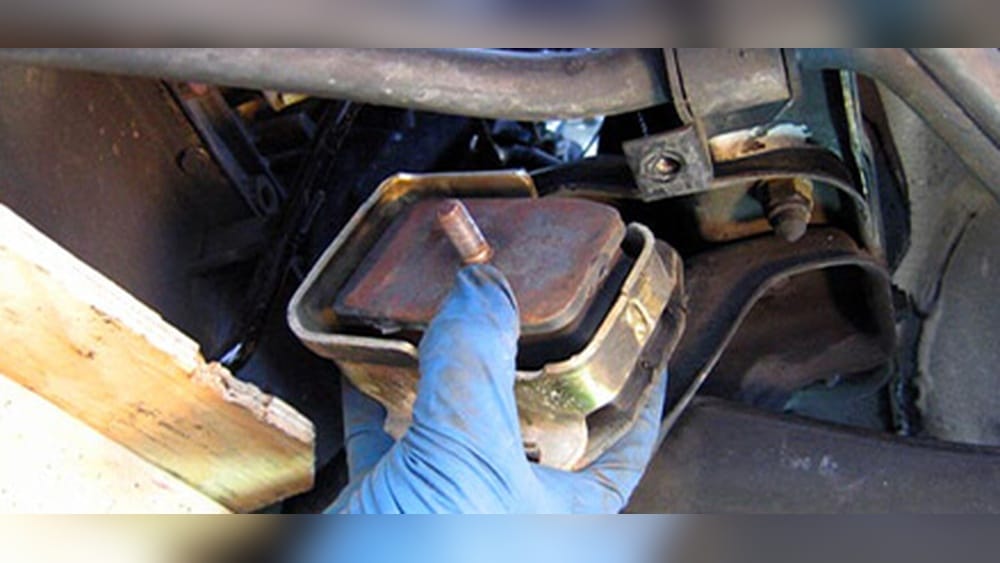
Replacing motor mounts is a task that can feel intimidating, but with some guidance and the right tools, many car owners can handle it themselves. The motor mounts (also called engine mounts) hold your vehicle’s engine in place, isolating vibrations and absorbing road shocks. Over time, these mounts can wear out, causing issues like increased vibration, noise, or even engine misalignment. Addressing bad motor mounts early helps prevent bigger problems and keeps your ride smooth.
This article gives you a practical, step-by-step guide to replacing motor mounts. Whether you’re a DIY beginner or have some car repair experience, you’ll learn how to tackle this repair safely and efficiently. We’ll cover what motor mounts do, signs of failure, tools and parts you need, a detailed replacement process, and tips for avoiding common mistakes.
You’ll also find data tables comparing motor mount types and estimated costs. By the end, you’ll have the knowledge and confidence to decide if this is a job you want to do yourself or leave to a professional.
What Do Motor Mounts Do?
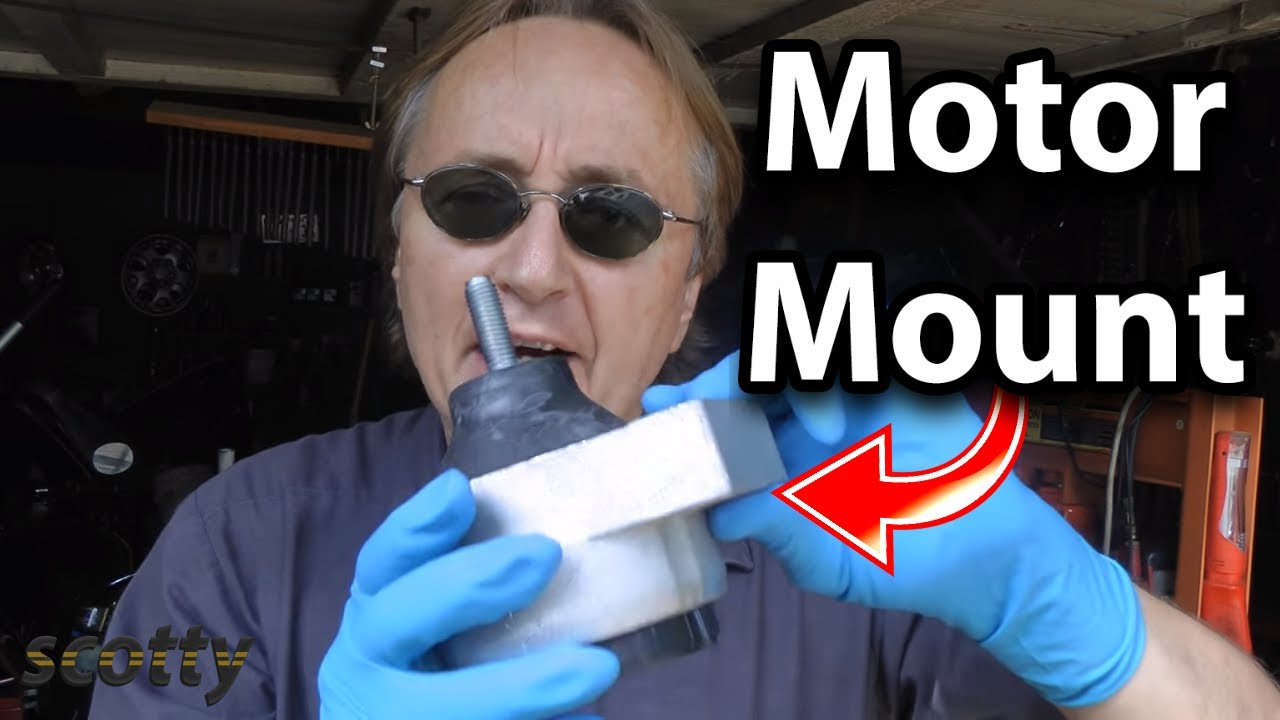
Motor mounts are small but critical parts in your vehicle. Their main job is to secure the engine to the car’s frame or subframe. Most cars have three or four mounts, placed to balance the engine and absorb movement.
Functions Of Motor Mounts
- Engine support: Hold the engine in place, preventing it from shifting during acceleration, braking, or cornering.
- Vibration isolation: Absorb and reduce engine vibrations, making the ride smoother and quieter.
- Shock absorption: Dampen impacts from bumps or potholes, protecting the engine and transmission.
If these mounts fail, the engine can move more than it should, causing noise, vibration, and even damage to other parts. Some modern mounts also have hydraulic or electronic elements to further control vibrations.
Signs You Need To Replace Motor Mounts
Knowing when to replace your motor mounts is key. Ignoring worn mounts can lead to bigger and more expensive problems. Watch for these warning signs:
Common Symptoms Of Failing Motor Mounts
- Excessive vibration: You feel more vibration than usual, especially at idle or when starting the engine.
- Clunking or banging noises: Loud thumps or clunks when shifting gears or accelerating quickly.
- Engine movement: The engine seems to rock or move under the hood more than normal.
- Visual damage: Cracks, separation, or leaking fluid from hydraulic mounts.
- Misaligned engine: Engine looks tilted or out of position.
- Increased engine noise: Louder engine sounds inside the cabin.
Non-obvious Insights
- Sometimes a failing mount only shows up under heavy acceleration or when going over bumps.
- Not all vibrations or noises come from mounts; worn suspension or exhaust hangers can cause similar symptoms. Always inspect carefully before replacing.
Types Of Motor Mounts
Choosing the right motor mount for your car is important. Let’s compare common types:
| Type | Main Material | Common Uses | Pros | Cons |
|---|---|---|---|---|
| Rubber | Steel + Rubber | Most passenger cars | Inexpensive, good vibration damping | Wears out over time, can crack |
| Hydraulic | Steel + Fluid-filled chamber | Luxury, newer cars | Excellent vibration isolation | Can leak fluid, more expensive |
| Polyurethane | Steel + Polyurethane | Performance cars, custom applications | Durable, less flex | Stiffer, transmits more vibration |
| Active/Electronic | Steel + Sensors/Actuators | High-end, hybrid vehicles | Adaptive damping | Complex, expensive |
Pro Tip: Always match the type of mount your car came with, unless you are upgrading for specific reasons. For example, switching from rubber to polyurethane increases durability, but you’ll feel more vibration.
Tools And Parts You’ll Need
Before starting, get all your tools and parts ready. This prevents delays and makes the job safer.
Essential Tools
- Socket set (metric and SAE sizes)
- Wrenches (combination or ratcheting)
- Breaker bar (for stubborn bolts)
- Torque wrench (to tighten bolts correctly)
- Floor jack (2-3 ton capacity)
- Jack stands (for safety)
- Engine support bar or block of wood (to support the engine)
- Pry bar (for stubborn mounts)
- Screwdrivers (flathead and Phillips)
- Penetrating oil (for rusted bolts)
- Work gloves and safety glasses
Parts And Supplies
- Replacement motor mounts (specific to your vehicle)
- Replacement bolts/nuts (if damaged or corroded)
- Thread locker (optional, for bolts)
- Shop rags and cleaner
Optional But Helpful
- Service manual for your car (helps with torque specs and mount locations)
- Flashlight or work light
- Magnetic pickup tool
Beginner Insight: Don’t skip the torque wrench. Tightening bolts by feel often leads to loose or overtightened mounts, causing future problems.

Credit: shop.advanceautoparts.com
Preparing For Motor Mount Replacement
Proper prep makes the job safer and faster. Here’s what to do before you start:
- Read your owner’s manual: Find the location and number of mounts.
- Buy the right mounts: Match part numbers, not just the general type.
- Work on a level surface: Use a garage or driveway, never a slope.
- Let the engine cool: Hot parts can burn you and make bolts hard to remove.
- Disconnect the battery: This prevents accidental short circuits, especially if you’ll be near electrical connectors.
Non-Obvious Tip: Take clear photos of the mount area before removing anything. These photos help you remember bolt positions and wire routes during reassembly.
Step-by-step Motor Mount Replacement Process
Replacing motor mounts varies by car, but the basic process is similar. Allow 2-4 hours for most vehicles. Here’s a general guide:
1. Secure The Vehicle
- Park on a flat surface.
- Engage the parking brake.
- If you’ll be under the car, use jack stands—never trust a hydraulic jack alone.
2. Locate The Motor Mounts
Most cars have 3 or 4 mounts: front, rear, and one or two sides. Common locations are between the engine and frame, near the transmission, or under the radiator.
- Use a flashlight to inspect all mounts.
- Look for cracks, separation, or leaking fluid (for hydraulic mounts).
3. Support The Engine
Never remove a mount without supporting the engine.
- Place the floor jack under the oil pan.
- Put a thick block of wood between the jack and oil pan to spread weight and avoid damage.
- Gently lift the engine just enough to take pressure off the mount.
Safety Note: Don’t lift the engine more than half an inch—just enough to see the mount separate from its bracket.
4. Remove The Old Motor Mount
- Spray penetrating oil on all mount bolts and let it sit for 5–10 minutes.
- Use the correct socket/wrench to loosen and remove the bolts.
- Some mounts have two sets of bolts: One to the engine, one to the frame.
- If bolts are stuck, use a breaker bar for extra leverage.
- Carefully slide the old mount out.
Example: On a Honda Civic, you may need to remove the air intake or battery to access the side mount.
5. Compare Old And New Mounts
- Check that the new mount matches the old one in shape, size, and bolt pattern.
- If they don’t match, stop and double-check your part number.
6. Install The New Motor Mount
- Slide the new mount into position.
- Start all bolts by hand to avoid cross-threading.
- Tighten bolts in stages, switching sides if there are multiple bolts.
- Use a torque wrench to tighten to the manufacturer’s spec (usually 40-70 ft-lbs, but check your manual).
- If using thread locker, add a drop to each bolt.
Beginner Mistake: Overtightening bolts can strip threads or crack the mount. Always use a torque wrench.
7. Lower The Engine And Reassemble
- Lower the jack slowly, letting the engine rest on the new mount.
- Double-check all bolts are tight.
- Reinstall any removed parts (air intake, battery, covers).
8. Repeat For Other Mounts
If you’re replacing more than one, do one at a time to keep the engine stable. Never remove all mounts at once.
9. Final Check
- Inspect all bolts and connections.
- Reconnect the battery.
- Start the engine and listen for unusual noises or vibration.
- Test drive at low speed, then check again.
Cost Comparison: Diy Vs Professional Replacement
Is it cheaper to replace motor mounts yourself? Here’s a cost breakdown:
| Cost Factor | DIY | Professional Shop |
|---|---|---|
| Parts (per mount) | $25–$150 | $25–$150 |
| Labor (per mount) | Free | $100–$350 |
| Total (1 mount) | $25–$150 | $125–$500 |
| Tools (if needed) | $50–$200 (one-time) | Included |
| Time needed | 2–4 hours | 1–2 hours |
Doing it yourself saves money, especially if you already have the tools. However, some cars (like certain BMW or Mercedes models) require special tools or engine support bars—these are best left to a pro.
Non-Obvious Insight: If your car has high mileage, consider replacing all mounts at once. Labor overlaps, so you save time and prevent future breakdowns.
Common Mistakes And How To Avoid Them
Even experienced DIYers make errors when replacing motor mounts. Here’s how to avoid the most frequent problems:
1. Not Supporting The Engine Properly
Never remove a mount without support. Using only the car’s jack or lifting in the wrong spot can damage the oil pan or transmission.
2. Cross-threading Bolts
Always start bolts by hand. If they don’t thread smoothly, back them out and try again. Cross-threaded bolts are weak and hard to remove later.
3. Using The Wrong Torque
Tightening bolts by feel leads to under-tightening (bolts loosen over time) or over-tightening (broken bolts, cracked parts). Always use a torque wrench and check the specs.
4. Mixing Up Mount Types
Some cars have different mounts in each location—rubber on the sides, hydraulic at the rear. Match each mount to its correct spot.
5. Forgetting To Reinstall Removed Parts
It’s easy to forget a ground wire, bracket, or sensor. Take photos during disassembly and double-check everything before starting the engine.
6. Ignoring Alignment
If the engine looks tilted or misaligned after installation, something may be wrong. Loosen the bolts, realign the mount, and retighten.
Pro Tip: If a mount seems hard to install, don’t force it. Check for hidden bolts or brackets you missed.
How Long Do Motor Mounts Last?
Most motor mounts last between 60,000 and 100,000 miles, but lifespan varies depending on driving style, road conditions, and mount type.
- Rubber mounts: 60,000–100,000 miles
- Hydraulic mounts: 80,000–120,000 miles (may leak if damaged)
- Polyurethane mounts: 100,000+ miles (stiffer ride)
- Active/electronic mounts: Varies; often last as long as rubber, but cost more to replace
Hard driving, frequent stop-and-go traffic, and rough roads shorten mount life. Regular inspection during oil changes can catch problems early.
Should You Upgrade Motor Mounts?
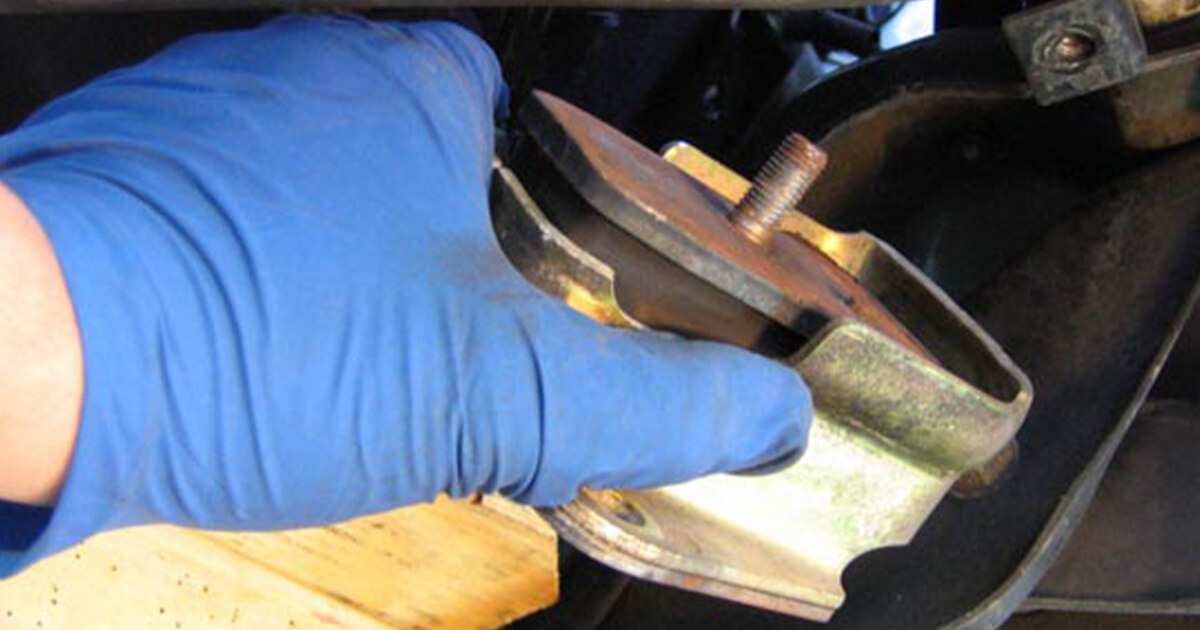
Some drivers consider upgrading to polyurethane or performance mounts, especially for high-horsepower or track cars. Upgrades offer benefits and trade-offs:
- Polyurethane mounts: Last longer, handle more power, but transmit more vibration.
- Solid mounts: Used in race cars, but not suitable for daily driving (too much vibration).
- Hydraulic/active mounts: Best for smoothness, but more costly.
For most daily drivers, stick with OEM-style mounts. Only upgrade if you want stiffer performance and can tolerate more vibration.
Credit: www.mobil.com
Environmental And Safety Tips
Replacing motor mounts is not only about performance. It also impacts safety and the environment.
- Worn mounts can cause exhaust leaks, which may increase emissions.
- Loose engines can damage wiring or hoses, creating fire risks.
Dispose of old mounts properly—many contain steel and rubber that can be recycled. Don’t throw them in household trash. Check with your local auto parts store or recycling center for proper disposal.
Safety Reminder: Always wear gloves and safety glasses. If you feel unsure at any step, seek help or consult a mechanic.
When To Let A Professional Handle It
Some situations call for a professional mechanic:
- Your car has complex, inaccessible mounts (some engines require lifting or special tools).
- You lack the right tools or experience.
- The mount is integrated with electronic sensors (active mounts).
- You find severe engine misalignment or other hidden damage.
A good shop can finish the job in less time and offers a warranty on parts and labor. For most common cars, though, replacing a mount is within reach for a careful DIYer.
Real-world Example: 2012 Toyota Camry Motor Mount Replacement
Let’s walk through a real-world example to see how the process works.
A 2012 Toyota Camry owner notices vibration and a clunk when shifting from reverse to drive. Inspection shows a cracked front motor mount.
Steps taken:
- The owner buys an OEM-style replacement mount for $75.
- Using a floor jack and wood block, they support the engine.
- The air intake box and battery are removed for access.
- Mount bolts are soaked with penetrating oil, then removed using a breaker bar.
- The old, cracked mount is swapped for the new one.
- Bolts are torqued to 45 ft-lbs, per the service manual.
- After reassembly, the engine is started—no more vibration or clunk.
Total time: 2.5 hours. Cost: $75 in parts, plus tools already owned. The owner saves about $250 compared to a shop.
Troubleshooting After Replacement
After installing new motor mounts, you might notice small changes in how your car feels. Here’s what’s normal—and what’s not:
- Slightly firmer ride: New mounts can feel stiffer for the first few hundred miles.
- No more clunking or vibration: If these persist, recheck your installation.
- Check engine light: Rare, but can happen if a wire is disconnected. Scan for codes if it appears.
If you hear new noises or the engine seems misaligned, double-check all bolts and brackets. If unsure, ask a mechanic to inspect your work.
Credit: www.youtube.com
Comparison: Factory Vs Aftermarket Motor Mounts
You’ll often choose between factory (OEM) and aftermarket mounts. Here’s a quick comparison:
| Feature | Factory (OEM) | Aftermarket |
|---|---|---|
| Fit & Compatibility | Perfect match | Varies, may need adjustment |
| Quality | Consistent, reliable | Ranges from good to poor |
| Warranty | Usually included | Varies by brand |
| Price | Higher | Lower |
| Performance options | Standard only | Polyurethane, solid, etc. |
If you want a smooth ride and long life, stick with OEM. If you want to experiment or upgrade, research aftermarket brands carefully—read reviews and check return policies.
Additional Tips For A Smooth Motor Mount Replacement
- Label bolts and parts: Use small containers or label bags for bolts to avoid confusion.
- Work slowly: Rushing leads to mistakes. Take your time, especially if it’s your first time.
- Ask for help: Having a friend nearby can make lifting and alignment easier.
- Keep receipts: If your new mount fails early, warranties require proof of purchase.
- Inspect other parts: While you’re under the hood, check belts, hoses, and other mounts.
Frequently Asked Questions
What Happens If I Drive With A Bad Motor Mount?
Driving with a bad motor mount increases engine movement, causing more vibration, noise, and possible damage to other parts. Over time, it can stress hoses, wiring, and even the transmission, leading to more costly repairs.
How Long Does It Take To Replace A Motor Mount?
For most cars, replacing a motor mount takes about 2–4 hours for a DIYer. Professional shops may finish in 1–2 hours, depending on mount location and vehicle design.
Can I Replace Just One Motor Mount Or Should I Replace All?
You can replace only the bad mount if the others are in good condition. However, if one has failed, the others may be worn. Replacing all at once saves labor and gives peace of mind.
Are Aftermarket Motor Mounts As Good As Oem?
Some aftermarket mounts are as good as or better than OEM, especially performance types. However, quality varies. Choose reputable brands and check reviews before buying.
Where Can I Find More Information About Motor Mount Replacement?
For more detailed guides and diagrams, visit the official Wikipedia Motor Mount page or your car’s service manual.
Replacing your own motor mounts can seem challenging, but with the right preparation, tools, and careful work, it’s a project many car owners can tackle. Fixing worn mounts makes your car quieter, smoother, and safer—plus, you save money and gain valuable skills. If you’re ever in doubt, don’t hesitate to call a trusted mechanic. Your engine—and your wallet—will thank you.