
Resetting your Nest Outdoor Camera can feel intimidating, especially if you rely on it for home security. Maybe the camera is offline, not recording, or you plan to give it to someone else. Whatever the reason, knowing how to reset your Nest camera correctly is essential.
This guide explains every step in clear, simple English, so you can confidently reset your device and solve common problems. You’ll also learn how to avoid common mistakes, understand what a reset really does, and know when you truly need to perform this action.
Why Reset A Nest Outdoor Camera?
Many people think of resetting only as a last resort. But sometimes, it’s the best solution. Here are the most common reasons to reset a Nest Outdoor Camera:
- Connectivity Problems: If your camera often disconnects from Wi-Fi or stays offline, a reset can help restore stable connections.
- Camera Not Responding: If the device ignores commands from the app or doesn’t record, a reset may fix these bugs.
- Selling or Giving Away: If you want to pass your camera to someone else, resetting erases your data and settings.
- Setup Issues: Sometimes, the initial setup fails. Resetting lets you start again from scratch.
- Security Concerns: If you suspect your account or camera was compromised, a reset will clear all settings.
It’s important to know that a reset will remove all custom settings. Your Wi-Fi details, motion zones, and saved preferences will be deleted. The camera will return to factory condition.
Types Of Reset: Soft Reset Vs Hard (factory) Reset
Understanding the difference between a soft reset and a hard (factory) reset helps you choose the right option.
Soft Reset
A soft reset is simply restarting your Nest camera. It does not erase your settings. Try this first if the camera is frozen or not responding.
- Unplug the camera’s power cable.
- Wait 10 seconds.
- Plug it back in.
Your settings, Wi-Fi connection, and account details stay the same. Only use a factory reset if a soft reset does not solve the issue.
Hard (factory) Reset
A factory reset erases all custom settings. The camera will forget your Wi-Fi and be removed from your Nest account. You’ll need to set it up again like a new device.
Key difference:
- Soft reset: Keeps your settings.
- Factory reset: Deletes everything and returns the camera to original state.
Preparing To Reset Your Nest Outdoor Camera
Before you press any buttons, prepare carefully. Skipping these steps can cause problems or data loss.
1. Check Your Internet Connection
A stable internet connection ensures you can reconnect your camera after reset.
2. Note Your Settings
Write down your Wi-Fi name, password, and any custom zones or alerts you set up.
3. Download Important Videos
Factory reset will remove stored videos from the camera’s memory. Download any important clips from the app before you start.
4. Charge Or Power The Camera
Make sure the camera is plugged in or has enough battery. Interrupting a reset can damage the device.
5. Know Your Nest Account Details
You’ll need your Nest or Google account login to set up the camera again.
6. Update The App
Use the latest version of the Google Home or Nest app. This avoids compatibility problems during setup.
Example: What Happens If You Skip Preparation?
Imagine you forget to download important video clips before a factory reset. Once the reset is done, those files are gone forever. Or, if you forget your Wi-Fi password, you can’t reconnect the camera. Simple mistakes can waste time and cause frustration.
Step-by-step: How To Factory Reset Nest Outdoor Camera
The process depends on your specific camera model. The most common models are Nest Cam Outdoor (1st Gen) and Nest Cam Outdoor or Indoor (Battery, 2nd Gen).
For Nest Cam Outdoor (1st Gen)
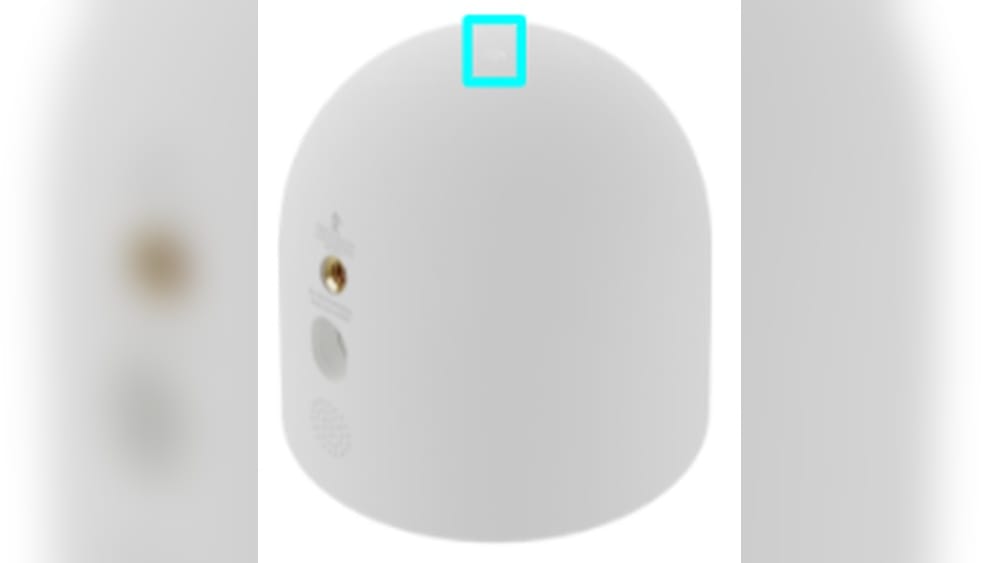
This model has a reset button on the back.
1. Unplug Your Camera
Disconnect the power cable.
2. Locate The Reset Button
Find the small, round button on the back of the camera.
3. Press And Hold The Reset Button
Use a pointed object (like a paperclip).
- Hold for 10 seconds.
- The camera’s light will turn solid yellow, then start blinking.
- Release the Button
When the light starts to blink yellow, let go. The camera will reboot.
5. Wait For The Camera To Reset
The camera’s light will turn blue and then go out. After about a minute, it will pulse blue, showing it’s ready for setup.
6. Set Up Again
Open the Nest app, tap the “+” sign, and follow instructions to add your camera.
For Nest Cam Outdoor Or Indoor (battery, 2nd Gen)
This model uses the Google Home app and has a reset button on the back.
1. Remove Camera From The App
Open Google Home, tap your camera, tap the settings gear, and choose “Remove device. ”
2. Press And Hold The Reset Button
Hold for 12 seconds.
- The camera’s light will turn solid yellow, then start flashing yellow, then solid white.
- Release the Button
When the light turns solid white, let go.
4. Wait For The Reset
The camera will make a sound and the light will pulse blue. This means the reset is finished.
5. Set Up Again
Open Google Home and follow the setup process.
Quick Reference Comparison
Here’s a side-by-side look at reset steps for both models:
| Step | Nest Cam Outdoor (1st Gen) | Nest Cam Outdoor/Indoor (Battery, 2nd Gen) |
|---|---|---|
| Remove from App | Not required before reset | Remove device in Google Home |
| Find Reset Button | Back of camera | Back of camera |
| Press & Hold Duration | 10 seconds | 12 seconds |
| Indicator Light | Solid yellow → Blinking yellow | Solid yellow → Blinking yellow → Solid white |
| Ready for Setup | Blue pulsing light | Blue pulsing light |
Resetting Using The Nest Or Google Home App
Sometimes, you can reset certain settings or remove the camera using the app. This is not a full factory reset, but it can help with minor issues.
Using The Nest App
- Open the Nest app.
- Tap your camera.
- Tap the settings gear.
- Scroll down and choose “Remove camera.”
Using Google Home App
- Open the Google Home app.
- Tap your camera.
- Tap the settings gear.
- Scroll down and select “Remove device.”
After removal, the camera disconnects from your account. But to fully erase all data, you must also use the reset button on the device itself.
Common Mistakes When Resetting Nest Outdoor Cameras
Resetting seems simple, but beginners often make small errors that create big headaches. Here are mistakes to avoid:
1. Not Removing From App First
If you reset the camera but don’t remove it from your account, setup can fail or create duplicate devices.
2. Resetting With Power Off
The camera must be powered during reset. Resetting while unplugged can cause hardware problems.
3. Not Pressing The Button Long Enough
If you let go too early, the reset won’t complete. Always watch the indicator light changes.
4. Forgetting Account Details
You’ll need your Google/Nest login to set up again. If you forget, you can’t finish setup.
5. Skipping Video Backup
Any saved clips will be lost after a factory reset. Always download videos you want to keep.
6. Ignoring Firmware Updates
After reset, update your camera’s software. Old firmware can cause repeated problems.
Non-obvious Insight: Resetting Does Not Always Fix Hardware Issues
Many users believe a factory reset will solve any problem. But if your camera is physically damaged (e. g. , water inside, broken lens), no reset will help. Look for signs of physical damage before trying a reset.
Non-obvious Insight: Use The Correct App For Your Model
Older Nest cameras use the Nest app, while newer ones use the Google Home app. Using the wrong app can block setup or give strange errors. Always check your camera’s model and follow the correct process.
After The Reset: Setting Up Your Nest Outdoor Camera Again
Once reset, your camera is like new. You’ll need to add it back to your account and reconnect it to Wi-Fi. Here’s how:
Step 1: Open The Right App
- Nest Cam Outdoor (1st Gen): Use the Nest app.
- Nest Cam Outdoor/Indoor (Battery, 2nd Gen): Use the Google Home app.
Step 2: Add Device
- Tap the “+” or “Add” button.
- Choose “Camera” and follow the instructions.
Step 3: Scan Qr Code
- Find the QR code on the back or bottom of your camera.
- Use your phone’s camera to scan it.
Step 4: Connect To Wi-fi
- Enter your Wi-Fi name and password.
- Wait for the camera to connect.
Step 5: Test The Camera
- Check the live video feed.
- Test motion alerts and notifications.
Step 6: Customize Settings
- Set activity zones.
- Adjust alert preferences.
- Choose recording quality.
Setting up takes about 10–15 minutes. If you have trouble, double-check your Wi-Fi info and app version.
Troubleshooting: What If Reset Doesn’t Work?
Sometimes, the reset process fails or the camera still has problems. Here’s what to do:
1. Check Power Supply
Make sure the camera is plugged in and receiving power. Test the outlet with another device.
2. Try Reset Again
Wait a few minutes and repeat the reset steps. Hold the button for the full time.
3. Check For Physical Damage
Look for cracks, water, or broken cables. Damaged cameras may need repair.
4. Update The App
An old app can block the setup. Update to the latest version.
5. Restart Your Router
If the camera won’t connect, restart your Wi-Fi router.
6. Contact Support
If nothing works, reach out to Google Nest Support for help.
Example: When A Factory Reset Fails
Suppose your camera still won’t connect after reset. You check and discover your router’s firewall is blocking new devices. After you allow connections, setup works. Sometimes, the problem is not the camera, but your network.
Security And Privacy After Reset
A factory reset is important for privacy, especially if you sell or give away your camera. Here’s how it keeps you safe:
- Removes Your Account: The camera is no longer linked to your Google/Nest account.
- Deletes Saved Wi-Fi Info: Your home network details are erased.
- Wipes Custom Zones and Clips: No one can see your old settings or video clips.
Tip: Always reset before selling or gifting a camera. If you don’t, the next owner might access your information.
Comparing Nest Outdoor Camera Models
With several Nest outdoor camera models on the market, knowing the differences helps you follow the right reset steps. Here’s a comparison of key features:
| Feature | Nest Cam Outdoor (1st Gen) | Nest Cam Outdoor/Indoor (Battery, 2nd Gen) |
|---|---|---|
| Release Year | 2017 | 2021 |
| Power Source | Wired | Battery or wired |
| App Required | Nest app | Google Home app |
| Reset Button Location | Back of camera | Back of camera |
| Video Quality | 1080p HD | 1080p HD |
| Night Vision | Yes | Yes |
| Weather Resistance | Yes | Yes |
| Cloud Storage | Nest Aware required | Nest Aware required |

Credit: www.reddit.com
Tips For A Smooth Reset And Setup Process
Resetting and setting up your Nest Outdoor Camera can go smoothly if you follow these tips:
- Have Wi-Fi Info Ready: Write down your network name and password before you start.
- Place Camera Near Router: During setup, keep the camera close to your router for strong signal.
- Update Firmware: After setup, check for software updates in the app.
- Use Original Cables: Third-party power cables can cause problems.
- Label Your Devices: If you have more than one Nest camera, label them in the app to avoid confusion.
- Check Permissions: Give the app all needed permissions, like location and camera access, on your phone.
Example: Why Location Matters
If your phone’s location is off, the app might fail to find your camera during setup. Turning on location services helps the app detect devices nearby.
When Should You Not Reset Your Nest Outdoor Camera?
A factory reset is powerful, but sometimes it’s not needed. Here are cases where you can skip resetting:
- Minor App Bugs: Try restarting the app or your phone first.
- Temporary Wi-Fi Issues: Wait or restart your router before resetting the camera.
- Battery Problems: Charge the camera fully before assuming a reset is needed.
- Firmware Updates: Sometimes, simply updating the camera fixes issues.
Reset only when all other solutions fail or when you need to erase your data.

Credit: support.google.com
Advanced Troubleshooting: If Problems Continue
If your camera still has issues after several resets, try these advanced steps:
- Test on Different Wi-Fi: Connect the camera to a friend’s Wi-Fi to see if the problem is your network.
- Check for Interference: Other devices, like microwaves or cordless phones, can cause Wi-Fi problems.
- Reset Your Router: Sometimes, your router needs a factory reset to clear hidden network problems.
- Check Device Limits: Some routers only allow a certain number of devices.
- Inspect Camera for Water Damage: Outdoor cameras can sometimes get water inside, especially after storms.
If none of these steps help, your camera may need professional repair or replacement.
How To Tell If Your Nest Camera Is Reset
After a factory reset, your camera will:
- Pulse blue or white (depends on model)
- Disappear from your app/device list
- Forget your Wi-Fi network
- Require setup as a new device
If you still see your old settings or the camera is still connected to Wi-Fi, the reset did not work. Try again, making sure you hold the reset button for the full time.
Credit: www.youtube.com
Data Privacy And Google Account Security
Resetting your Nest Outdoor Camera is not just about fixing bugs; it’s also about protecting your privacy. When you reset:
- Your camera disconnects from your Google/Nest account.
- No one can access your saved video clips or settings.
- Any linked services (like smart home automations) are removed.
Important: For full security, also change your Google account password if you suspect unauthorized access.
Real-world Example: A Family Upgrades Their Cameras
The Smith family decided to upgrade from a 1st Gen Nest Cam Outdoor to the latest battery model. They carefully reset each old camera, removed them from the Nest app, and set up the new ones in Google Home. By following all the steps, they avoided lost videos and had a smooth upgrade.
Comparing Reset Features: Nest Vs. Other Outdoor Cameras
Nest Outdoor Cameras have a clear, button-based reset process. How does this compare with other brands?
| Brand | Reset Method | App Removal Needed? |
|---|---|---|
| Nest | Physical button + app removal | Yes |
| Arlo | Physical button | Recommended |
| Ring | Reset via app or button | Yes |
| Wyze | Button or app | Yes |
Nest’s process is similar to other popular brands, but always check the manual for your specific model.
Pros And Cons Of Factory Resetting Your Nest Outdoor Camera
Resetting your camera has clear benefits, but there are also a few downsides.
Pros
- Solves Complex Issues: Fixes many bugs and errors.
- Erases Personal Data: Keeps your information safe if selling.
- Fresh Start: Lets you set up from scratch.
Cons
- Time Consuming: Takes about 10–15 minutes per camera.
- Loses Custom Settings: All zones, alerts, and preferences are erased.
- Requires Re-setup: You must reconnect to Wi-Fi and your account.
Consider these points before starting a reset.
Frequently Asked Questions
How Do I Know If My Nest Outdoor Camera Has Been Reset?
After a factory reset, the camera will pulse blue or white and disappear from your app. It will no longer connect to your Wi-Fi. You must set it up again as a new device. If you still see it working normally, the reset did not complete.
Can I Reset My Nest Outdoor Camera Remotely?
No, a full factory reset requires pressing the physical reset button on the camera itself. You can remove the camera from your account using the app, but this does not erase all data from the device.
What Should I Do If My Nest Camera Won’t Reset?
First, check that the camera is powered and you are pressing the correct button for the full time. Try again, watching the light changes. If it still fails, update your app or try a different power source. If nothing works, contact Google Nest Support.
Will Resetting My Camera Delete My Video History?
Yes, a factory reset erases all locally stored video clips on the camera. Cloud recordings in your Nest Aware account may still be available, but always download important videos before resetting to avoid permanent loss.
Do I Need To Reset My Nest Camera Before Selling It?
Yes, always perform a factory reset before selling or giving away your Nest Outdoor Camera. This protects your privacy by removing your account and Wi-Fi details from the device.
Resetting your Nest Outdoor Camera does not have to be stressful. With the right preparation and clear steps, you can restore your camera to factory settings, solve common problems, and protect your privacy. Take your time, follow each step carefully, and your camera will be ready for a fresh start or a new owner.
If you ever feel stuck, don’t hesitate to reach out to official support or trusted online communities for help.