
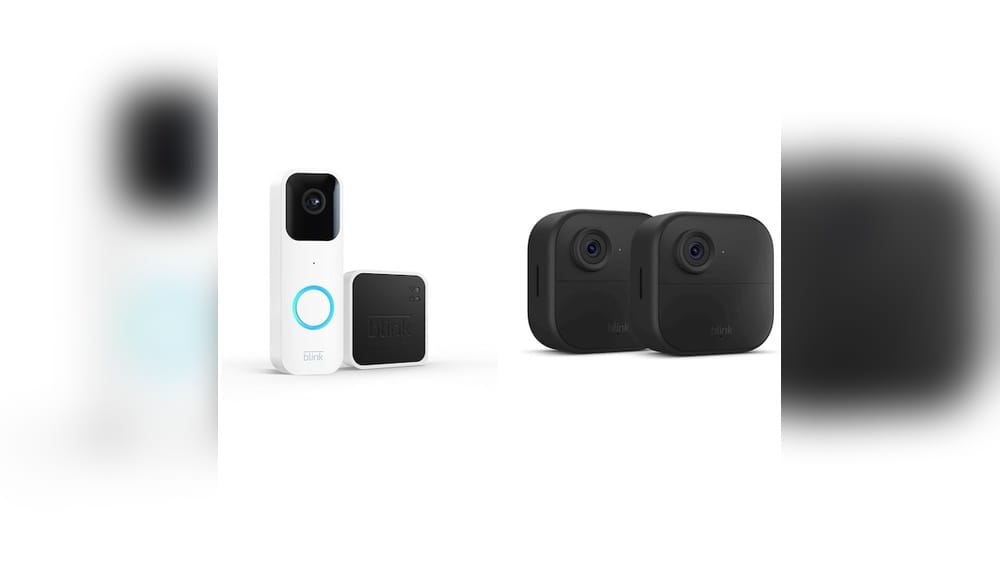
If you use a Blink Video Doorbell, you know how useful it is for keeping your home safe. You can see who’s at your door, talk to visitors, and even get alerts when someone’s there. But what if you want to save a video from your Blink doorbell to your computer? Maybe you want to keep a record of suspicious activity, share a funny moment, or just back up your files for safety. Many Blink users struggle with this because the process isn’t always clear. Some methods are easy but low-quality, while others are more technical but give you better results. This guide will show you all the best ways to get your Blink Video Doorbell footage onto your computer, step by step, with clear instructions and expert tips for every skill level.
Understanding How Blink Video Doorbells Store Footage
To save Blink videos, it’s important to know where the videos are stored and how the system works. Unlike some traditional security cameras, Blink devices don’t record continuously. Instead, they capture clips when motion is detected or when someone presses the doorbell. These clips are usually stored in the cloud if you have a subscription, or on a local device if you set up local storage.
Cloud Storage Vs Local Storage
Blink gives you two main options:
- Cloud Storage: If you pay for a Blink Subscription Plan, your clips are saved securely in Blink’s cloud. You can watch and manage them from the Blink app.
- Local Storage: If you don’t want a subscription, you can use a Sync Module 2 with a USB drive. Your clips are saved to the USB, which you can later connect to your computer.
Here’s a quick comparison to help you understand:
| Storage Type | Requires Subscription? | How to Access | Retention Period |
|---|---|---|---|
| Cloud | Yes | Blink app, web portal | 60 days (US), 30 days (EU/UK) |
| Local (Sync Module 2 + USB) | No | Remove USB, connect to computer | Until USB is full |
Insight: Many users don’t realize that Blink’s local storage doesn’t support all features of the cloud. For example, you can’t view local clips from the app unless you use a Sync Module 2 and set it up properly.
Saving Blink Videos Using The Blink App
The Blink app is the most direct way to save a video to your phone, and then you can transfer it to your computer. Here’s how you do it:
- Open the Blink app on your smartphone.
- Go to the Clips section.
- Find the video you want to save.
- Tap the Download icon (usually looks like an arrow pointing down).
- The video will save to your phone’s gallery or files.
Transferring From Phone To Computer
Once your video is on your phone, you can move it to your computer. Here are the most common ways:
- USB Cable: Connect your phone to your PC or Mac, open your device’s folders, and drag the video file to your computer.
- Email: Attach the video to an email and send it to yourself.
- Cloud Drive: Upload the video to Google Drive, Dropbox, or iCloud, then download it on your computer.
Practical Tip: If you have a lot of videos, using a USB cable is usually faster and more reliable than email or cloud services.
Limitations Of The Blink App Method
While this method is simple, it has a few downsides:
- You can only download one clip at a time.
- Clips are sometimes compressed for mobile devices, which can reduce video quality.
- The app may not allow downloads if you use only local storage.
Expert Insight: If you want to save many clips, or if video quality is important, you might prefer a direct download from the Blink web portal or USB.

Credit: www.amazon.com
Using The Blink Web Portal (for Subscription Users)
If you have a Blink Subscription Plan, you can use the official Blink web portal to access and save your videos directly to your computer.
Step-by-step: Downloading Videos From The Web Portal
- Visit the official Blink web portal: Blink Home.
- Log in with your Blink account details.
- Go to the Clips section.
- Browse or search for the video you want.
- Click on the video, then select Download.
- Choose where to save the file on your computer.
Batch Downloading: Is It Possible?
Currently, Blink does not offer a way to download multiple clips at once from the portal. You must save each video individually. However, some users use browser extensions or automation tools to speed up this process, but these are unofficial and may violate Blink’s terms of service.
Non-obvious Insight: Some web browsers let you right-click and “Save video as…” for clips, which is a quick shortcut if the download button isn’t visible.
Saving Videos With Blink’s Local Storage (sync Module 2 + Usb)
For users who prefer not to pay for a subscription, Blink’s local storage is a valuable feature. Here’s how you can use it to save videos directly to your computer.
Setting Up Sync Module 2 With Usb
- Plug a compatible USB flash drive (up to 256GB) into your Sync Module 2.
- Use the Blink app to set up local storage.
- The Sync Module will now save motion clips to the USB drive.
Note: Not all USB drives work perfectly with Blink devices. Stick to well-known brands and formats (FAT32 or exFAT).
Retrieving Videos From Usb
- Safely remove the USB drive from your Sync Module 2.
- Insert the USB into your computer’s USB port.
- Open the USB folder to find your video files (usually in .mp4 format).
- Copy and paste the files to a folder on your computer.
Comparing Local Storage Vs Cloud For Video Access
Here’s a handy comparison:
| Feature | Cloud Storage | Local Storage (USB) |
|---|---|---|
| Remote access to videos | Yes, from anywhere | No, USB must be connected to computer |
| Batch downloading | No (single download per clip) | Yes (copy multiple files at once) |
| Video quality | Good, but may be compressed | Original quality |
| Clip retention | 60 days (US), auto-delete | Until USB is full |
Pro Tip: Local storage lets you back up all clips at once, which is ideal for users who want to archive months of footage.
Advanced Methods: Screen Recording And Automation
Some users want to save videos even if they have only limited access, such as when sharing accounts or using devices that don’t support direct downloads. In these cases, screen recording can be a helpful workaround.
Using Screen Recording Software
You can use free or paid screen recording tools to capture videos as they play:
- Windows: Use the built-in Xbox Game Bar (press Windows+G).
- Mac: Use QuickTime Player (File > New Screen Recording).
- Third-party apps: OBS Studio, Bandicam, or Camtasia.
Steps:
- Play the Blink video in full screen on your computer or phone.
- Start your screen recording software.
- Record the video as it plays.
- Stop the recording and save the file.
Warning: Screen recording may reduce video quality, especially if your computer or phone lags. Always test your setup before recording important footage.
Non-obvious Insight: Some advanced screen recorders let you select just a window or a part of your screen, making the final video easier to edit and share.
Automation For Power Users
Some tech-savvy users create automation scripts to download or copy Blink videos. These methods often require programming knowledge and may not be supported by Blink. For most users, stick with the official methods to avoid account or security issues.
Common Problems And Troubleshooting
Even with the best instructions, sometimes things don’t go as planned. Here are the most frequent issues people face and how to fix them.
Usb Drive Not Recognized By Sync Module Or Computer
- Try a different USB port on your computer.
- Make sure the drive is formatted to FAT32 or exFAT.
- Use a different USB drive if the problem continues.
Blink App Doesn’t Show Download Option
- Make sure you have a Blink Subscription Plan.
- Update your app to the latest version.
- Log out and log back in.
Video Files Won’t Play On Computer
- Try a different media player (VLC is very reliable).
- Make sure the file extension is .mp4.
- If the file is corrupted, try copying it again from the USB drive.
Expert Guidance: Always back up important videos to at least two places (such as your computer and an external drive) to avoid losing them.

Credit: www.lowes.com
Security And Privacy Considerations
Saving doorbell videos is useful, but it comes with privacy risks. Here’s what you should consider:
- Keep backups secure: Don’t store sensitive footage on shared or public computers.
- Encrypt important videos: Use encryption tools if you save videos that contain private moments.
- Don’t share carelessly: Only send clips to people you trust, and be careful about posting online.
- Understand your local laws: In some areas, recording audio or video of people without consent may be restricted.
Non-obvious Insight: Deleting videos from the Blink app or cloud doesn’t always remove all copies if you’ve downloaded or backed them up elsewhere. Double-check all storage locations if you want to erase footage completely.
Tips For Better Video Management
As you save more and more videos from your Blink Video Doorbell, managing them becomes important. Here are some tips:
- Organize by date: Create folders named by year, month, and day.
- Add notes to filenames: Include details like “package delivered” or “suspicious visitor” in the file name.
- Use external storage: For large collections, use an external hard drive for backups.
- Regularly clean up: Delete old, unneeded videos to save space.
- Convert formats if needed: If you need to edit or share, you can use free converters to change the format from .mp4 to others.

Credit: www.amazon.com
Comparing Blink With Other Video Doorbell Brands
Not all video doorbells make it as easy to save footage. Let’s see how Blink compares with other popular brands:
| Brand | Subscription Needed for Downloads? | Local Storage Option? | Batch Download Support | Typical File Format |
|---|---|---|---|---|
| Blink | Yes (for cloud) | Yes (Sync Module 2 + USB) | No (cloud), Yes (USB) | .mp4 |
| Ring | Yes | No | No | .mp4 |
| Arlo | Yes (for cloud) | Yes (with base station) | Yes | .mp4 |
| Google Nest | Yes | No | No | .mp4 |
Expert Observation: Blink’s local storage option is a big advantage if you want to avoid monthly fees or need to archive videos in bulk.
What To Do If You Need Longer Video Clips
By default, Blink clips are limited in length (usually up to 60 seconds). If you want longer recordings:
- Adjust motion settings: In the Blink app, go to device settings and set the maximum clip length.
- Trigger new recordings: If motion continues, Blink can start a new clip automatically.
- Consider third-party options: Some users set up external cameras with continuous recording if longer footage is critical.
Caution: Longer clips use more storage and may drain batteries faster. Find a balance between coverage and efficiency.
Legal And Ethical Use Of Saved Videos
Saving and sharing doorbell footage can be helpful for security, but there are legal limits:
- Don’t record neighbors’ private areas: Point your camera only at your property.
- Respect audio laws: Some US states require consent for audio recording.
- Don’t use footage for harassment: Only use saved videos for safety or official purposes.
If you plan to share footage with law enforcement, always keep the original file and be ready to provide the date and time for reference.
Frequently Asked Questions
How Long Does Blink Keep Video Clips In The Cloud?
With a Blink Subscription Plan, your clips are stored for up to 60 days in the US (30 days in the UK/EU). After that, older clips are automatically deleted unless you download them.
Can I Save Blink Videos Without A Subscription?
Yes, if you use a Sync Module 2 and connect a USB drive, you can save clips locally without paying for cloud storage. However, cloud-only features like remote viewing may be limited.
Why Can’t I Download Videos From The Blink App?
You need an active Blink Subscription Plan to download from the app. If you use only local storage, downloads from the app are not supported. Make sure your app is up to date.
What File Format Are Blink Doorbell Videos Saved In?
Blink saves video clips in the .mp4 format, which is widely supported by computers and media players. If you have trouble playing a clip, try using VLC Media Player.
Is There A Way To Automate Saving All My Blink Videos?
There’s no official way to batch download all Blink videos from the cloud. However, with local storage (USB), you can copy multiple files at once. Some tech-savvy users use browser automation or scripts, but this requires technical skill and may not be supported by Blink.
Saving videos from your Blink Video Doorbell to your computer is easier than many people think, once you know the right steps. Whether you use the app, the web portal, or local storage, you now have all the tools you need to back up and manage your important footage. Remember to stay organized, protect your privacy, and review your settings regularly for the best results. This way, you’ll always be ready to save, share, or review your Blink videos whenever you need them.