
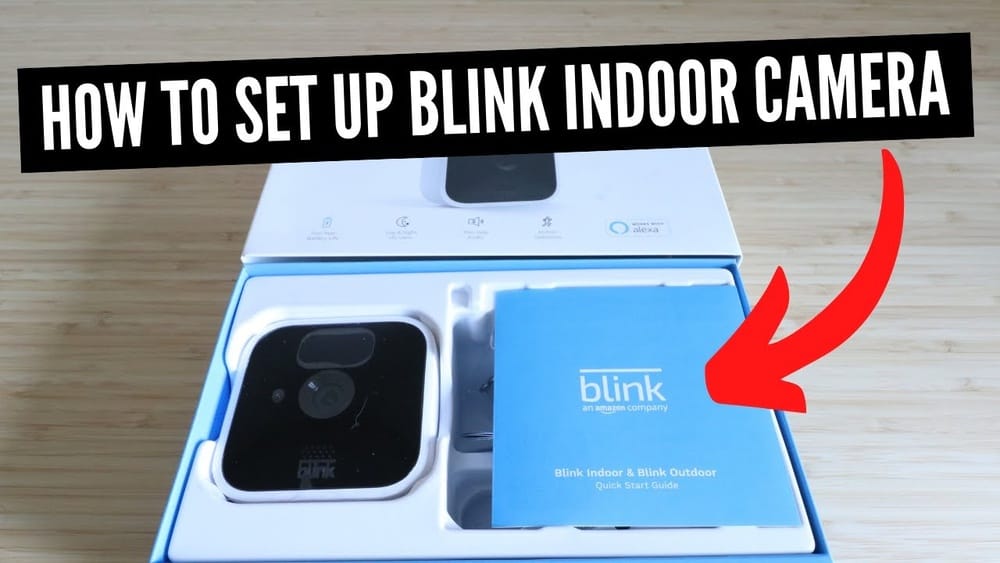
Setting up a Blink Indoor Camera can make your home safer and give you peace of mind. Whether you’re worried about security, want to keep an eye on pets, or just want to monitor what’s happening at home, this camera offers a simple and effective solution. Many people feel nervous about installing smart home devices, but the Blink Indoor Camera is designed for beginners. With the right guidance, you can get your camera running smoothly—no technical experience needed.
This guide walks you through every step of the process, from unboxing to troubleshooting. You’ll learn how to connect your camera, adjust settings, and even avoid common mistakes that new users often make. By the end, you’ll understand the full potential of your Blink Indoor Camera, and you’ll know how to get the most out of your investment.
What You Need Before You Start
To make the setup process smooth, gather all necessary items before you begin. This avoids interruption and ensures you have everything at hand.
- Blink Indoor Camera (the camera unit itself)
- Sync Module (included in most kits, required for setup)
- USB power adapter and cable (for the Sync Module)
- AA lithium batteries (usually included for the camera)
- Wi-Fi network (2.4 GHz, not 5 GHz)
- Smartphone or tablet (iOS or Android)
- Blink Home Monitor app (free download from App Store or Google Play)
- Screws and mounting bracket (for wall or ceiling installation, if desired)
- Internet access (for setup and ongoing camera use)
Pro tip: Make sure your Wi-Fi signal is strong in the area where you want to install the camera. Weak signals are a common source of connection issues.
Unboxing And Understanding The Components
Opening your new Blink Indoor Camera package is exciting, but it’s wise to check that all parts are included and undamaged.
Key Items In The Box
- Camera unit: The main device, compact and wireless.
- Sync Module: Small hub that connects your camera to Wi-Fi.
- USB power cable and adapter: Powers the Sync Module.
- Mounting kit: Includes a bracket and screws.
- AA lithium batteries: Last longer than regular batteries.
- Quick start guide: Basic instructions from Blink.
Beginner insight: The camera runs on batteries, but the Sync Module needs to be plugged into a wall outlet. This confuses many first-timers.
Checking For Damage
Examine each part. If you see cracks, missing pieces, or anything unusual, contact Blink support before continuing. Using damaged parts can cause setup failures or later problems.
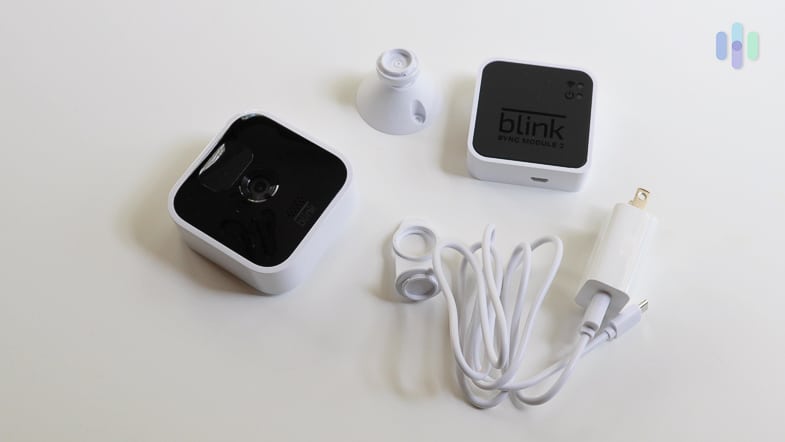
Credit: www.security.org
How The Blink Indoor Camera Works
Before you dive into installation, it helps to understand how the system operates.
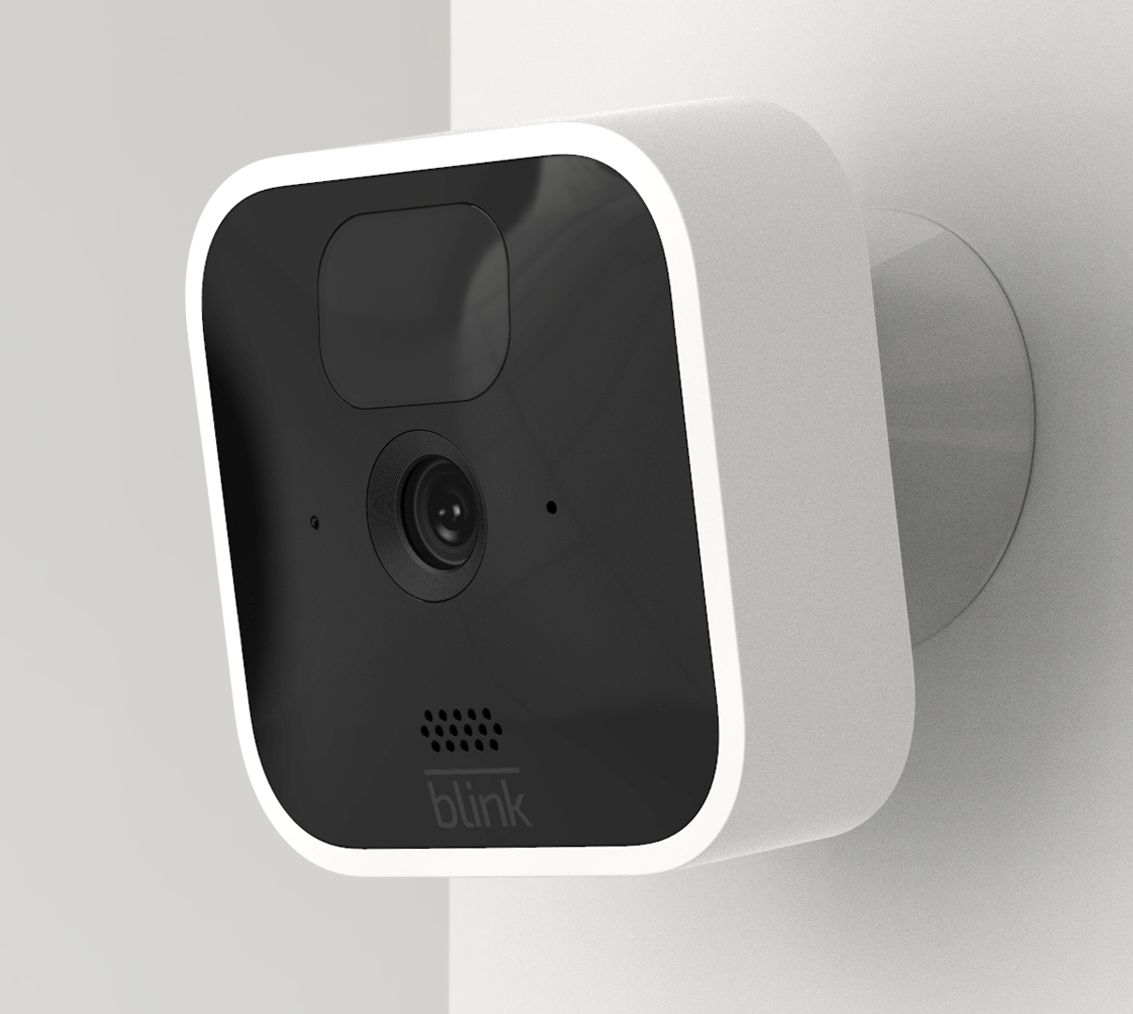
The Blink Indoor Camera is a wireless, battery-powered security camera. It uses a Sync Module to connect to your home Wi-Fi and the Blink cloud. The camera sends video and motion alerts to your phone through the Blink app. You can watch live video, receive motion notifications, and adjust settings anytime.
Key features:
- 1080p HD video quality
- Infrared night vision
- Two-way audio
- Customizable motion detection zones
- Free cloud storage (with some plans)
Non-obvious insight: The camera itself does not connect directly to Wi-Fi. The Sync Module acts as a bridge, making setup more reliable and extending battery life.
Setting Up The Blink Home Monitor App
Everything starts with the app. It’s your main control center for the camera.
- Download the app: Search for “Blink Home Monitor” in your device’s app store.
- Create a Blink account: Open the app, tap “Create Account,” and follow the instructions. Use a real email address you can access.
- Verify your email: Blink sends a code to your inbox. Enter it in the app to confirm your account.
- Set up two-factor authentication: For extra security, you’ll need to add your phone number. You’ll get a code via SMS to verify.
Expert tip: Use a strong, unique password for your Blink account. Security starts with your login details.
Credit: support.blinkforhome.com
Connecting The Sync Module
The Sync Module connects all your Blink devices to the internet. Setting this up is a must before adding your camera.
Placement Tips
- Choose a spot near your Wi-Fi router and a power outlet.
- Avoid locations behind metal objects or inside cabinets—they can block the signal.
Step-by-step Setup
- Plug in the Sync Module using the USB power cable and adapter.
- Wait for the light on the module to blink blue and solid green. This means it’s ready to connect.
- Open the Blink app. Tap the “+” sign to add a device.
- Select “Sync Module.”
- Scan the QR code on the back of the module, or enter the serial number manually.
- Follow the on-screen instructions:
- Connect your phone to the Sync Module’s temporary Wi-Fi network.
- Select your home Wi-Fi network in the app.
- Enter your Wi-Fi password.
- Wait for the app to confirm the Sync Module is online.
Troubleshooting tip: If the lights don’t show blue and green, unplug the module and try again after 10 seconds.
Adding Your Blink Indoor Camera
Now your Sync Module is ready, it’s time to add the camera itself.
Insert The Batteries
- Open the back cover of the camera (press the latch or slide, depending on your model).
- Insert the two AA lithium batteries. Make sure to match the + and – symbols.
- Replace the back cover securely.
Pairing The Camera
- In the Blink app, tap the “+” to add a device.
- Choose “Blink Wireless Camera.”
- Scan the QR code inside the battery compartment or on the camera itself.
- The app will connect the camera to your Sync Module.
- Name your camera (e.g., “Living Room,” “Front Door”) for easy identification.
Beginner mistake: Don’t try to add the camera before setting up the Sync Module. The camera cannot work alone.
Non-obvious insight: If you have multiple cameras, you can add them all to the same Sync Module—up to 10 cameras per module.
Choosing The Right Location
Picking the best spot for your camera improves both security and video quality.
Placement Guidelines
- Height: Mount the camera 6–8 feet above the floor for a wide view.
- Field of view: Point towards entry points—doors, windows, or hallways.
- Avoid direct sunlight: Sunlight can cause glare or wash out the image.
- Keep indoors: Blink Indoor Cameras are not weatherproof. Don’t put them outside or in damp areas.
- Distance from Sync Module: Keep the camera within 100 feet (30 meters) of the Sync Module for reliable connection.
Mounting Options
- Flat surfaces: You can simply place the camera on a shelf or table.
- Wall or ceiling: Use the included mounting bracket and screws.
How To Mount
- Choose your spot and mark where the screws will go.
- Drill small pilot holes if needed.
- Attach the bracket with the screws.
- Snap the camera onto the bracket.
Pro tip: Test the camera view in the app before finalizing the mount. Adjust as needed for the best angle.
Connecting To Wi-fi And Testing The Camera
After installation, check that the camera connects well and streams video.
- Open the Blink app.
- Tap on your camera’s name.
- Press the “Live View” button to see real-time video.
If the video loads quickly and clearly, your setup is successful. If you see delays or poor video, try moving the camera closer to the Sync Module or your Wi-Fi router.
Common mistake: Some users confuse the camera’s LED light signals. A solid blue means the camera is working; a flashing red means it can’t connect.
Understanding Camera Controls And Settings
The Blink app offers several ways to customize your camera’s behavior.
Motion Detection
- Arm/Disarm: Use the app’s main screen to “arm” the system for motion alerts or “disarm” to pause alerts.
- Activity zones: Select areas in the camera’s view to ignore (for example, a fan or moving curtains).
- Sensitivity: Adjust how easily the camera triggers on movement.
Video Settings
- Clip length: Set how long each recorded video is (5 to 60 seconds).
- Retrigger time: Delay before recording another clip after motion.
- Night vision: Infrared LEDs turn on automatically in low light, but you can adjust the sensitivity or turn it off.
Audio Features
- Two-way talk: Hold the microphone icon in the app to speak through the camera.
- Speaker volume: Adjust in the app’s device settings.
Non-obvious insight: Lowering sensitivity can help avoid false alerts, but setting it too low may miss important events.
Table: Blink Indoor Camera Vs. Blink Mini
Here’s a quick comparison if you’re curious how the Blink Indoor Camera stands against the Blink Mini.
| Feature | Blink Indoor Camera | Blink Mini |
|---|---|---|
| Power Source | AA Batteries (up to 2 years) | Wired (USB) |
| Wireless | Yes | No |
| Weatherproof | No (indoor only) | No (indoor only) |
| Mounting | Bracket included | Bracket included |
| Price | Higher | Lower |
Using Multiple Blink Cameras
A single Sync Module can manage up to 10 Blink cameras. If you want to cover more rooms, simply add each camera through the app.
Tips for multi-camera setup:
- Name each camera clearly (e.g., “Garage,” “Kitchen”).
- Use different activity zones for each.
- Check battery levels often in the app, especially if you have many cameras.
Pro insight: If you need more than 10 cameras, you’ll need a second Sync Module. Place it in another area of your home for best coverage.
Managing Notifications And Alerts
Blink cameras send alerts for motion events. How and when you receive these is up to you.
Customizing Notifications
- In the Blink app, go to “Settings” > “Notifications.”
- Choose if you want push notifications, email, or both.
- Set a schedule for when alerts are active (for example, only at night).
Example: Set alerts to only trigger when you’re at work, so you’re not disturbed during the day at home.
Avoiding Notification Overload
Too many alerts can be annoying. Adjust sensitivity and activity zones to focus only on real threats.
Non-obvious insight: You can pause alerts while at home, then arm the system when leaving with one tap in the app.
Table: Blink Subscription Plans Overview
Blink offers both free and paid plans for video storage and features.
| Plan | Cloud Storage | Monthly Price | Additional Features |
|---|---|---|---|
| Basic | Single camera | $3 | Motion alerts, live view |
| Plus | All cameras | $10 | Extended warranty, video sharing |
| Local Storage Only | With Sync Module 2 USB | Free | No cloud backup |
Expert tip: If you want to avoid monthly fees, use the Sync Module 2 with a USB flash drive for local video storage.
Integrating With Smart Home Systems
The Blink Indoor Camera works with several smart home platforms, making it easy to automate security.
Alexa Integration
- Link your Blink account with Alexa in the Alexa app.
- You can view live camera feeds on Echo Show devices.
- Use voice commands like “Alexa, show the living room camera.”
Other Integrations
Blink does not currently support Google Home or Apple HomeKit natively. However, you can use third-party tools or routines for simple automation.
Pro tip: Set up routines to arm your cameras automatically when you leave home or at a specific time each night.
Battery Life And Maintenance
One of the best features of the Blink Indoor Camera is its long battery life. But you still need to check and maintain it for best results.
Maximizing Battery Performance
- Use only AA lithium batteries (not alkaline or rechargeable).
- Lower sensitivity or clip length in high-traffic areas.
- Keep the camera’s firmware up to date for efficiency.
Checking Battery Levels
- The Blink app shows battery status for each camera.
- Replace batteries when you see a “Low Battery” warning.
Common mistake: Using the wrong battery type. This can cause short life or even damage the camera.
Table: Common Setup Problems And Solutions
Here’s a quick reference for typical setup issues and how to solve them.
| Problem | Possible Cause | Solution |
|---|---|---|
| Camera won’t connect | Weak Wi-Fi / out of Sync Module range | Move camera closer, check Wi-Fi strength |
| Flashing red light | No Wi-Fi / wrong setup order | Set up Sync Module first, reconnect |
| No notifications | System disarmed / app settings | Arm system, enable app notifications |
| Poor video quality | Low bandwidth / sunlight glare | Improve Wi-Fi, move camera |
| Short battery life | Wrong batteries / too many triggers | Use lithium AA, adjust sensitivity |
Firmware Updates And Security
Keeping your Blink Indoor Camera updated helps protect your privacy and ensures the latest features.
How Updates Work
- Firmware updates happen automatically when the camera is online.
- You’ll see a notification in the app if an update is available.
Why Updates Matter
- Fix security bugs
- Add new features
- Improve battery life or video quality
Security tip: Never share your Blink account password. Always use two-factor authentication for best protection.
Privacy And Data Security
With any connected camera, privacy is a top concern.
How Blink Protects You
- Video clips are encrypted in the cloud.
- Only people with your Blink account details can view live streams or clips.
- You can delete clips anytime in the app.
What You Can Do
- Change your password regularly.
- Only share app access with trusted family members.
- Review app permissions on your phone.
For more on smart home privacy, see this in-depth resource from the US Federal Trade Commission.

Credit: support.blinkforhome.com
Advanced Tips For Power Users
If you want to get more from your Blink system, try these advanced features.
Scheduling
Set up a daily or weekly schedule to arm and disarm your cameras automatically. This is perfect if you have a regular routine and don’t want to remember to do it manually.
Shared Access
You can invite other people (family, roommates) to access your Blink system. In the app, go to settings and send an invitation by email.
Local Video Storage
With the Sync Module 2, plug in a USB flash drive to save clips locally. This saves cloud space and gives you a backup.
Non-obvious insight: Local storage is not a replacement for cloud storage if you want remote access to old clips, but it’s a good way to avoid subscription costs.
Troubleshooting Common Issues
Even with a simple setup, problems can happen. Here’s how to solve the most frequent ones:
Camera Offline
- Check if the Sync Module is online.
- Move the camera closer to the Sync Module.
- Remove and reinsert batteries.
App Won’t Connect
- Update the Blink app in your app store.
- Restart your phone or tablet.
- Check if your Wi-Fi is working for other devices.
Motion Alerts Not Working
- Make sure the system is armed in the app.
- Double-check notification settings for the Blink app on your phone.
- Increase motion sensitivity if needed.
Pro tip: Always test your setup after any changes by walking in front of the camera and checking for alerts.
When To Contact Blink Support
If you’ve tried all troubleshooting steps and still can’t get your camera working, it’s time to reach out for help.
- Visit Blink’s official support page for guides and contact options.
- Have your camera’s serial number and purchase details ready.
- Be ready to describe your issue in detail.
Beginner insight: Most problems can be solved without a replacement. Support can walk you through advanced troubleshooting if needed.
Frequently Asked Questions
How Many Blink Indoor Cameras Can I Connect To One Sync Module?
You can connect up to 10 Blink Indoor Cameras to a single Sync Module. If you need more coverage, add another Sync Module to your system.
Can I Use Blink Indoor Cameras Outdoors?
No, the Blink Indoor Camera is not weatherproof. It’s designed for indoor use only. Exposure to rain or humidity can damage the camera.
How Long Do The Batteries Last In The Blink Indoor Camera?
With typical use, the AA lithium batteries last up to two years. High activity levels, frequent live viewing, or using non-lithium batteries can shorten battery life.
Is There A Monthly Fee To Use Blink Indoor Cameras?
You can use basic features and local storage for free. For cloud storage and some advanced features, Blink offers paid plans starting at $3 per month.
Can I Integrate Blink Indoor Camera With Alexa?
Yes, the Blink Indoor Camera works with Amazon Alexa. You can view live feeds on Echo Show devices and control your cameras with voice commands.
Setting up a Blink Indoor Camera is straightforward with the right approach. Once installed, you gain a reliable way to monitor your home, pets, or valuables from anywhere. The system is flexible—expand it with extra cameras, adjust alerts, and use smart home features as you grow more comfortable. Take your time during setup, follow the tips above, and you’ll enjoy better security and peace of mind for years to come.