
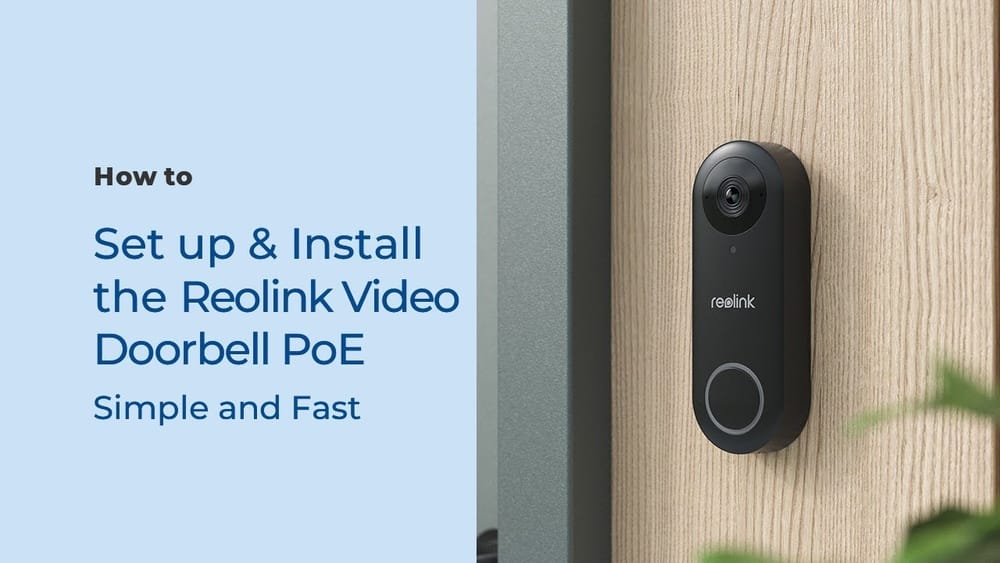
Setting up a Reolink Video Doorbell PoE Camera can transform the way you protect and monitor your home. Video doorbells are no longer just fancy gadgets; they are a key part of modern security. The Reolink PoE (Power over Ethernet) model stands out for its clear video, reliable wired connection, and flexible smart features. But how do you actually set one up, and what do you need to know to get the most out of it?
This guide will walk you through everything, step by step, using clear language and practical examples. Whether you are a first-time installer or upgrading from a wireless doorbell, you’ll find tips, warnings, and non-obvious details that make the process smoother.
By the end, you’ll have your Reolink Video Doorbell PoE camera working, optimized, and integrated into your home—without confusion or guesswork.
Why Choose A Reolink Video Doorbell Poe Camera?
Before diving into setup, it’s good to understand why PoE video doorbells are popular and why Reolink is often recommended.
Power over Ethernet (PoE) means your camera gets both power and data through a single Ethernet cable. This makes the installation cleaner, more reliable, and less dependent on Wi-Fi quality. Some key advantages:
- Stable Connection: PoE is less likely to drop out compared to Wi-Fi.
- Continuous Power: No batteries to recharge or replace.
- Higher Video Quality: Wired bandwidth supports better resolution and frame rates.
- Easy Integration: Works with many network video recorders (NVRs).
The Reolink model, in particular, offers:
- 5MP or higher resolution for crisp video.
- Two-way audio (talk and listen).
- Smart motion detection to reduce false alerts.
- Wide compatibility with smart home systems.
A wired setup takes a bit more effort than a wireless one, but it pays off in daily use.
What You Need Before You Start
Getting ready is half the battle when installing a PoE doorbell camera. Here’s what you’ll need:
- Reolink Video Doorbell PoE package (camera, mounting bracket, screws, etc.)
- Ethernet cable (Cat5e or better)—length depends on your door location
- PoE switch or injector (unless your router or NVR provides PoE)
- Power drill and bits for mounting
- Screwdriver
- Smartphone or computer with the Reolink app or desktop client
- Access to your router/network (for configuration)
- Existing doorbell wiring (optional, for chime integration)
- Measuring tape and pencil (for marking holes)
A common mistake is not checking cable length or network hardware before starting. Measure carefully, and make sure you have a PoE-enabled port available.
Understanding The Poe Connection
The PoE setup is different from Wi-Fi cameras. Let’s break down how it works:
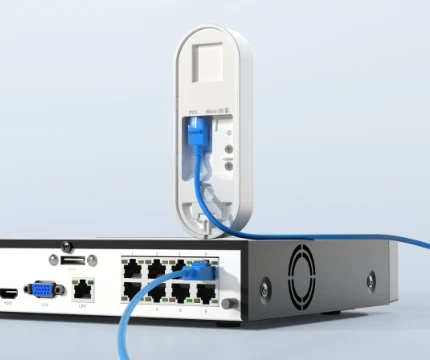
- Ethernet cable runs from your camera to a PoE switch/injector.
- The switch/injector connects to your router or NVR.
- The camera gets both power and data over this cable.
Below is a simple comparison of PoE and Wi-Fi video doorbell setups:
| Feature | PoE Doorbell | Wi-Fi Doorbell |
|---|---|---|
| Connection Type | Wired (Ethernet) | Wireless (Wi-Fi) |
| Power Source | Ethernet (PoE) | Battery or Doorbell Wiring |
| Signal Stability | Very High | Depends on Wi-Fi |
| Installation Difficulty | Moderate | Easy |
| Maintenance | Low | Moderate (battery charging) |
If your home is already wired with Ethernet, PoE is a natural fit. For new builds or renovations, running Ethernet can be a smart investment.
Step-by-step Installation Guide
Let’s walk through the process of setting up your Reolink Video Doorbell PoE camera from start to finish.
Step 1: Plan The Camera Placement
The right location is critical for field of view and protection.
- Mount the camera about 48 to 60 inches (120–150 cm) above the ground.
- Ensure the lens covers the doorway and entry path.
- Avoid direct sunlight or places where rainwater drips.
- Check that your Ethernet cable can reach the spot.
A common mistake is mounting too high or too low. Test the angle by holding the camera at the planned spot and checking the live view on your phone.
Step 2: Run The Ethernet Cable
This step may require patience, especially if your door doesn’t have an existing cable path.
- Use Cat5e or Cat6 cable for best performance.
- Drill a hole (usually 3/8 inch or 10 mm) through the wall or door frame.
- Insert a cable grommet or sealant to protect the cable from weather.
- Run the cable inside to your PoE switch or injector.
If you’re uncomfortable drilling through walls, consider hiring a professional. Hidden cables look neater and reduce the risk of damage.
Step 3: Mount The Doorbell Camera
- Attach the mounting bracket to the wall using screws and anchors.
- Align the bracket so the camera faces straight ahead or slightly downward.
- Snap the camera onto the bracket until it clicks.
- Connect the Ethernet cable to the back of the camera.
Some doors have uneven surfaces. In that case, use the included angled mounting wedge to adjust the view. Always test the angle before tightening the screws.
Step 4: Connect To Poe And Network
- Plug the other end of the Ethernet cable into your PoE switch or injector.
- Make sure the switch/injector is connected to your router or NVR.
- The camera’s status light should turn on, showing it has power.
If you don’t see a light, check the cable connections and the PoE switch’s power.
Step 5: Set Up The Reolink App
- Download the Reolink app from the App Store or Google Play.
- Open the app and tap Add Device.
- Scan the QR code on your camera or enter its serial number.
- The app will find the camera on your network.
- Set a password and name your camera for easy identification.
The desktop Reolink Client works similarly for PC users. Both apps allow live view, playback, and settings adjustments.
Step 6: Adjust Video And Audio Settings
Fine-tuning these settings makes a big difference.
- Set the resolution to the highest your network can handle (usually 5MP).
- Adjust the motion detection zones to cover only important areas.
- Set up motion sensitivity to avoid false alerts from passing cars or animals.
- Enable two-way audio for speaking to visitors.
One non-obvious tip: If you get too many notifications, try lowering motion sensitivity and masking out busy areas.
Step 7: Integrate With Chimes And Smart Home Devices
The Reolink Video Doorbell PoE can work with:
- Mechanical or digital chimes (if you have existing doorbell wiring)
- Alexa or Google Assistant for voice announcements
- NVRs for 24/7 recording
Connect the doorbell wires from your old chime to the terminals on the Reolink bracket. In the app, enable chime support. For smart home setups, follow the app instructions to link accounts.
Not all chimes are compatible. Check your chime’s voltage and type before connecting.
Step 8: Test Everything
- Press the doorbell and check if your phone and chime receive alerts.
- Walk through the camera’s field of view to test motion detection.
- Try talking through the app to test two-way audio.
- View recorded video and test playback speed.
If anything doesn’t work, review each step and check your network settings.

Credit: www.amazon.com
Advanced Configuration Tips
Once basic setup is done, explore these advanced options to get more from your Reolink Video Doorbell PoE camera.
Using Network Video Recorders (nvr)
If you want continuous recording and easy playback, add an NVR:
- Connect the camera to the NVR’s PoE port.
- Set recording schedules (24/7, motion-based, etc. ).
- Access footage from the NVR app or monitor.
This is especially helpful for multiple cameras or if you travel often.
Fine-tuning Motion Detection
The camera’s smart features can save you from many false alarms.
- Use custom detection zones to focus on walkways or porches.
- Adjust human-only detection (AI filtering) if available.
- Set up push notifications only for certain hours.
A useful, less-known tip: Review your alert logs weekly. If you see too many false positives, tweak the zones or sensitivity.
Integrating With Smart Assistants
Reolink PoE doorbells work with Alexa and Google Assistant:
- Enable the Reolink skill in your smart assistant app.
- Link your Reolink account.
- Use voice commands like “Show front door camera.”
This adds hands-free convenience for busy households.
Remote Access And Security
You can access your video doorbell from anywhere, but protect your privacy:
- Use strong, unique passwords for the camera and app.
- Enable two-factor authentication if available.
- Regularly update firmware through the app.
Never share your device QR code or login details. If you use cloud storage, read the privacy policy carefully.
Multiple User Access
Share camera access with family:
- Add users in the Reolink app.
- Set permissions (view only, admin, etc. ).
- Remove access quickly if needed.
This is useful if you want to give temporary access to neighbors or delivery services.
Common Issues And How To Fix Them
Even with good planning, you may face a few obstacles. Here’s how to solve the most frequent problems:
The Camera Doesn’t Power On
- Check that your PoE switch or injector is active.
- Test the Ethernet cable with another device.
- Make sure you are using the correct port.
No Video On App
- Confirm the camera is added to the app.
- Check that your phone is on the same network (for initial setup).
- Restart your router and camera.
Motion Alerts Not Working
- Increase sensitivity in the app.
- Make sure detection zones cover the right area.
- Check that notifications are enabled in your phone settings.
Chime Not Ringing
- Confirm wiring is connected securely.
- Verify chime voltage and compatibility.
- Enable chime support in the app.
Video Quality Is Poor
- Upgrade to a higher category Ethernet cable.
- Set video to Clear mode in the app.
- Clean the camera lens regularly.
Many issues can be solved by restarting the camera or updating the firmware.

Credit: www.youtube.com
Comparison: Reolink Poe Doorbell Vs. Other Brands
How does Reolink stack up against other popular PoE doorbell brands? Here’s a data-driven look:
| Feature | Reolink Video Doorbell PoE | Amcrest AD410 | Hikvision DS-KV6113 |
|---|---|---|---|
| Resolution | 5MP (2560×1920) | 4MP (2560×1920) | 2MP (1920×1080) |
| Field of View | 180° | 164° | 129° |
| PoE Support | Yes | Yes | Yes |
| AI Motion Detection | Yes | Yes | No |
| 2-Way Audio | Yes | Yes | Yes |
| Smart Home Integration | Alexa, Google | Alexa, Google | Limited |
| Onboard Storage | microSD card | microSD card | No |
Reolink’s high resolution, wide field of view, and strong smart home support make it a top pick for many users.
Optimizing For Security And Privacy
A video doorbell can improve safety, but only if you use it wisely. Here are some security-focused tips:
- Change default passwords immediately after setup.
- Update firmware regularly to patch vulnerabilities.
- Limit sharing of video feeds to trusted users only.
- Position the camera so it does not invade neighbors’ privacy.
- If you use cloud storage, pick a provider with strong encryption.
In the US, be aware of local laws about audio/video recording at entrances. Always display a sticker or sign if required.
Real-world Example: A Successful Installation
Lisa, a homeowner in Texas, installed a Reolink Video Doorbell PoE at her front door. She used a Cat6 cable run from her living room switch, drilled through brick with a masonry bit, and placed the camera at 54 inches.
She followed these tips:
- Used the angled wedge for a better view of packages.
- Masked the sidewalk in the app to avoid traffic alerts.
- Connected to her Alexa speaker for instant visitor announcements.
After setup, Lisa saw a 90% drop in missed deliveries and caught a porch theft attempt on video, which was helpful for the police.
Maintenance And Troubleshooting Best Practices
To keep your system running smoothly, follow these guidelines:
- Wipe the camera lens monthly to prevent blurry video.
- Check the Ethernet connection every 6 months.
- Update software and firmware as soon as updates appear.
- Test chime and notifications after power outages.
- Review motion logs for unusual activity.
A surprising tip: Power surges from lightning or outages can reset your camera. Use a surge protector for your PoE switch.
Pros And Cons Of The Reolink Video Doorbell Poe
Every product has strengths and weaknesses. Here’s a summary:
Pros
- Reliable wired connection—no Wi-Fi dropouts
- High video quality—clear faces and details
- Flexible storage options—microSD, NVR, or cloud
- Smart detection—less false alerts
- Good app support—easy to set up and use
- Works with Alexa and Google
Cons
- More complex installation—requires Ethernet cabling
- No battery backup—won’t work in a power outage without UPS
- Some chimes may not be compatible
- Initial setup can take longer than Wi-Fi models
If you want long-term stability and performance, the pros usually outweigh the cons.
How Much Does Installation Cost?
Costs can vary depending on your home and needs. Here’s a rough breakdown:
| Item | Estimated Cost (USD) |
|---|---|
| Reolink Video Doorbell PoE | $100–$150 |
| Ethernet Cable (Cat6, 50ft) | $10–$20 |
| PoE Switch/Injector | $30–$80 |
| Professional Installation (optional) | $100–$250 |
| microSD Card (64GB) | $15–$25 |
DIY installation is much cheaper, but hiring a professional is a good idea if you’re uncomfortable with electrical work or drilling.
Two Non-obvious Insights Beginners Often Miss
- Network Bandwidth Planning: Each 5MP camera can use up to 8 Mbps of network bandwidth during high-quality streaming. If you add more cameras or stream to multiple devices, make sure your router and network can handle the load without slowing down your internet.
- Firmware and App Sync: If you set up your camera on a desktop client, always sync settings to the mobile app. Sometimes, changes in one place don’t update on the other until you log out and back in or update firmware.
Frequently Asked Questions
What If I Don’t Have An Existing Ethernet Cable Near My Door?
You’ll need to run a new Ethernet cable from your router or PoE switch to your door location. This often involves drilling through a wall or door frame and may require longer cable runs. If you’re not comfortable with this, hiring a professional electrician or installer is a good option.
Can I Use The Reolink Video Doorbell Poe With My Old Mechanical Chime?
Yes, but not all chimes are compatible. The Reolink doorbell supports many mechanical and digital chimes, but you should check your chime’s voltage and wiring type. Follow the app’s instructions to connect the chime wires and enable chime support in the settings.
Does The Reolink Video Doorbell Poe Require A Subscription For Recording?
No, it does not require a subscription for local recording. You can use a microSD card (up to 256GB) or an NVR for free local storage. Cloud storage is optional and may have a monthly fee if you choose to use it for offsite backups.
How Secure Is The Reolink Video Doorbell Poe Camera?
Reolink uses encrypted protocols for video and audio transmission. Always set a strong password and keep your firmware updated. For extra security, enable two-factor authentication in the app and avoid sharing access with untrusted users. For more details, see Reolink’s official security page.
Credit: reolink.com
Can I View My Doorbell Camera When I’m Not At Home?
Yes, you can access your Reolink Video Doorbell PoE camera from anywhere using the Reolink app or client, as long as your camera is connected to the internet. Make sure you have remote access enabled, and your network firewall allows the necessary traffic.
Setting up a Reolink Video Doorbell PoE camera may take a little planning, but the result is a more secure, smarter home. With stable wiring, strong video quality, and helpful smart features, you’ll enjoy peace of mind and easy monitoring—whether you’re at home or away.