
How To Wire Outdoor Camera
Securing your home is more important than ever. Installing an outdoor camera is one of the smartest ways to protect your property. Many people buy wireless cameras, but wired cameras often provide better video quality, reliability, and long-term security. Wiring an outdoor camera may seem difficult, but with careful planning, the right tools, and simple steps, you can do it yourself. This guide will help you understand the process, avoid common mistakes, and install your camera safely.
Understanding Outdoor Camera Types
Before you start wiring, you should know the different types of outdoor cameras. The way you wire your camera depends on the model you choose.
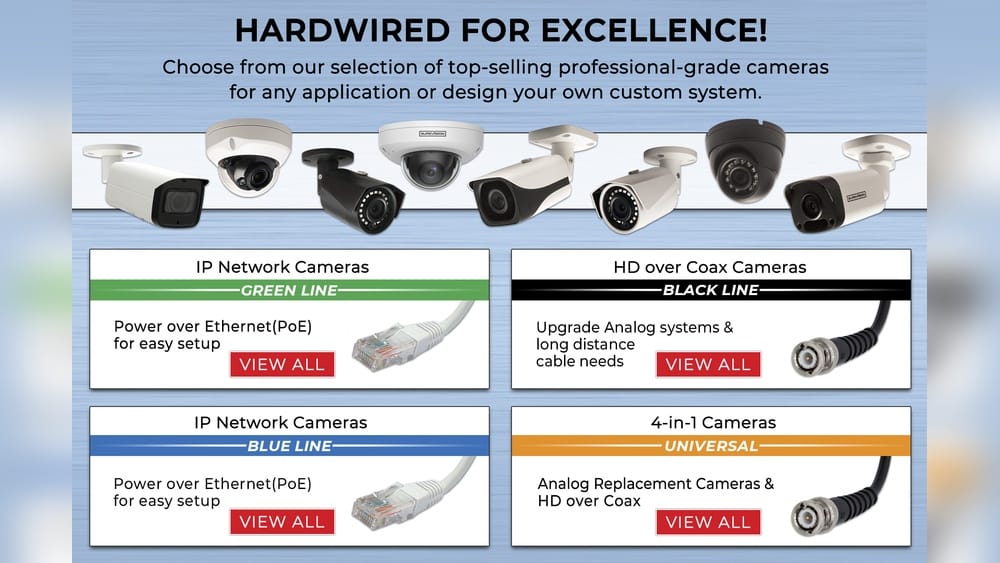
- Analog CCTV cameras: Use coaxial cables and often need a separate power cable.
- IP cameras: Use Ethernet cables (Cat5e or Cat6). Many support PoE (Power over Ethernet), so only one cable is needed for power and data.
- Wireless cameras with wired power: Send video wirelessly but need a power cable.
Most modern installations use IP cameras with PoE. This makes wiring simpler and safer, especially for beginners.
Why Choose Wired Outdoor Cameras?
Wired outdoor cameras have several clear advantages:
- Stable connection: No interference from Wi-Fi or other signals.
- Higher video quality: Wired connections support HD or 4K streaming.
- Better security: Harder for hackers to access compared to wireless.
- Continuous power: No need to replace batteries.
Statistics show that homes with visible security cameras are up to 38% less likely to be targeted by burglars. Wired cameras are also less likely to fail during bad weather or when you need them most.
Planning Your Outdoor Camera Installation
Good planning is critical. If you rush, you may make mistakes that lead to poor coverage or wiring problems. Here are the steps you should follow:
Assess Your Property
Walk around your house and decide:
- Where do you need the most coverage? (Front door, driveway, backyard)
- Are there any blind spots?
- How close are these areas to power sources and your router or DVR/NVR?
Draw a simple map to help you visualize cable paths.
Choose Camera Locations
Pick spots where the camera will:
- Cover entry points and high-risk areas
- Be mounted high enough to avoid tampering
- Have clear line of sight
- Be shielded from heavy rain or direct sunlight
Avoid placing cameras near bushes, trees, or anything that could block the view.
Check Local Regulations
Some cities and homeowners’ associations have rules about camera placement. Make sure you are not violating privacy laws—don’t point cameras at neighbors’ windows or private property.
Estimating Cable Length
Measure the distance from the camera location to your power source or network connection. Add extra length for bends, obstacles, and mistakes. It’s better to have a longer cable than to run short.
Selecting The Right Equipment
To wire your outdoor camera, you need the right tools and materials. Buying quality items saves time and avoids problems later.
Essential Tools And Materials
- Camera: Choose a model with weatherproof housing (rated IP65 or above).
- Cables: Use Cat5e/Cat6 for IP cameras, or RG59/RG6 for analog.
- Cable connectors: RJ45 for Ethernet, BNC for coaxial.
- Power adapter: If not using PoE, you’ll need a suitable power supply.
- Drill and bits: For making holes in walls.
- Fish tape or cable puller: Helps guide cables through walls.
- Cable clips: Secure cables along surfaces.
- Screwdriver: For mounting camera and securing cables.
- Weatherproof junction box: Protects connections outdoors.
- Sealant: Keeps holes and connections watertight.
Optional Equipment
- PoE switch/injector: Supplies power and data through Ethernet.
- Surge protector: Guards against lightning and power surges.
- Conduit: Extra protection for cables exposed to weather or animals.
Comparison Of Cable Types
Here is a quick comparison of common cable types for outdoor cameras:
| Type | Used For | Max Length | Weather Resistance |
|---|---|---|---|
| Cat5e/Cat6 | IP Cameras | 328 ft (100 m) | Medium, needs outdoor-rated jacket |
| RG59/RG6 | Analog CCTV | Up to 500 ft | Good, especially RG6 |
| Power Cable | All cameras | Varies by voltage | Low, needs protection |
Choose cables with UV-resistant jackets for outdoor use. If you’re not sure, ask at your local hardware store.
Preparing For Installation
Before wiring, prepare your workspace and equipment.
Safety First
- Turn off power before handling wires.
- Wear safety glasses and gloves.
- Use a sturdy ladder if mounting cameras high.
Test Your Camera Indoors
Connect the camera to power and network inside your home. Make sure it works before installing outdoors. This avoids troubleshooting later.
Mark Cable Paths
Use chalk or tape to mark where cables will run. Plan to avoid sharp bends or areas with heavy foot traffic.
Drill Holes Carefully
Drill at an angle to prevent water from entering. Use the smallest hole possible for the cable. If you must go through brick or concrete, use a masonry bit.
Running The Cables
This is often the most time-consuming part. Take your time and follow these steps.
Choose A Cable Route
Decide if you’ll run cables:
- Through walls: Best for hiding cables, but harder.
- Along walls: Easier, but cables are visible.
- Through attic or crawl space: Good for longer runs.
Tips For Outdoor Routing
- Use conduit for cables exposed to weather or animals.
- Avoid running cables near electrical lines to prevent interference.
- Secure cables every 12–18 inches with cable clips.
Pulling The Cable
If you’re going through walls, use fish tape. Push fish tape from one side, attach cable, and pull through. If you get stuck, try a different angle or add lubricant.
Protecting The Cable
At the exit point, use a weatherproof junction box. Seal any gaps with silicone sealant to keep water out.
Connecting The Camera
Once the cable is in place, connect it to your camera and power source.
For Ip Cameras (poe)
- Plug the Ethernet cable into the camera.
- Connect the other end to a PoE switch or PoE injector.
- Connect switch/injector to your router or NVR.
For Analog Cameras
- Connect coaxial cable to camera and DVR.
- Attach power cable to camera and power supply.
Check the manufacturer’s instructions for your model. Some cameras use special connectors.
Mounting The Camera
Now mount your camera in the chosen spot.
- Attach the mounting bracket using screws.
- Adjust the camera angle for best coverage.
- Tighten all screws. Make sure the camera does not move easily.
Make sure the camera is not blocked by gutters, roof edges, or other objects.
Weatherproofing Connections
Outdoor cameras need extra protection. Water can damage cables and cause short circuits.
- Use weatherproof boxes for all connections.
- Wrap connectors in electrical tape.
- Seal holes and gaps with silicone sealant.
- Keep cables off the ground to avoid water and pests.
If your camera comes with rubber grommets, use them for extra protection.
Testing Your System
After installation, check the camera feed and make adjustments.
- Log in to your camera software or NVR.
- Check image quality and coverage.
- Adjust camera angle if needed.
- Test at night for infrared (IR) performance.
If you see blurry images or weak signal, check cable connections and distance.
Troubleshooting Common Wiring Problems
Even careful installers face problems. Here are some common issues and solutions:
Camera Not Powering On
- Check if power supply is plugged in.
- Test outlet with another device.
- Check for damaged cables.
Video Signal Lost
- Check cable connectors.
- Make sure cables are not pinched or cut.
- If using PoE, check switch/injector status.
Poor Image Quality
- Make sure camera lens is clean.
- Check cable length (too long causes signal loss).
- Use higher quality cable for long runs.
Interference Or Flickering
- Keep cables away from electrical wires.
- Use shielded cables if needed.
Data Table: Common Camera Problems And Fixes
| Problem | Possible Cause | Solution |
|---|---|---|
| No Power | Loose connection or faulty adapter | Check connections, replace adapter |
| Weak Signal | Long cable run or poor quality cable | Use better cable, add signal booster |
| Blurry Video | Dirty lens or interference | Clean lens, reroute cable |
| Water Damage | Poor weatherproofing | Seal all joints, use waterproof boxes |
Setting Up Your Recording System
Most wired outdoor cameras connect to a network video recorder (NVR) or digital video recorder (DVR). Here’s how to set up:
- Connect all cameras to NVR/DVR with cables.
- Plug NVR/DVR into your router for remote access.
- Install software on your phone or computer.
Modern systems allow you to view footage from anywhere. Some offer motion alerts and cloud storage.
Comparing Nvr Vs. Dvr
| Feature | NVR | DVR |
|---|---|---|
| Camera Type | IP | Analog |
| Video Quality | Up to 4K | Usually 1080p |
| Cable Used | Cat5e/Cat6 | Coaxial |
| Remote Access | Easy | More limited |
If you plan to expand your system, NVR is usually more flexible.
Practical Tips For A Successful Installation
Here are non-obvious insights and practical advice that can make a big difference:
- Test cable length before installation: Connect your camera indoors with the actual cable. This finds weak cables or faulty connectors early.
- Label cables: If you have multiple cameras, label both ends of each cable. This saves time when troubleshooting.
- Use outdoor-rated cables and connectors: Indoor cables wear out quickly outside. Look for “weatherproof” or “UV-resistant” labels.
- Plan for future upgrades: Leave extra space in your conduit or junction box for new cameras.
- Check camera app compatibility: Make sure your camera supports your preferred mobile app or cloud storage.
Many beginners forget to check power supply ratings. Using the wrong voltage can damage your camera. Always check the manual before connecting.
Common Mistakes To Avoid
Even experienced DIYers make mistakes. Here are some you should avoid:
- Running cables without conduit: Animals or weather can destroy exposed cables.
- Skipping weatherproofing: Water ruins cables quickly.
- Mounting cameras too low: Easy for thieves to tamper with.
- Ignoring cable length limits: Too long means weak signal.
- Forgetting surge protection: Lightning can destroy your camera.
If you’re unsure, ask a professional or check a reliable guide like Family Handyman.
Maintaining Your Outdoor Camera System
After installation, regular maintenance is important.
- Clean camera lens every few months.
- Check cable clips and junction boxes for damage.
- Update camera firmware for security.
- Test the system after storms or power outages.
A well-maintained system lasts longer and keeps your home safe.
Expanding Your Camera System
You may want to add more cameras later. Plan ahead:
- Use a PoE switch with extra ports.
- Leave space in junction boxes.
- Run conduit with extra room.
Adding cameras is easier if you prepare at the start.
Integrating With Smart Home Devices
Many modern outdoor cameras work with smart home systems like Alexa, Google Home, or Apple HomeKit. This allows you to control cameras with your voice or receive alerts on your phone.
- Check compatibility before buying.
- Follow app instructions to link devices.
- Set up automation for lights or alarms.
Smart integration makes security more convenient and responsive.
Data Security And Privacy
Wired cameras are harder to hack, but you should still protect your system:
- Use strong passwords on your NVR/DVR.
- Update firmware regularly.
- Limit who has access to footage.
- Avoid pointing cameras at public spaces.
Privacy laws vary, so check local regulations before installing.
Cost Breakdown: Typical Outdoor Camera Installation
Here’s an example of what you might spend on a basic wired outdoor camera installation:
| Item | Estimated Cost |
|---|---|
| IP camera (weatherproof) | $80–$250 |
| Cat6 cable (100 ft) | $15–$30 |
| PoE switch/injector | $40–$100 |
| Weatherproof box | $10–$25 |
| Conduit (10 ft) | $8–$20 |
| Miscellaneous (clips, sealant) | $15–$30 |
Total estimated cost: $170–$455 per camera (not including NVR/DVR).
If you hire a professional, labor costs can add $150–$500 per camera.
Wired Vs. Wireless: Which Is Better For Outdoor Cameras?
Many people ask if wired is better than wireless for outdoor use. Here’s a quick comparison:
- Wired cameras: More reliable, better video quality, harder to hack, but installation is harder.
- Wireless cameras: Easy to install, flexible placement, but can suffer from Wi-Fi issues and need battery changes.
For important areas like front doors and driveways, wired cameras are usually best. Wireless may be okay for less critical spots.
How Weather Impacts Outdoor Camera Wiring
Weather is a major factor in outdoor installations. Rain, snow, and heat can damage cables and connectors.
- Use outdoor-rated cables and waterproof boxes.
- Avoid placing cameras where water can pool.
- Check connections after storms.
In cold climates, consider heated housings or cameras rated for low temperatures.
Non-obvious Insight: Future-proofing With Fiber Optic
Most home installations use Cat5e/Cat6 cables. But for very long runs or future-proofing, fiber optic cable is an option. It supports longer distances and faster speeds, but requires special connectors and equipment.
If you plan to cover large properties, ask about fiber optic options.
Tips For Concealing Camera Wires
Visible wires can attract attention or be tampered with. Here are ways to hide them:
- Use paintable conduit that matches your wall color.
- Run cables behind gutters or under eaves.
- Install cameras under roof overhangs.
- Bury cables underground (use outdoor-rated cable).
Concealed wires improve security and make your installation look professional.
Step-by-step Example: Wiring A Poe Outdoor Camera
Let’s walk through a typical installation:
- Choose the spot: Above the garage door, facing driveway.
- Measure cable length: 50 ft to router.
- Drill hole: Angled downwards to prevent water entry.
- Run Cat6 cable: Through wall, along garage ceiling, down to router.
- Install weatherproof junction box: Outside, at camera location.
- Connect cable to camera: Plug RJ45 into camera port.
- Mount camera: Secure with screws, adjust angle.
- Connect other end to PoE switch: Plug into switch, power switch.
- Connect switch to router: For network and remote access.
- Seal holes: Use silicone sealant around cable entry.
- Test camera feed: Check video quality, adjust angle if needed.
- Check at night: Test IR performance.
This process takes about 2–4 hours for beginners. If you prepare tools and materials ahead, you’ll save time.
Safety Reminders For Diyers
- Never drill into live electrical wires.
- Use a voltage tester before drilling near outlets.
- Work with a partner if possible, especially when using ladders.
- If you’re unsure about wiring, consult a professional.
Non-obvious Insight: Grounding Your Camera
Many people forget to ground outdoor cameras. If your camera is hit by lightning, grounding can prevent damage. Some cameras have grounding terminals—connect these to a proper ground rod.
Grounding is especially important in areas with frequent storms.
Upgrading Your System: Adding More Cameras
If you want to add more cameras:
- Use a PoE switch with more ports.
- Run new cables in existing conduit if possible.
- Label and document each cable for easy troubleshooting.
- Test each new camera before mounting.
Modern systems allow up to 8 or 16 cameras. Plan for expansion by buying a larger NVR/DVR.
Environmental Concerns: Protecting Wildlife
Outdoor installations can impact wildlife. Avoid running cables in areas where birds or animals nest. If you bury cables, use protective conduit to prevent chewing.
If you install cameras near trees, check for branches that might block the view or damage cables.
Diy Vs. Professional Installation
Should you do it yourself or hire an expert? Here’s a quick comparison:
- DIY: Lower cost, more control, good learning experience. Requires time and patience.
- Professional: Faster, more reliable, warranty included. Higher cost.
If your home is large or has difficult cable paths, professional installation may be best. For simple setups, DIY is often enough.
Checklist For A Successful Outdoor Camera Installation
- Choose camera and cable type
- Plan camera locations and cable routes
- Buy outdoor-rated materials
- Test all equipment indoors
- Mark cable paths and drill holes
- Run cables with conduit for protection
- Connect camera, power, and network
- Mount camera and weatherproof connections
- Test system and adjust angles
- Maintain regularly
Following these steps ensures your camera works well and lasts longer.
What To Do If You Have Problems
If your camera isn’t working:
- Check power and cable connections
- Test cables with a different device
- Check camera software settings
- Look for firmware updates
- Contact manufacturer support
Most problems can be solved with careful troubleshooting. If you need help, search for your camera model online or visit a trusted guide.
Final Thoughts
Wiring an outdoor camera takes planning, patience, and the right tools. Wired cameras give you strong security, clear video, and fewer problems compared to wireless models. By following these steps, testing equipment, and avoiding common mistakes, you can create a reliable system that keeps your home safe for years.
Always use outdoor-rated materials, weatherproof your connections, and check your system regularly. If you plan for future upgrades and follow safety tips, you’ll enjoy peace of mind and strong protection.
Frequently Asked Questions
How Long Can I Run An Ethernet Cable For A Wired Outdoor Camera?
You can run Cat5e or Cat6 Ethernet cable up to 328 feet (100 meters) without losing signal quality. For longer runs, use a signal booster or switch, or consider fiber optic cable.
Do I Need A Poe Switch For My Outdoor Camera?
If your camera supports Power over Ethernet (PoE), a PoE switch or injector is needed. This lets you use one cable for power and data, making installation easier and safer.
How Do I Keep Outdoor Camera Cables Safe From Weather And Animals?
Use outdoor-rated cables and protect them with conduit or weatherproof boxes. Seal holes with silicone. If you bury cables, use thick conduit to prevent damage from animals.
Can I Install A Wired Outdoor Camera Without Drilling Holes?
You can sometimes use existing holes, gaps, or run cables through windows, but drilling is usually needed for a secure, weatherproof installation. Always seal holes to keep water out.
Are Wired Outdoor Cameras More Secure Than Wireless Cameras?
Yes, wired cameras are generally more secure. They are harder to hack and do not depend on Wi-Fi, which can be disrupted. Wired systems also offer better video quality and reliability.

Credit: www.gallowayvets.co.uk